Dinner · Part 2 of 3: Instructions
Slow Cooker Blackberry Jalapeno Pulled Pork Step-by-step instructions
- Prep
- Cook
- Total
- Serves
- 8
Before you start
Before you begin, gather all your ingredients and ensure your slow cooker is clean and ready for use.
Mince the fresh jalapenos finely so that the heat is distributed evenly throughout the dish. If you are using a store-bought blackberry sauce, have it measured out and ready to pour.
Prepare a clean workspace, and ensure you have enough counter space to handle the pork shoulder safely. If you are trimming the pork, do so on a dedicated cutting board to maintain proper kitchen hygiene.
Ingredients at a glance (4)
- 3 lb pork shoulder, trimmed of excess fat
- 2 jalapenos, minced
- 1 tbsp smoked paprika
- 1 cup blackberry sauce, store-bought or made ahead
Instructions
Setting up the slow cooker
- Prepare the Slow CookerPlace the pork shoulder into the slow cooker insert. Ensure the pork is positioned evenly to allow for consistent cooking throughout the entire duration of the process.Look for The pork shoulder is sitting flat at the bottom of the slow cooker.Tip Pat the pork dry with paper towels before placing it in the cooker to improve the sear and flavor development.
The pork shoulder is positioned securely at the base of the slow cooker insert. The ingredients are prepared and ready for seasoning, and the slow cooker is plugged in and ready to begin the long, low-heat cooking process that will ensure the meat becomes perfectly tender.
Seasoning the meat
- Season the PorkScatter the minced jalapenos evenly over the top of the pork. Dust the surface of the meat with the smoked paprika, ensuring an even coating for maximum flavor infusion.Look for The jalapenos and paprika cover the top of the pork shoulder.Tip Remove the seeds from the jalapenos if a milder flavor is preferred.
The minced jalapenos and smoked paprika have been evenly distributed over the pork. The seasoning is clinging to the meat, and you are ready to add the final liquid component to begin the flavor infusion process that defines the character of this dish.
Cooking and shredding
- Add Sauce and CookPour the blackberry sauce over the seasoned pork. Cover and cook on low for 8 hours until the meat is tender and easily shreds with a fork. Once finished, ensure the internal temperature reaches at least 145°F (63°C). Let the meat rest for at least 10 minutes before shredding.Look for The sauce coats the pork and the meat shreds easily when pulled with a fork.Safe temperature 145°F (63°C) internal temperature (steaks, chops and roasts)Tip Use two forks to pull the meat into small, bite-sized pieces directly in the slow cooker to absorb the juices.
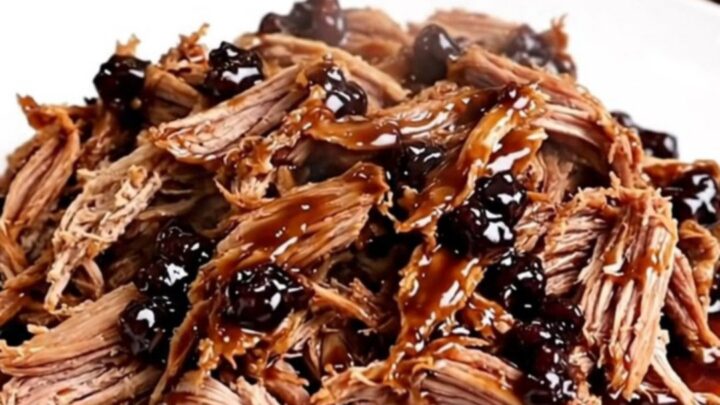
The pork is fully cooked, tender, and coated in the blackberry sauce. It is ready to be pulled apart with forks, creating a succulent and flavorful final dish that smells fragrant with the combination of sweet fruit and savory spices.
Common mistakes
Avoid the mistake of lifting the lid too often, as this releases heat and moisture, significantly increasing the total cooking time. Another common error is failing to season the meat directly; ensure the paprika and jalapenos are distributed over the pork before adding the sauce.
Do not rush the shredding process; if the meat is not pulling apart easily, it likely needs more time in the slow cooker. Finally, ensure the pork is fully cooled within two hours before storing it.
How to tell it’s done
To determine if the pork is done, check that the meat is fork-tender and pulls apart easily with minimal resistance. Use a food thermometer to verify that the thickest part of the pork has reached an internal temperature of at least 145°F (63°C).
Allowing the meat to rest for at least 10 minutes after cooking is crucial, as it lets the juices redistribute within the fibers, ensuring the final pulled pork remains moist and flavorful.
- Steaks, chops and roasts: 145°F (63°C) in the thickest part, then a 3-minute rest
Up next · Part 3 of 3
2 variations · storage & make-ahead · 3 answers · printable card
Tips, FAQ & printable recipe (Part 3)← Back to the ingredients (Part 1)