Dinner · Part 2 of 3: Instructions
Slow Cooker Blackberry Jalapeno Chicken Drumsticks Step-by-step instructions
- Prep
- Cook
- Total
- Serves
- 4
Before you start
Before beginning, ensure the slow cooker insert is clean and dry. Remove the chicken drumsticks from their packaging and pat them dry with paper towels to improve the adhesion of the seasoning. Slice the fresh jalapeno peppers into thin, uniform rings.
If a milder flavor is preferred, remove the seeds and white membranes from the jalapenos before slicing. Gather the garlic powder and blackberry jam so everything is ready for assembly. This quick setup ensures the process remains smooth and efficient once the cooking begins.
Ingredients at a glance (4)
- 8 pieces chicken drumsticks, bone-in and skin-on
- 1 tsp garlic powder
- 1 cup blackberry jam
- 2 whole jalapeno peppers, sliced into rings
Instructions
Layering the ingredients
- Prepare the slow cookerPlace the raw bone-in, skin-on chicken drumsticks into the slow cooker insert. Ensure they are arranged in an even layer to allow for consistent cooking throughout the process.Look for drumsticks placed side by side evenlyTip Pat the chicken dry with paper towels before placing it in the cooker to remove excess moisture.
The chicken should be arranged in a single, tight layer at the bottom of the slow cooker insert. This ensures that the heat is distributed evenly throughout the cooking process. Verify that the drumsticks are not piled too high, as this could lead to uneven cooking. The chicken should look clean and ready to receive the seasoning and glaze.
Glazing the chicken
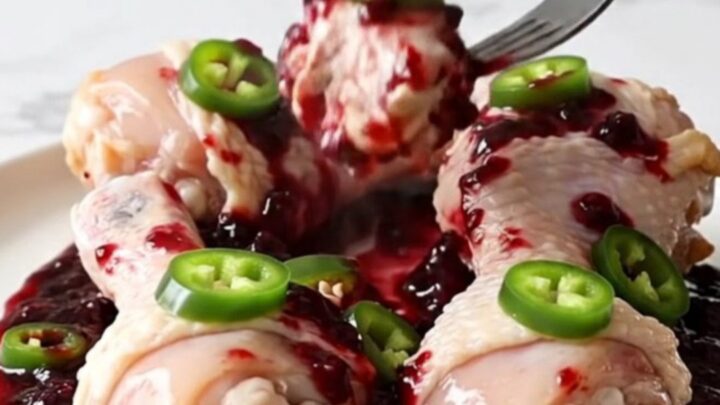
- Season and glazeSprinkle the garlic powder evenly over the chicken pieces. Spoon the blackberry jam over the top, ensuring each piece is well-coated. Scatter the fresh jalapeno rings across the chicken.Look for chicken covered in jam and peppersTip Use a silicone spatula to help spread the thick jam if necessary.
The drumsticks should be well-coated with the blackberry jam and seasoned with the garlic powder. The jalapeno rings should be scattered uniformly across the top.
The combination of the deep purple jam, the white garlic powder, and the bright green jalapeno rings should create a distinct and appealing visual contrast before the slow cooker is covered.
Final cook and resting
- Slow cook and serveCover and cook on low for 4 hours. Ensure the internal temperature of the chicken reaches 165°F (74°C) using a meat thermometer. Allow the chicken to rest for 5 minutes before serving to ensure the juices redistribute.Look for tender meat pulling away from the boneSafe temperature 165°F (74°C) internal temperature (poultry)Tip Check the temperature at the thickest part of the drumstick without touching the bone.
After the slow cooking phase, the kitchen should smell rich and slightly sweet with a hint of spice from the jalapenos. The chicken will look deeply glazed and tender. Ensure the internal temperature has reached 165°F (74°C). The meat should look soft and the glaze should be thick and syrupy, indicating it is ready to be served.
Common mistakes
Avoid overcooking the chicken, as even slow-cooked meat can become dry if left for too long. If the chicken is left on the heat for significantly longer than the recommended time, the sauce may become overly reduced and potentially burn at the edges of the insert.
Another common error is failing to spread the jam evenly; ensure that every drumstick is adequately covered to avoid uneven flavor distribution. Finally, do not lift the lid frequently, as this causes significant heat loss and extends the cooking time.
How to tell it’s done
The chicken is done when the meat is tender and easily separates from the bone. The most reliable way to verify doneness is by using a food thermometer to check the thickest part of the drumstick.
The internal temperature must reach at least 165°F (74°C). Because the chicken cooks in a sugary sauce, the skin will be soft and glazed rather than crispy. The sauce should be thickened and glossy, clinging well to the surface of the meat.
- Poultry: 165°F (74°C) in the thickest part
Up next · Part 3 of 3
2 variations · storage & make-ahead · 3 answers · printable card
Tips, FAQ & printable recipe (Part 3)← Back to the ingredients (Part 1)