Desserts · Part 2 of 3: Instructions
Slow Cooker Blackberry Apple Compote: A Simple Fruit Dessert Step-by-step instructions
- Prep
- Cook
- Total
- Serves
- 4
Before you start
Ensure the slow cooker insert is clean and dry before beginning. Gather all ingredients and prepare the fruit by peeling, coring, and dicing the apples. Have a serving bowl and a large spoon ready for when the compote is finished.
Since this recipe requires a long, unattended cook time, verify that the slow cooker is placed on a stable, heat-resistant surface away from any overhanging cabinets or curtains.
Ingredients at a glance (4)
- 4 apples, peeled and diced
- 2 cups fresh blackberries
- 1/2 cup cane sugar
- 1/4 cup water
Instructions
Fruit Assembly
- Prepare the fruitPeel and core the apples, then dice them into uniform pieces to ensure they cook evenly. Place the diced apples into the bottom of the slow cooker insert.Look for The apples are uniformly diced and spread in a single layer at the bottom of the slow cooker.Tip Keep the apple pieces roughly the same size to ensure they soften at the same rate during the long cooking process.
At the end of this phase, the apples are evenly distributed at the bottom of the slow cooker.
The blackberries sit on top, dusted with sugar, with the water poured over the ingredients to initiate the steaming process. Everything is layered and ready to be covered.
Slow Cooking
- Assemble the ingredientsScatter the fresh blackberries over the layer of diced apples. Sprinkle the cane sugar evenly across the top of the fruit, then pour the water over the mixture to provide enough liquid for the steaming process.Look for The sugar is evenly distributed and the water has settled at the base of the fruit mixture.Tip Do not stir the ingredients at this stage, as the fruit will naturally release juices as it heats up in the slow cooker.
The fruit is slowly simmering, and the kitchen should smell fragrant and sweet. The apples are becoming translucent, and the blackberries are releasing their juices, which are beginning to mingle with the sugar and water to form a deep, rich syrup.
Final Reduction
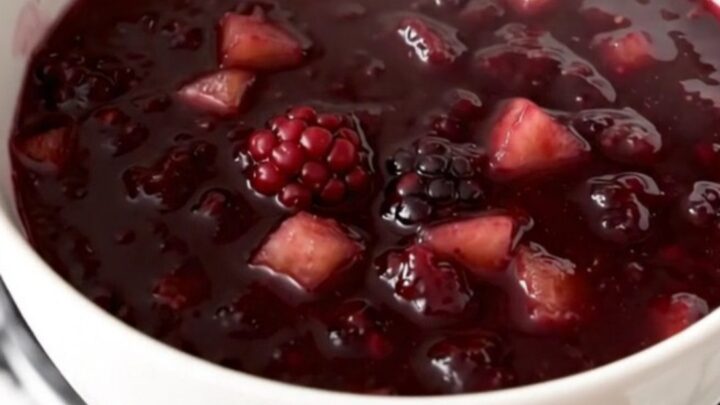
- Cook and serveCover the slow cooker and cook on the low setting for approximately three hours until the apples are tender and the blackberries have broken down into a thick, glossy sauce. Let the compote rest for ten minutes before serving warm in bowls.Look for The compote has a deep purple color, the apples are soft, and the sauce has a thick, glossy consistency.Tip If the sauce appears too thin after three hours, remove the lid and cook for an additional twenty minutes to allow some moisture to evaporate.
The compote has achieved a thick, glossy consistency. The apples are completely tender, and the mixture has transformed into a uniform, deep purple sauce that is ready to be served warm or cooled for later use.
Common mistakes
Avoid over-mixing the fruit after it has been added to the slow cooker, as this can crush the blackberries too early and result in a mushy texture.
Additionally, ensure the lid remains tightly sealed throughout the cooking process; lifting the lid frequently releases trapped steam and heat, which significantly increases the total cooking time and can affect the final consistency of the sauce.
How to tell it’s done
The compote is finished when the apples are fork-tender and have absorbed the vibrant color of the blackberries. The sauce should be thick and glossy enough to coat the back of a spoon.
If a piece of apple is pierced with a fork, it should offer no resistance, and the blackberries should have fully collapsed into the syrup.
Up next · Part 3 of 3
2 variations · storage & make-ahead · 3 answers · printable card
Tips, FAQ & printable recipe (Part 3)← Back to the ingredients (Part 1)