Dinner · Part 2 of 3: Instructions
Slow Cooker Beer Braised Chuck Roast Step-by-step instructions
- Prep
- Cook
- Total
- Serves
- 6
Before you start
Before starting, ensure your slow cooker is clean and the power cord is accessible. Take the beef chuck roast out of the refrigerator about 20 to 30 minutes before you are ready to assemble the ingredients to take the chill off.
Peel and slice your yellow onions into thick rounds, as these will hold their structure throughout the long cooking time. Have your measuring cup and gravy packet within reach to ensure a smooth assembly process.
Ingredients at a glance (4)
- 3 lb beef chuck roast
- 2 large yellow onions, thickly sliced
- 1 packet brown gravy mix
- 12 oz dark ale
Instructions
Assembling the roast
- Prepare the slow cookerPlace the beef chuck roast into the base of the slow cooker. Ensure it is positioned centrally for even cooking. Layer the thick slices of onion directly over the top of the beef. The onions will release moisture and flavor as they cook down into the meat.Look for The beef is flat in the bottom and covered by onions.Tip Ensure the roast is thawed before placing it in the slow cooker for even heat distribution.
At the end of this phase, the beef should be nestled securely at the bottom of the slow cooker. The onions should be distributed evenly over the top of the roast.
Ensure that the onions are cut thick enough so they do not completely disintegrate during the extended cooking cycle, providing texture to the final dish.
Seasoning and braising
- Add seasoning and liquidOpen the gravy mix packet and sprinkle the contents evenly over the onion layer. Pour the dark ale slowly over the beef and onions, allowing the liquid to run down the sides of the roast. Cover the slow cooker with its lid and set to low heat for 8 hours.Look for The liquid surrounds the meat and the powder is mostly dissolved.Tip Pour the beer slowly to prevent the dry gravy powder from splashing out.
Once the gravy mix and dark ale are added, the slow cooker should be covered securely. The liquid should cover about one-third to one-half of the roast. By this point, the kitchen should be free of clutter, and the slow cooker should be set to the low setting to begin the slow transformation of the beef.
Shredding the beef
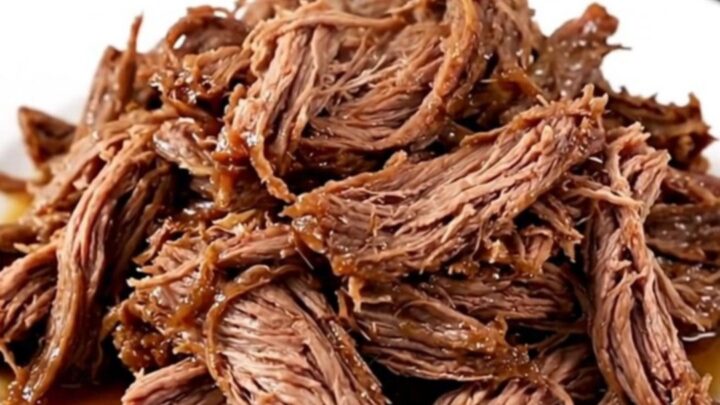
- Shred and finishOnce the cooking time is complete, verify the meat is tender by piercing it with a fork. It should fall apart easily. Remove the roast to a cutting board, let it rest for 10 minutes, and shred it with two forks. Ensure the internal temperature reaches 145°F (63°C).Look for The beef is dark, glossy, and falls apart easily with a fork.Safe temperature 145°F (63°C) internal temperature (steaks, chops and roasts)Tip Use the cooking liquid as a natural jus for drizzling over the shredded meat.
The final phase involves checking the tenderness of the meat and shredding it. The beef should look dark and glossy, and the sauce should have thickened into a rich gravy. Once the meat is shredded and has absorbed the juices, it is ready to be served immediately while still steaming hot.
Common mistakes
Avoid lifting the lid of the slow cooker during the first several hours of cooking, as this releases heat and steam, which significantly increases the total cooking time.
Another common mistake is failing to let the meat rest after cooking; shredding it immediately causes the juices to run out, leaving the beef dry. Finally, ensure you do not use a lean cut of meat, as it will become tough and stringy rather than tender and succulent.
How to tell it’s done
The roast is considered done when it reaches an internal temperature of at least 145°F (63°C). Visually, the meat should be very dark and tender enough to be easily pulled apart with two forks.
If the beef still feels firm or resists the fork, continue cooking for an additional 30 to 60 minutes. Once done, always allow the roast to rest on a cutting board for at least 10 minutes before shredding to retain the juices.
- Steaks, chops and roasts: 145°F (63°C) in the thickest part, then a 3-minute rest
Up next · Part 3 of 3
2 variations · storage & make-ahead · 3 answers · printable card
Tips, FAQ & printable recipe (Part 3)← Back to the ingredients (Part 1)