Dinner · Part 2 of 3: Instructions
Slow Cooker Beer and Leek Mussels for an Easy Dinner Step-by-step instructions
- Prep
- Cook
- Total
- Serves
- 4
Before you start
Before beginning, ensure that all mussels are thoroughly cleaned. Scrub the shells under cold running water to remove any debris or barnacles, and pull off the fibrous beard found on the side of the shell.
Rinse the leeks carefully to remove any trapped sand or soil from between the layers, then slice them into thin rounds. Mince the shallots finely so they distribute evenly throughout the dish during the cooking process.
Ingredients at a glance (4)
- 2 lbs fresh raw mussels, cleaned and debearded
- 2 cups sliced leeks, white and light green parts only
- 1/2 cup minced shallots
- 1 cup blonde beer
Instructions
Initial Preparation and Layering
- Prepare the Slow Cooker BasePlace the cleaned and debearded mussels into the bottom of the slow cooker insert. Ensure the mussels are spread out evenly to allow for consistent heat distribution during the cooking process.Look for The mussels should cover the bottom surface of the slow cooker evenly without being piled too high.Tip Check for any open shells before adding them to the slow cooker and discard any that do not close when tapped.
The mussels are arranged in the base of the slow cooker, covered with sliced leeks and minced shallots.
The ingredients should be distributed evenly to ensure that the aromatic flavors permeate the shellfish during the steaming process. At this stage, everything is ready for the addition of the cooking liquid.
Adding the Liquid and Steaming
- Layer the Aromatics and LiquidScatter the sliced leeks over the mussels. Evenly sprinkle the minced shallots on top of the leeks. Carefully pour the blonde beer over the ingredients to create the steaming liquid.Look for The beer should settle at the bottom of the slow cooker, partially submerging the mussels and aromatics.Tip Use a light-bodied blonde beer to ensure the broth maintains a delicate flavor profile that complements the shellfish.
The blonde beer is poured over the layered ingredients, creating the foundation for the broth. The slow cooker is then covered, and the cooking cycle begins. During this phase, the heat will gradually rise, allowing the mussels to steam in the aromatic liquid until the shells open and the flavors meld.
Final Cooking and Serving
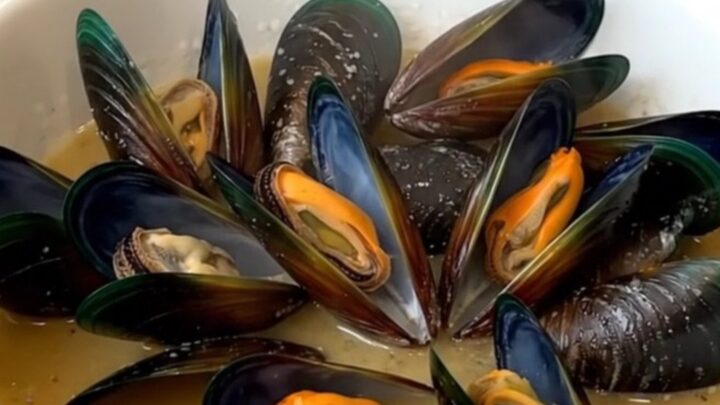
- Cook and ServeCover the slow cooker and cook on high for 60 minutes. The mussels are ready when they have fully opened. Once cooked, transfer the mussels and broth to bowls, ensuring an internal temperature of 145°F (63°C) is reached for the shellfish.Look for The shells will be fully opened and the meat will be tender and opaque.Safe temperature 145°F (63°C) internal temperature (shellfish)Tip Discard any mussels that remain closed after the cooking time is complete.
The mussels are checked to ensure they have opened and reached the required internal temperature. The dish is now ready to be served, with the mussels and the flavorful broth being the primary focus. Check that all shells are open before serving to ensure the quality and safety of the final meal.
Common mistakes
A common mistake is failing to clean the mussels properly, which can lead to grit in the finished broth. Be sure to rinse them well and remove all beards.
Another error is overcooking the mussels; while the slow cooker is gentle, leaving them in for too long can result in rubbery, tough meat. Always monitor the cooking time closely and remove the mussels from the heat as soon as they have opened to maintain their delicate texture.
How to tell it’s done
The mussels are done when the shells have fully opened and the meat is tender and opaque. It is crucial to reach an internal temperature of 145°F (63°C) for the shellfish to ensure safety.
Discard any mussels that do not open, as they are not suitable for consumption. The broth should be fragrant, clear, and flavorful, with the leeks and shallots softened to a tender consistency.
- Shellfish: 145°F (63°C) in the thickest part
Up next · Part 3 of 3
2 variations · storage & make-ahead · 3 answers · printable card
Tips, FAQ & printable recipe (Part 3)← Back to the ingredients (Part 1)