Dinner · Part 2 of 3: Instructions
Slow Cooker Beef Stew with Black Olives and Rosemary Step-by-step instructions
- Prep
- Cook
- Total
- Serves
- 4
Before you start
Before beginning, ensure the beef is trimmed of excessive surface fat and cut into uniform one-inch cubes to promote even cooking. Have all ingredients measured and ready to go.
Because the recipe relies on the slow cooker to do the work, there is no need to sear the meat beforehand, which saves significant time and effort. Simply ensure the slow cooker insert is clean and positioned near a power outlet, and that the lid is ready to provide a tight seal throughout the cooking duration.
Ingredients at a glance (6)
- 2 lb beef chuck roast, cut into 1-inch cubes
- 2 cups tomatoes, sliced
- 1/2 cup black olives, pitted
- 3 cloves garlic, crushed
- 2 sprigs fresh rosemary
- 1 cup red wine
Instructions
Layering the ingredients
- Prepare the slow cooker basePlace the cubed beef into the bottom of the slow cooker insert. Ensure the beef is spread out in an even layer to promote consistent cooking throughout the process.Look for The beef should be evenly distributed at the base.Tip Pat the beef dry with paper towels before adding to the cooker to improve browning.
At this phase, the slow cooker contains the raw beef at the bottom, topped with the sliced tomatoes, black olives, garlic, and fresh rosemary. Everything should be arranged in a neat, layered manner. Check that the garlic is evenly distributed and the rosemary sprigs are placed on top to allow the essential oils to infuse the stew as the temperature slowly rises.
Adding the wine
- Layer the vegetables and aromaticsScatter the sliced tomatoes and pitted black olives over the beef. Add the crushed garlic cloves and place the rosemary sprigs on top, ensuring they are slightly tucked in.Look for Ingredients should be layered evenly without stirring.Tip Crushing the garlic with the flat side of a knife releases more essential oils.
Once the red wine is poured over the ingredients, it will begin to settle into the bottom of the pot, mingling with the juices of the beef and tomatoes.
The liquid should not cover the ingredients entirely, as the vegetables will release their own moisture during the cooking process. Verify that the lid is securely in place to ensure a proper seal for the long, slow simmer.
Final slow cooking
- Add liquid and cookPour the red wine over the ingredients. Cover and cook on low for 8 hours until the beef reaches an internal temperature of 145°F (63°C). Let the beef rest for at least 3 minutes before serving.Look for The stew is finished when the beef is fork-tender.Safe temperature 145°F (63°C) internal temperature (steaks, chops and roasts)Tip Check the temperature in the thickest part of the meat to ensure safety.
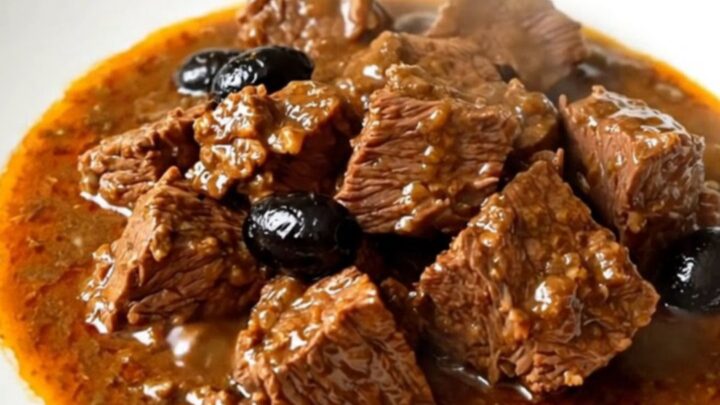
During the final stage, the kitchen should be filled with the rich, savory aroma of red wine and rosemary. The beef will have reached a tender, pull-apart consistency. Before serving, give the stew a gentle stir to incorporate the juices into a cohesive sauce. The final dish should be steaming, glossy, and visibly tender, ready to be served immediately on a warmed plate.
Common mistakes
Avoid over-crowding the slow cooker, as this can prevent the ingredients from cooking evenly and may lead to excess moisture accumulation.
Do not lift the lid during the first six hours of cooking, as this releases heat and steam, significantly extending the required cooking time. Ensure the beef cubes are not too large, as oversized pieces will remain tough and chewy even after eight hours of slow cooking.
How to tell it’s done
The stew is done when the beef is fork-tender, meaning it yields easily when pierced with a fork. To ensure safety, use a meat thermometer to verify that the beef has reached an internal temperature of at least 145°F (63°C).
The liquid should be reduced slightly and appear glossy, having combined with the juices from the tomatoes and the wine to form a flavorful, light sauce that coats the back of a spoon.
- Steaks, chops and roasts: 145°F (63°C) in the thickest part, then a 3-minute rest
Up next · Part 3 of 3
2 variations · storage & make-ahead · 3 answers · printable card
Tips, FAQ & printable recipe (Part 3)← Back to the ingredients (Part 1)