Dinner · Part 2 of 3: Instructions
Slow Cooker Beef Shanks in Tomato Gravy Step-by-step instructions
- Prep
- Cook
- Total
- Serves
- 4
Before you start
Before beginning, ensure your slow cooker basin is clean and dry. Gather all your ingredients, including the beef shanks, baby carrots, and seasonings. No special preparation is required for the beef, as the slow cooking process will handle the tenderizing.
Simply have your crushed tomatoes ready to pour. If you are planning to serve this over a starch like mashed potatoes or polenta, begin preparing those about 30 minutes before the beef is finished cooking so everything is ready to serve at the same time.
Ingredients at a glance (5)
- 4 bone-in beef shanks
- 1 cup baby carrots
- 1 tsp garlic powder
- 1 tbsp Italian seasoning
- 28 oz crushed tomatoes
Instructions
Preparation and assembly
- Assemble ingredientsArrange the bone-in beef shanks at the bottom of the slow cooker basin. Scatter the baby carrots evenly around and over the meat to ensure they cook through during the long braising process.Look for The beef shanks should be arranged in a single layer if possible to ensure even cooking.Tip If the shanks are very large, ensure the slow cooker lid can close completely to trap moisture.
The beef shanks are neatly arranged at the bottom of the slow cooker, surrounded by the baby carrots. The ingredients are layered to ensure the meat is fully exposed to the heat and the aromatic seasonings are distributed evenly across the surface of the beef.
Seasoning and braising
- Season and coverSprinkle the garlic powder and Italian seasoning over the beef and carrots. Pour the crushed tomatoes over the top, ensuring the meat is well-covered by the tomato sauce to keep it moist while cooking.Look for The tomatoes should fully submerge the seasoning to create a flavorful braising liquid.Tip Spreading the tomatoes evenly helps prevent any dry spots on the meat.
The crushed tomatoes completely cover the beef and carrots, creating a thick, uniform layer.
The garlic powder and Italian seasoning are incorporated into the liquid, setting the stage for deep flavor infusion as the slow cooker begins its long, steady heating cycle.
Final cooking and resting
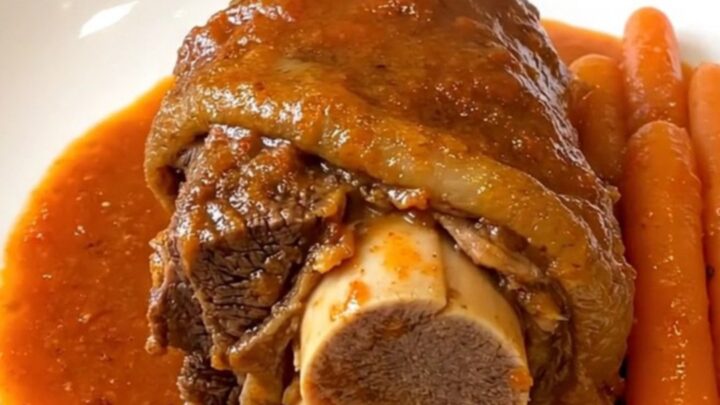
- Slow cook and serveCover and cook on low for 8 hours. The meat is done when it reaches an internal temperature of 145°F (63°C). Let the meat rest for at least 3 minutes before serving with the thickened tomato gravy.Look for The meat is fork-tender and easily pulls away from the bone.Safe temperature 145°F (63°C) internal temperature (steaks, chops and roasts)Tip For a thicker gravy, you can remove the lid for the final hour of cooking.
The meat is fork-tender and aromatic, with the tomato gravy having thickened into a rich, savory consistency. The beef has reached the required safe internal temperature and is ready to be pulled from the slow cooker after the mandatory resting period.
Common mistakes
A common mistake is opening the slow cooker lid too frequently during the cooking process. Each time the lid is lifted, heat escapes and the cooking time increases. Keep the lid closed for the duration of the 8 hours to maintain a consistent temperature.
Another error is neglecting to ensure the meat is properly submerged in the tomato sauce. If the meat is not partially covered, the top portions may become dry or tough. Always check that the sauce surrounds the shanks before starting.
How to tell it’s done
The beef shanks are perfectly done when the meat is exceptionally tender and pulls away from the bone with minimal effort. Using a meat thermometer, ensure the thickest part of the meat has reached an internal temperature of at least 145°F (63°C).
Once this temperature is achieved, allow the meat to rest for at least 3 minutes. This resting period allows the juices to redistribute, ensuring the beef remains succulent and flavorful when sliced or served whole.
- Steaks, chops and roasts: 145°F (63°C) in the thickest part, then a 3-minute rest
Up next · Part 3 of 3
2 variations · storage & make-ahead · 3 answers · printable card
Tips, FAQ & printable recipe (Part 3)← Back to the ingredients (Part 1)