Dinner · Part 2 of 3: Instructions
Slow Cooker Beef Neck Stew with Yellow Carrots Step-by-step instructions
- Prep
- Cook
- Total
- Serves
- 4
Before you start
Before starting, ensure all vegetables are thoroughly washed and sliced into uniform pieces. This consistency is key to ensuring that the carrots and onions cook at the same rate.
Prepare the beef neck by trimming any excess surface fat if desired, and make sure your slow cooker is clean and positioned on a stable, heat-resistant countertop with enough space for proper ventilation during the long cooking period.
Ingredients at a glance (6)
- 2 lb beef neck, cut into large chunks
- 4 medium yellow carrots, peeled and sliced
- 1 medium onion, thinly sliced
- 1 tsp dried thyme
- 1 cube beef bouillon, crumbled
- 1/2 cup dry white wine
Instructions
Preparation and layering
- Assemble the slow cooker basePlace the beef neck chunks at the bottom of the slow cooker insert. Distribute the sliced yellow carrots and onions evenly over the meat, ensuring they are well dispersed to provide flavor throughout the cooking process.Look for The beef should be in a single layer if possible to ensure even heat distribution.Tip Do not crowd the slow cooker too much; layer the ingredients to allow the heat to circulate effectively.
At this stage, the slow cooker is filled with raw beef, sliced yellow carrots, and onions. The ingredients are layered neatly to allow for even heat distribution.
Check that the beef pieces are roughly the same size to ensure they cook uniformly over the next several hours.
Seasoning and braising
- Season and add liquidSprinkle the dried thyme and the crumbled beef bouillon cube over the beef and vegetables. Carefully pour the dry white wine over the mixture to provide the braising liquid for the stew.Look for Ensure the bouillon is crumbled finely so it dissolves quickly into the wine.Tip The acidity of the white wine helps tenderize the tougher beef neck cut over the long cooking time.
The dried thyme and bouillon are scattered, and the white wine is added. The mixture should look moist and aromatic. The wine provides the essential acidity needed to tenderize the meat, and the bouillon creates a fragrant, savory base for the stewing process.
Cooking and final texture
- Slow cook and serveCover the slow cooker and cook on low for 8 hours or high for 4 hours. Once cooked, check that the beef reaches an internal temperature of 145°F (63°C). Let the meat rest for 5 minutes before serving on warm plates.Look for The meat should be fork-tender and easily pull apart with minimal pressure.Safe temperature 145°F (63°C) internal temperature (steaks, chops and roasts)Tip Check the internal temperature in the thickest part of the meat to ensure it is fully cooked and safe to eat.
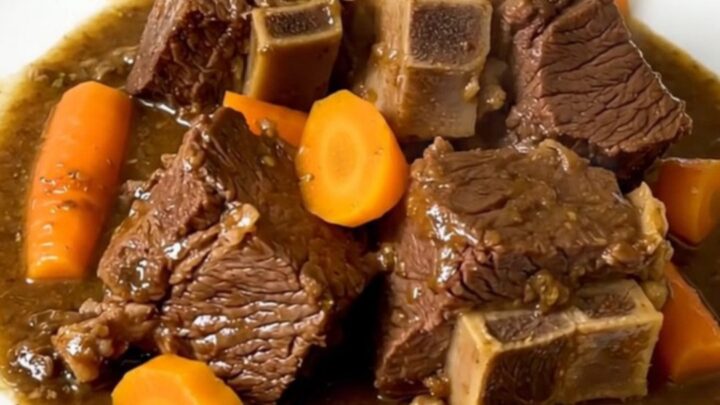
After the long cook, the beef is tender and the vegetables are soft. The stew should be fragrant and steaming, with a rich, flavorful liquid. Verify the internal temperature of the beef reaches 145°F (63°C) and let it rest before final plating.
Common mistakes
A common mistake is failing to properly space the ingredients, which can lead to uneven cooking. Another error is checking the meat too frequently; every time the lid is lifted, heat escapes and the cooking time increases.
Avoid using excessively large chunks of beef, as they may remain tough in the center even after the designated cooking time. Lastly, do not skip the resting period, as it is essential for the final quality of the stew.
How to tell it’s done
The beef is perfectly done when it reaches an internal temperature of 145°F (63°C). At this stage, the meat should be exceptionally tender, yielding easily to the pressure of a fork.
The connective tissue should be fully softened, and the yellow carrots should be tender but not mushy. Always allow the meat to rest for at least 5 minutes before serving to ensure the juices redistribute throughout the fibers for the best possible texture.
- Steaks, chops and roasts: 145°F (63°C) in the thickest part, then a 3-minute rest
Up next · Part 3 of 3
2 variations · storage & make-ahead · 3 answers · printable card
Tips, FAQ & printable recipe (Part 3)← Back to the ingredients (Part 1)