Dinner · Part 2 of 3: Instructions
Slow Cooker Beef Carnitas for Easy Weeknight Dinners Step-by-step instructions
- Prep
- Cook
- Total
- Serves
- 6
Before you start
Before you begin, ensure your slow cooker is placed on a level, heat-resistant surface away from any water sources. Take the beef chuck roast out of the refrigerator about 20 minutes before you start to take the chill off.
Have all your ingredients measured and ready to go. If you are using a large onion, peel it and cut it into quarters ahead of time. Double-check that your citrus juice is freshly squeezed if possible, as it provides the brightest flavor to the final dish.
Ingredients at a glance (5)
- 3 lb beef chuck roast
- 1 large white onion, quartered
- 2 tbsp chili powder
- 1 tbsp dried oregano
- 1/2 cup fresh citrus juice
Instructions
Initial assembly
- Prepare the slow cookerPlace the beef chuck roast into the bottom of the slow cooker. Arrange the quartered white onion pieces around the meat to ensure even flavor distribution during the cooking process.Look for The beef should sit flat on the bottom of the cooker.Tip Ensure the slow cooker is clean and dry before adding the ingredients.
At this stage, the beef is placed in the slow cooker with the onions surrounding it. The ingredients are raw and fresh, and the setup is ready for the seasoning to be added.
Check that the roast is positioned securely at the bottom of the slow cooker to ensure it remains submerged in the flavorful juices as it begins to heat up.
Seasoning and cooking
- Season and pourEvenly sprinkle the chili powder and dried oregano over the top of the beef. Pour the citrus juice over the meat and onions to help tenderize the roast as it cooks slowly.Look for The spices should lightly coat the top surface of the meat.Tip Distribute the spices evenly to build a consistent flavor profile.
The spices and citrus juice are now in the cooker. You should see the chili powder and oregano coating the top of the beef. At this point, you are ready to put the lid on and begin the long, slow cook. Ensure the lid is sealed tightly to lock in all the moisture and aromatic steam that will slowly infuse the roast.
Shredding and finishing
- Cook and serveCover and cook on low for 8 hours until the meat is fork-tender. Remove the beef, shred it, and ensure it reaches an internal temperature of at least 145°F (63°C). Let the meat rest for at least 3 minutes before serving.Look for The meat should easily pull apart with two forks.Safe temperature 145°F (63°C) internal temperature (steaks, chops and roasts)Tip If the sauce is too thin, simmer it in a pan for a few minutes to reduce.
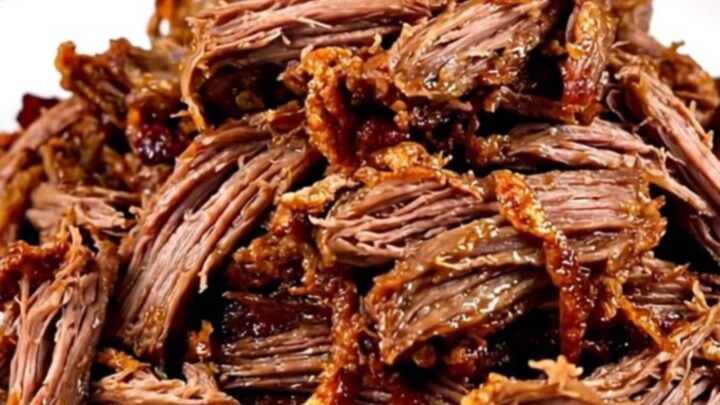
After 8 hours, the beef should be incredibly soft and fragrant, filling the kitchen with a savory, spiced aroma. The meat should be easy to shred with forks, and the liquids should have reduced into a rich, flavorful sauce. Verify the internal temperature is at least 145°F (63°C) before proceeding to shred the beef for serving.
Common mistakes
A common mistake is rushing the cooking process by using the high setting on the slow cooker instead of the low setting. High heat can cause the meat to dry out before the connective tissues have a chance to properly break down.
Another error is neglecting to let the meat rest after cooking. Resting allows the juices to redistribute throughout the fibers, which is crucial for maintaining the moisture and tenderness that makes this dish so enjoyable. Always ensure you give it at least 3 minutes.
How to tell it’s done
The beef is done when it is extremely tender and pulls apart easily with the gentle pressure of two forks. The internal temperature must reach at least 145°F (63°C) to be considered safe and perfectly cooked.
If you find that the meat is still firm or resists shredding, it likely needs more time in the slow cooker. Always check the thickest part of the roast with a digital meat thermometer to confirm it has reached the required temperature for safe consumption.
- Steaks, chops and roasts: 145°F (63°C) in the thickest part, then a 3-minute rest
Up next · Part 3 of 3
2 variations · storage & make-ahead · 3 answers · printable card
Tips, FAQ & printable recipe (Part 3)← Back to the ingredients (Part 1)