Dinner · Part 2 of 3: Instructions
Slow Cooker Beef and Cabbage Stew for Easy Weeknight Dinners Step-by-step instructions
- Prep
- Cook
- Total
- Serves
- 4
Before you start
Before starting, ensure your workspace is clean and organized. Cut the beef into uniform 1-inch pieces, trimming any excessive fat if desired. Peel and chop your potatoes into bite-sized chunks and shred or roughly chop the cabbage.
Having all your ingredients prepped and ready to go before you begin layering makes the assembly process fast and efficient. Ensure your slow cooker is plugged in and placed on a heat-resistant surface away from the edge of the counter.
Ingredients at a glance (5)
- 2 lb beef chunks, cut into 1-inch pieces
- 1 head cabbage, chopped
- 4 medium potatoes, peeled and chopped
- 1 cube vegetable bouillon cube
- 2 cups water
Instructions
Initial Assembly
- Prepare the slow cookerPlace the raw beef chunks into the bottom of the slow cooker insert. Ensure the meat is distributed evenly across the base to allow for consistent cooking throughout the long simmering process.Look for Beef is arranged in a single layerTip Cut the beef into uniform chunks to ensure they cook at the same rate.
The slow cooker is filled with the raw beef, chopped vegetables, and seasoning. The ingredients should be layered, not mixed, to allow the heat to distribute correctly.
Check that the bouillon is evenly crumbled over the top of the vegetables so it can dissolve properly as the cooking liquid heats up.
The Simmering Process
- Add vegetables and aromaticsLayer the chopped cabbage and peeled potatoes over the beef. Crumble the vegetable bouillon cube directly over the vegetables to ensure the flavors disperse evenly as the liquid heats up during the cooking cycle.Look for Vegetables cover the beef completelyTip Keep the vegetable pieces fairly large so they maintain their texture without turning to mush.
The slow cooker is covered and the heat is set to low. During this long phase, the beef releases its juices and the cabbage wilts down, creating the base of the stew. The kitchen should begin to smell savory and aromatic as the ingredients meld together over the several-hour cooking window.
Final Integration
- Add liquid and cookPour the water over the ingredients. Cover the slow cooker and cook on the low setting for 6 to 8 hours until the beef reaches an internal temperature of 145°F (63°C). Let the beef rest for at least 5 minutes before serving to ensure tenderness.Look for Beef is fork-tender and liquid is aromaticSafe temperature 145°F (63°C) internal temperature (steaks, chops and roasts)Tip Do not lift the lid during the first few hours to maintain the necessary internal temperature.
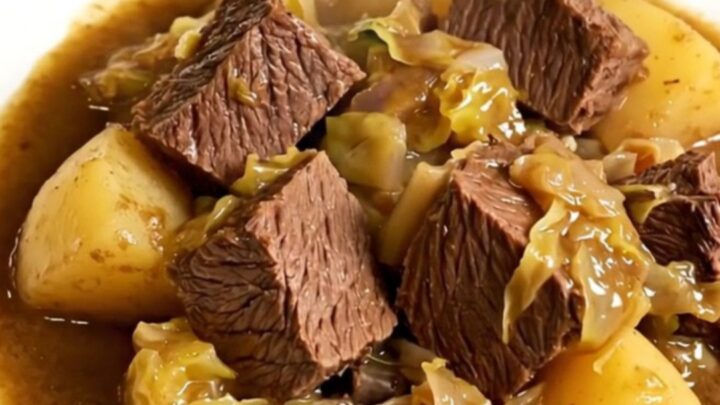
The beef is tender and the vegetables are fully cooked. At this stage, the liquid should be a rich, flavorful broth. Give the stew a gentle stir to combine all the ingredients before serving. Ensure the beef has reached the required internal temperature of 145°F (63°C) before turning off the heat.
Common mistakes
A common mistake is overcrowding the slow cooker, which can prevent proper heat circulation and lead to uneven cooking. Avoid adding too much water; you only need enough to just cover the ingredients, as the cabbage will release a significant amount of moisture as it cooks.
Another mistake is lifting the lid too frequently to check on the progress. Each time you remove the lid, heat escapes, significantly increasing the total cooking time and potentially disrupting the tenderizing process.
How to tell it’s done
The beef is fully cooked and ready to serve when it is fork-tender, meaning it should easily pull apart with minimal pressure from a fork. The internal temperature of the beef should reach at least 145°F (63°C).
The potatoes should be soft enough to pierce easily with a knife, and the cabbage should be wilted and tender, having absorbed the flavors of the broth. Always verify the temperature with a meat thermometer to ensure safety and quality.
- Steaks, chops and roasts: 145°F (63°C) in the thickest part, then a 3-minute rest
Up next · Part 3 of 3
2 variations · storage & make-ahead · 3 answers · printable card
Tips, FAQ & printable recipe (Part 3)← Back to the ingredients (Part 1)