Dinner · Part 2 of 3: Instructions
Balsamic Pancetta Brussels Sprouts: Easy Slow Cooker Glaze Step-by-step instructions
- Prep
- Cook
- Total
- Serves
- 6
Before you start
Before starting, halve the Brussels sprouts and measure out all ingredients. Cook the pancetta in a skillet over medium heat until crispy, then drain on paper towels. Mince the garlic and melt the butter.
If using whole walnuts, toast them in a dry skillet over medium heat for 3-5 minutes until fragrant, then chop. Have the balsamic glaze, brown sugar, and all other ingredients ready so the slow cooker can be filled quickly.
Ingredients at a glance (9)
- 2 lb Brussels sprouts, halved
- 1/2 cup crispy rendered pancetta
- 1/4 cup unsalted butter, melted
- 3 cloves garlic, minced
- 1/2 cup aged balsamic glaze
- 2 tbsp brown sugar
- 1/2 cup toasted walnuts, chopped
- 1/4 cup shaved parmesan
- Extra balsamic glaze, for drizzling, to taste
Instructions
Toss and Layer
- Prep and TossPlace the halved Brussels sprouts in a 6-quart slow cooker. Add the crispy rendered pancetta, melted butter, minced garlic, aged balsamic glaze, and brown sugar. Toss everything together with a large spoon until the sprouts are evenly coated.Look for Every sprout should glisten with glaze and butter; no dry spots remain.Tip If the sprouts are large, cut them into quarters so they cook evenly.
- Layer and ArrangeSpread the sprouts into an even layer in the slow cooker. Tuck any larger pieces toward the bottom and push smaller ones to the top. This helps them cook at the same rate and absorb the glaze uniformly.Look for The sprouts form a single, mostly even layer in the cooker.Tip Don't overcrowd; if needed, use a wider slow cooker or reduce the batch.
The sprouts are evenly coated with a glossy mixture of butter, balsamic, and brown sugar. The pancetta is scattered throughout, and the garlic is distributed.
The slow cooker looks colorful and inviting, with the glaze pooling at the bottom. Before moving on, give everything one more toss to ensure no dry spots remain.
Slow Cook and Glaze
- Slow Cook on HighCover the slow cooker with its lid and set to HIGH. Cook for 2 1/2 hours without opening the lid during the first 2 hours. The steam trapped inside helps the sprouts become tender and allows the balsamic glaze to reduce and thicken.Look for A rich, sweet balsamic aroma fills the kitchen; sprouts are fork-tender.Tip Resist lifting the lid; each peek releases heat and extends cooking time.
- Check and StirAfter 2 hours, gently stir the sprouts to redistribute the glaze. Continue cooking for the remaining 30 minutes, uncovered if the glaze seems thin, so it can reduce to a sticky, dark coating. The sprouts should be tender but not mushy.Look for The glaze clings to the sprouts and turns deep brown and syrupy.Tip If the sprouts are still firm, cook 15 minutes more and check again.
After 2 1/2 hours, the kitchen smells sweet and savory. The sprouts are tender and have absorbed most of the liquid, leaving a thick, sticky glaze that clings to each piece. The color is deep amber, and the edges are slightly caramelized. Stir gently to coat all sprouts evenly with the reduced glaze.
Finish and Serve
- Finish and SeasonOnce the sprouts are tender and glossy, taste one and adjust seasoning if needed. The pancetta and balsamic are salty, so add salt sparingly. If you prefer more tang, stir in an extra teaspoon of balsamic glaze.Look for The sprouts are caramelized, sticky, and deeply flavored.Tip A pinch of black pepper brightens the flavor without adding salt.
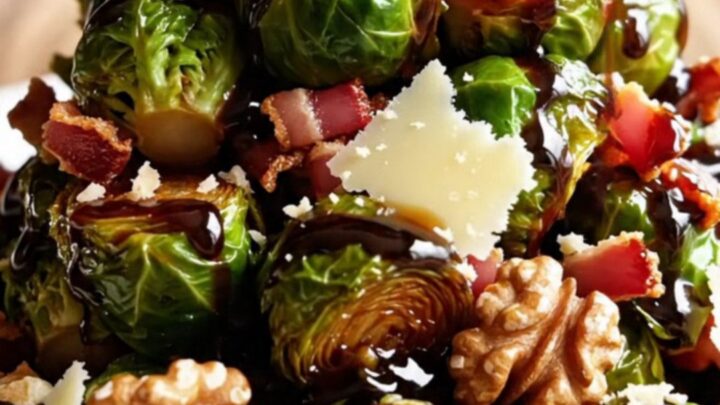
- Serve with ToppingsTransfer the glazed Brussels sprouts to a serving platter. Sprinkle with toasted walnuts and shaved parmesan, then drizzle with extra balsamic glaze. Serve immediately while warm, so the cheese softens slightly and the walnuts stay crunchy.Look for The sprouts are glossy, topped with crunchy nuts and shavings of cheese.Tip For a prettier plate, add the walnuts and parmesan just before serving.
The sprouts are glossy, tender, and coated in a dark balsamic reduction. Topped with crunchy walnuts, shaved parmesan, and an extra drizzle of glaze, they look restaurant-worthy. The parmesan is slightly melted, and the walnuts add a golden crunch. Serve immediately for the best texture and flavor.
Common mistakes
One common mistake is opening the slow cooker too often, which releases heat and extends cooking time. Another is using frozen Brussels sprouts; they release excess water and become soggy. Also, be careful not to overcook—while tender is desired, mushy sprouts fall apart and lose their appeal.
Finally, don't skip the browning of the pancetta; it adds a depth of flavor that raw pancetta cannot provide. If the glaze is too thin at the end, cook uncovered to reduce it quickly.
How to tell it’s done
The Brussels sprouts are done when they are fork-tender and easily pierced with a knife, but still hold their shape. The glaze should be thick and sticky, coating each sprout with a glossy, dark brown sheen. If the glaze is too thin, remove the lid and cook on HIGH for an additional 15-20 minutes to reduce.
The internal temperature of the sprouts should reach at least 165°F (74°C) for food safety, although they are typically served well above that. Taste one to ensure it is cooked through and has absorbed the sweet-savory flavors.
Up next · Part 3 of 3
4 variations · storage & make-ahead · 5 answers · printable card
Tips, FAQ & printable recipe (Part 3)← Back to the ingredients (Part 1)