Desserts · Part 2 of 3: Instructions
Slow Cooker Autumn Plum Clafoutis: Easy Hands-Off Dessert Step-by-step instructions
- Prep
- Cook
- Total
- Serves
- 6
Before you start
Before starting, gather all the ingredients and equipment. Grease the slow cooker insert lightly with butter or oil to prevent sticking. Halve and pit the plums, and have the eggs, flour, vanilla sugar, and milk measured and ready. The slow cooker should be clean and dry.
No need to preheat the cooker; it will heat gradually as it cooks. If you prefer a cleaner presentation, you can whisk the eggs, flour, sugar, and milk together in a bowl before pouring over the plums—but the video shows them added separately, and that works perfectly.
Ingredients at a glance (5)
- 1 1/2 lb ripe plums, halved and pitted
- 4 large eggs
- 1/2 cup all-purpose flour
- 1/4 cup vanilla sugar
- 1 cup whole milk
Instructions
Layer the Fruit and Eggs
- Prepare the Slow Cooker and PlumsLightly grease the inside of the slow cooker insert with butter or a neutral oil. Arrange the halved plums in a single layer, cut side up, covering the bottom of the cooker as evenly as possible. If the plums are very large, cut them into quarters to fit snugly.Look for The plums should cover the bottom in a single layer, cut side up.Tip Choose ripe but firm plums so they hold their shape during cooking.
- Add the EggsCrack the eggs directly over the plums, dropping them in whole as shown in the video. Do not stir yet; the eggs will be blended with the other ingredients in the next step.Look for The eggs sit on top of the plums, yolks intact.Tip If any shell falls in, remove it with a clean spoon.
After arranging the plums and adding the eggs, the slow cooker should show a neat layer of fruit cut side up with whole eggs resting on top. The eggs may spread slightly, but that's fine.
This is the foundation for the batter, so make sure the plums cover the bottom evenly. If any eggs have broken yolks, it's okay—the batter will still come together.
Add the Dry Ingredients and Milk
- Add the Dry IngredientsSprinkle the all-purpose flour evenly over the eggs and plums, then sprinkle the vanilla sugar over the top. Use a spoon or your fingers to distribute the flour and sugar as evenly as possible, but do not stir.Look for The flour and sugar form a light dusting over the eggs and fruit.Tip Shaking the flour through a small sieve helps avoid lumps.
- Pour in the MilkSlowly pour the whole milk over the entire mixture, making sure it reaches the edges and covers the flour and sugar. Do not stir; the batter will come together as it cooks.Look for The milk pools around the plums and moistens the dry ingredients.Tip Pouring slowly helps the milk distribute evenly without disturbing the layers.
With the flour, vanilla sugar, and milk added, the surface should look speckled with dry patches and liquid pooling around the plums. The flour and sugar will not be fully dissolved at this point, but they will incorporate as the slow cooker heats. The milk should cover the dry ingredients in most places; if not, gently tilt the cooker to distribute it.
Cook and Rest
- Cook the ClafoutisCover the slow cooker and cook on high for 2 hours, or until the edges are golden and the center is just set. The clafoutis should be gently firm to the touch, not jiggly. If the top is still very wet, cook for an additional 15 to 30 minutes.Look for The top is golden brown and the center springs back lightly when touched.Safe temperature 160°F (71°C) internal temperature (egg dishes)Tip Cooking times vary; check at 1 hour 45 minutes to avoid overbaking.
- Rest and ServeTurn off the slow cooker and let the clafoutis rest, uncovered, for at least 10 minutes. The eggs finish setting during this time; the internal temperature should reach at least 160°F (71°C). Carefully transfer to a plate or serve directly from the cooker.Look for The clafoutis holds its shape and is no longer steaming heavily.Safe temperature 160°F (71°C) internal temperature (egg dishes)Tip Use a wide spatula to lift out portions without breaking them.
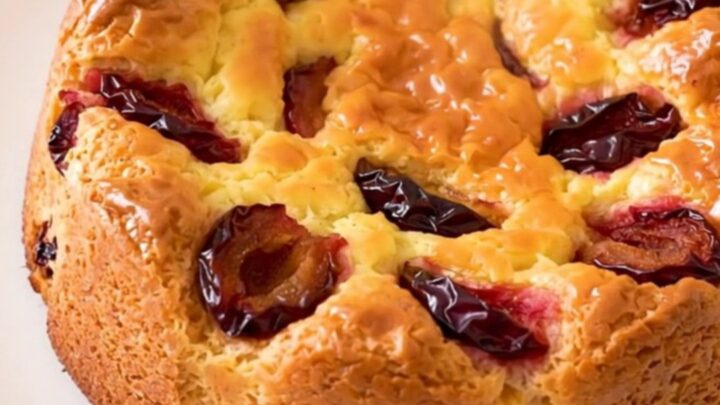
After cooking, the clafoutis should be golden brown on top and firm to the touch in the center. The edges will be slightly darker and may pull away from the sides of the cooker. The aroma will be sweet and eggy with a hint of vanilla. Let it rest for 10 minutes before serving; the custard will set further as it cools.
Common mistakes
Avoid opening the slow cooker lid during the first 90 minutes of cooking; releasing steam can cause the temperature to drop and prolong cooking. Don't stir the ingredients after adding the milk—stirring can break up the plums and create a cloudy batter.
If the top looks wet after 2 hours, cook for an additional 15 to 30 minutes, but check frequently to prevent overbaking, which can make the clafoutis rubbery. Use ripe but firm plums; overly ripe ones may turn mushy and release too much liquid.
How to tell it’s done
The clafoutis is done when the edges are golden brown and the center is set but still moist—it should not be jiggly when gently shaken. A knife inserted into the center should come out clean or with just a few moist crumbs.
The internal temperature of the eggs should reach at least 160°F (71°C) to ensure food safety. After turning off the slow cooker, let the clafoutis rest for 10 minutes; it will continue to firm up as it cools slightly.
- Egg dishes: 160°F (71°C) in the thickest part
Up next · Part 3 of 3
4 variations · storage & make-ahead · 5 answers · printable card
Tips, FAQ & printable recipe (Part 3)← Back to the ingredients (Part 1)