Dinner · Part 2 of 3: Instructions
Crockpot Apple Maple Pork Roast Step-by-step instructions
- Prep
- Cook
- Total
- Serves
- 6
Before you start
Before starting, make sure the pork roast is thawed if it was frozen. Pat it dry with paper towels—this helps the seasoning adhere, though this recipe doesn't require additional salt or pepper. Core and slice the apples; you can leave the peel on for texture and color. Measure the cinnamon and maple syrup so they are ready to go.
Place the slow cooker on the counter and plug it in. There's no need to brown the pork first; the slow cooker will develop flavor over the long cooking time. If you prefer a deeper color, you can sear the roast in a skillet before adding it, but it's not necessary.
Ingredients at a glance (4)
- 3 lb boneless pork roast
- 3 apples, cored and sliced
- 1 tbsp ground cinnamon
- 1/2 cup maple syrup
Instructions
Assemble and start
- Prepare the roastPlace the boneless pork roast in the bottom of the slow cooker. If the roast is tied, leave it as is; if it has a thick fat cap, you can trim it slightly, but leaving it adds flavor.Look for The roast sits snugly in the slow cooker, touching the bottom.Tip For even cooking, choose a roast that is relatively uniform in thickness.
- Add the applesScatter the sliced apples over the top of the pork roast, covering it as evenly as possible. The apples will soften and create a chunky, saucy topping as they cook.Look for The apples form a single layer over the pork.Tip Core the apples but leave the skin on—it helps them hold their shape during the long cook.
- Season with cinnamonSprinkle the ground cinnamon evenly over the apples and pork. Use your hand or a spoon to distribute it, but there's no need to stir—the slow cooker will blend the flavors.Look for A light brown dusting of cinnamon covers the apples.Tip If you like a stronger cinnamon flavor, add an extra teaspoon.
- Pour the maple syrupPour the maple syrup over everything in the slow cooker, drizzling it evenly. Do not stir; the syrup will meld with the apple juices and pork drippings as it cooks.Look for The syrup pools around the apples and runs down the sides of the roast.Tip Use pure maple syrup for the best flavor, not pancake syrup.
At the end of this phase, the slow cooker contains the pork roast with sliced apples scattered on top, dusted with cinnamon, and drizzled with maple syrup. The apples should cover the roast fairly evenly, and the syrup should pool around the edges.
The setup is simple—no heat yet, just the raw ingredients arranged neatly. This is the point where you can adjust the seasoning or add more apples if you like. Once the lid is on and the slow cooker is set, the cooking begins.
Cook until tender
- Cook low and slowCover the slow cooker and cook on LOW for 8 hours, or on HIGH for 4-5 hours, until the pork is fork-tender and reaches an internal temperature of 145°F (63°C). The long, gentle heat breaks down the connective tissue, making the roast easy to shred or slice. Let it rest for 3 minutes before slicing.Look for The pork is tender and pulls apart easily with a fork; the apples are soft and translucent.Safe temperature 145°F (63°C) internal temperature (steaks, chops and roasts)Tip Resist the urge to lift the lid during cooking—each peek releases heat and adds time.
- Rest the roastOnce the pork is cooked, remove the roast from the slow cooker to a cutting board and let it rest for at least 5 minutes. This allows the juices to redistribute, ensuring moist, flavorful slices.Look for The roast rests on the board, lightly steaming.Tip Resting is essential—don't skip it, or the meat will be dry.
After the cooking time, the pork should be fork-tender and easily pull apart. The apples will have softened and darkened, and the liquid will have reduced slightly into a glossy sauce. The aroma of cinnamon and maple will fill the kitchen. Check the internal temperature of the pork with a thermometer—it should read at least 145°F (63°C). If it's not there yet, continue cooking in 30-minute increments. The roast should be cooked through but still moist.
Rest and serve
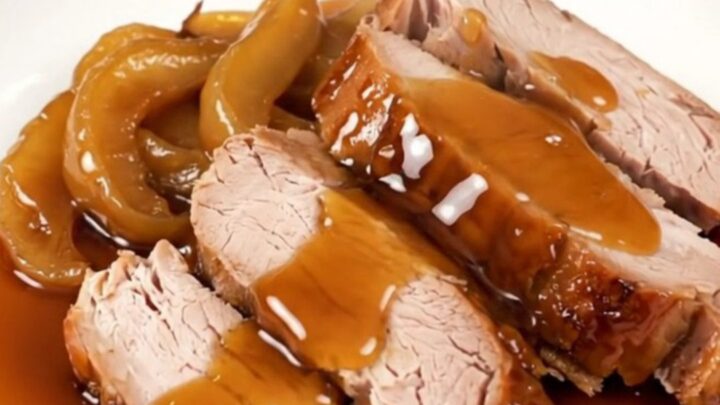
- Slice and serveSlice the pork against the grain into thick, even slices. Serve with the glazed apples from the slow cooker spooned over the top. The apples will have softened into a sweet, jammy accompaniment.Look for The slices are juicy and tender, with the apples clinging to them.Tip For neat slices, use a sharp carving knife and cut against the grain.
After removing the pork from the slow cooker, it rests on a cutting board for at least 5 minutes. The apples remain in the slow cooker, keeping warm. When you slice the pork, the slices should be tender and juicy, with a slight pinkness allowed if the temperature is above 145°F (63°C). Spoon the glazed apples over the top. The dish is ready to serve, with the sweet and savory flavors melded together.
Common mistakes
One common mistake is lifting the lid too often to check on the roast. Each time you open the slow cooker, heat escapes, which can extend the cooking time significantly. Trust the process and wait until the minimum time has passed.
Another mistake is using a lean cut like pork tenderloin, which will dry out over the long cooking time. Stick with a shoulder or butt roast. Finally, don't skip the resting step—slicing immediately will cause the juices to run out, leaving the meat dry. Letting it rest ensures moist, flavorful slices.
How to tell it’s done
The pork is done when it is fork-tender and easily pulls apart, and an instant-read thermometer inserted into the thickest part registers at least 145°F (63°C). Because the roast is cooked low and slow, it may reach higher temperatures, which is fine as long as it remains moist.
The apples should be soft and translucent, almost jammy, and the liquid in the slow cooker should be syrupy. Let the roast rest for at least 5 minutes before slicing to allow the juices to redistribute. If the pork is still tough, continue cooking and check again after 30 minutes.
- Steaks, chops and roasts: 145°F (63°C) in the thickest part, then a 3-minute rest
Up next · Part 3 of 3
4 variations · storage & make-ahead · 5 answers · printable card
Tips, FAQ & printable recipe (Part 3)← Back to the ingredients (Part 1)