Desserts · Part 2 of 3: Instructions
Slow Cooker Apple Cinnamon Oat Crumble Step-by-step instructions
- Prep
- Cook
- Total
- Serves
- 4
Before you start
Before beginning, ensure all your ingredients are measured and ready. Peel, core, and dice your apples into uniform pieces. If you are using a slow cooker with a ceramic insert, make sure it is properly seated in the heating base.
Have your measuring cups and spoons clean and dry to ensure accurate measurements, especially for the cinnamon and oats. Clearing your workspace will make the assembly process efficient and straightforward, allowing you to focus on the simple layering required to create this delicious dessert.
Ingredients at a glance (4)
- 4 cups diced apples, peeled and cored
- 1 cup rolled oats
- 1 tsp ground cinnamon
- 4 tbsp cold butter, cubed
Instructions
Assembling the fruit base
- Prepare the apple basePlace the diced apples into the bottom of the slow cooker insert. Ensure the apples are spread out in an even layer across the base of the insert to promote uniform cooking during the process.Look for Apples should cover the bottom of the slow cooker insert evenly.Tip Cut the apples into uniform half-inch cubes to ensure they cook at the same rate.
The apples should be arranged in a single, even layer across the bottom of the slow cooker insert. This ensures that the heat is applied evenly to the fruit from the start. Check that no large gaps are left, as this will help the apples cook consistently. The base is now ready for the dry ingredients.
Adding the topping layers
- Add the topping componentsScatter the rolled oats over the layer of apples. Sprinkle the ground cinnamon evenly over the oats to ensure every bite is seasoned. Finally, place the cold butter cubes evenly across the surface of the oat layer.Look for The butter cubes should be distributed across the top of the oats.Tip Keep the butter very cold until the last second to help it hold its shape before melting.
The oats and cinnamon should be distributed evenly over the apples, and the butter cubes should be placed uniformly on top. This arrangement is crucial for the butter to melt down through the oats as the cooker warms up. Once the butter is positioned, the slow cooker is ready to be covered and turned on.
Cooking to golden perfection
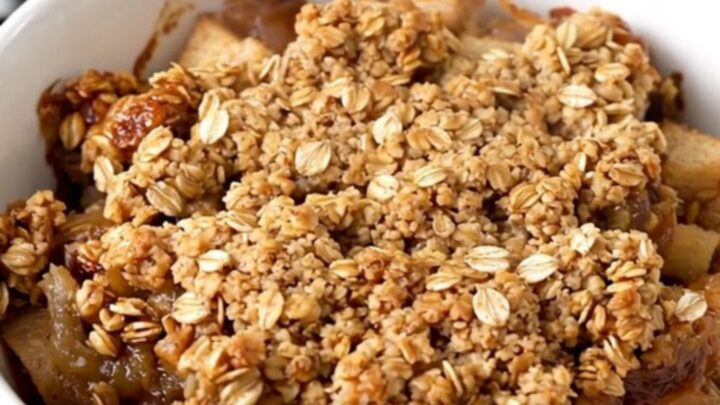
- Cook and serveCover the slow cooker and cook on high for three hours or until the apples are tender and the topping is golden and bubbling. Let the crumble rest for ten minutes before serving warm on plates.Look for The apples are soft when pierced with a fork and the topping is golden brown.Tip Avoid lifting the lid too often, as this releases heat and moisture needed for proper cooking.
The dish is finished when the apples are soft and the topping appears golden and slightly crisp. The aroma should be rich and inviting throughout the kitchen.
Ensure the juices are bubbling before turning off the heat, as this signals that the sugars in the fruit have caramelized appropriately for a balanced flavor.
Common mistakes
A common mistake is cutting the apples into uneven sizes, which leads to some pieces turning to sauce while others remain hard. Ensure all apple cubes are roughly the same size for consistent texture.
Another error is over-crowding the slow cooker; make sure your insert is appropriately sized so the ingredients have enough room to cook properly. Avoid lifting the lid repeatedly during the cooking cycle, as this causes significant heat loss and extends the necessary cooking time, potentially drying out the fruit.
How to tell it’s done
The crumble is done when the apples are fork-tender and the topping has developed a golden-brown hue. You should see juices bubbling up around the edges of the insert, indicating that the fruit has released its natural moisture and the butter has fully incorporated into the oats.
The house should smell intensely of caramelized apples and warm cinnamon. If the apples still feel firm, continue cooking for an additional twenty minutes and check again for tenderness.
Up next · Part 3 of 3
2 variations · storage & make-ahead · 3 answers · printable card
Tips, FAQ & printable recipe (Part 3)← Back to the ingredients (Part 1)