Dinner · Part 2 of 3: Instructions
Slow Cooker Apple Butter Country-Style Ribs Step-by-step instructions
- Prep
- Cook
- Total
- Serves
- 4
Before you start
Before beginning, ensure your slow cooker is clean and positioned on a stable, heat-resistant surface near an electrical outlet. Gather all your ingredients so they are ready for quick assembly.
Remove the ribs from the refrigerator about 20 minutes before you start to take the chill off, which helps the meat cook more evenly.
Check that your measuring tools are clean and that you have enough space to maneuver your hands comfortably inside the slow cooker basin without making a mess on the countertop.
Ingredients at a glance (4)
- 2 lb country-style pork ribs
- 1/2 cup apple butter
- 1 tsp garlic powder
- 1 cup barbecue sauce
Instructions
Preparation and assembly
- Assemble the ingredientsPlace the raw country-style pork ribs into the bottom of a clean slow cooker basin. Arrange them in a single layer if possible to ensure even cooking throughout the process.Look for Ribs are placed in the slow cookerTip Pat the ribs dry with paper towels before adding them to the slow cooker to help the sauce adhere better to the surface of the meat.
The ribs should be placed in a single layer at the base of the slow cooker. Ensure the ribs are dry and that the slow cooker is plugged in and ready to be set to the low heat setting. Everything should look organized and ready for the addition of the sauce components.
Seasoning the meat
- Add the seasoningsSpoon the apple butter directly over the pork ribs. Evenly sprinkle the garlic powder over the surface of the meat and apple butter, then pour the barbecue sauce over the top to coat everything thoroughly.Look for Ingredients are added to the slow cookerTip Use a silicone spatula to scrape all the apple butter from the spoon to ensure the full amount is incorporated into the sauce.
The apple butter, garlic powder, and barbecue sauce should be layered evenly over the ribs. The aroma of the garlic and barbecue sauce should be apparent. Check that the ribs are mostly covered by the sauce mixture to ensure they stay moist throughout the long cooking duration.
Cooking to tenderness
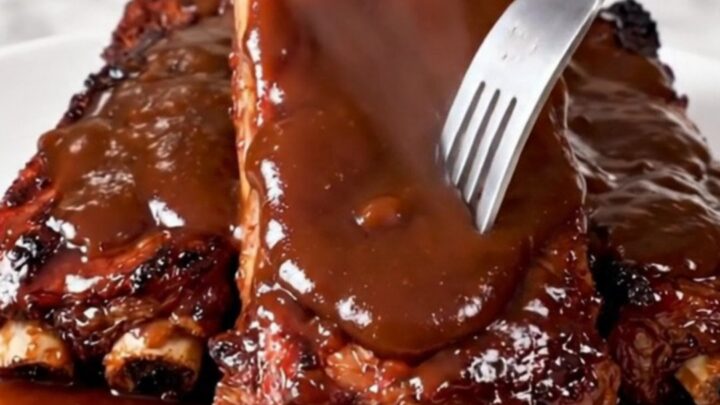
- Slow cook and serveCover the slow cooker and cook on low for 7 to 8 hours. Once the ribs reach an internal temperature of 145°F (63°C), remove them carefully and let them rest for at least 5 minutes before serving.Look for Ribs are fork-tender and glossySafe temperature 145°F (63°C) internal temperature (steaks, chops and roasts)Tip The ribs are done when they are fork-tender and pull apart easily with gentle pressure from a fork.
The ribs should appear dark, glossy, and coated in a thick, reduced sauce. They should smell savory and slightly sweet. Test with a fork to ensure the meat is tender and pulling away from the bone or center. Verify the internal temperature of 145°F (63°C) before serving.
Common mistakes
A common mistake is overcrowding the slow cooker, which prevents the heat from circulating evenly and can lead to unevenly cooked meat. Avoid the temptation to stir the ribs frequently, as this can break apart the meat before it is fully tender.
Additionally, ensure you do not use too much sauce, as the moisture released by the pork during the slow cooking process will thin out the glaze. Finally, do not skip the resting period, as this is crucial for the final texture of the pork.
How to tell it’s done
The ribs are considered done when they are fork-tender, meaning a fork inserted into the thickest part of the meat meets no resistance and the meat pulls apart easily. Using a reliable meat thermometer, ensure the thickest portion of the pork reaches an internal temperature of at least 145°F (63°C).
Once this temperature is reached, remove the ribs from the heat and allow them to rest for at least 5 minutes to let the juices redistribute, ensuring every bite remains moist and flavorful.
- Steaks, chops and roasts: 145°F (63°C) in the thickest part, then a 3-minute rest
Up next · Part 3 of 3
2 variations · storage & make-ahead · 3 answers · printable card
Tips, FAQ & printable recipe (Part 3)← Back to the ingredients (Part 1)