Dinner · Part 2 of 3: Instructions
Slow Cooker Apple and Sweet Onion Country-Style Ribs Step-by-step instructions
- Prep
- Cook
- Total
- Serves
- 4
Before you start
Before beginning, ensure your slow cooker is positioned on a level, heat-resistant surface away from any edges. Wash and dry the apples thoroughly before slicing them. Peel and slice the sweet onion into uniform pieces to ensure they cook at the same rate.
Measure the apple juice carefully and have your gravy packet ready to open. Having all ingredients prepped and near the cooker makes the assembly process smooth and efficient.
Ingredients at a glance (5)
- 2 lbs country-style pork ribs
- 2 apples, sliced
- 1 sweet onion, sliced
- 1 packet pork gravy mix
- 1 cup apple juice
Instructions
Initial Assembly
- Prepare the Slow Cooker BasePlace the raw country-style pork ribs in the bottom of the slow cooker insert, arranging them in a single layer to ensure even cooking throughout the process.Look for Ribs are settled at the base of the insert.Tip Ensure the slow cooker is clean and dry before starting.
The ribs are placed in the bottom of the slow cooker, forming a solid foundation. Ensure the meat is not overlapping excessively to allow for consistent heat penetration. The surface of the meat should be clean and ready for the seasoning and aromatics. At this stage, everything is organized and ready for the liquid and flavorful additions that will build the base of the final sauce.
Seasoning and Layering
- Add Aromatics and SeasoningScatter the sliced apples and sweet onions evenly over the top of the ribs. Sprinkle the packet of pork gravy mix over the layers, then pour the apple juice over everything.Look for Ingredients are layered and moistened.Tip Distribute the gravy mix evenly to avoid clumping.
The apples and onions are spread evenly over the ribs, and the gravy mix is distributed across the top. The apple juice is poured over the ingredients, creating the foundation for the braising liquid.
Everything should look well-distributed, with no dry spots from the gravy powder. The slow cooker is now ready to be covered, ensuring a tight seal to keep the moisture and heat inside during the long cooking duration.
Slow Cooking
- Slow Cook and ServeCover and cook on low for 8 hours. Once finished, ensure the internal temperature of the pork reaches 145°F (63°C). Let the meat rest for 5 minutes before serving.Look for Meat is tender and pulls apart easily with a fork.Safe temperature 145°F (63°C) internal temperature (steaks, chops and roasts)Tip Check the temperature at the thickest part of the meat.
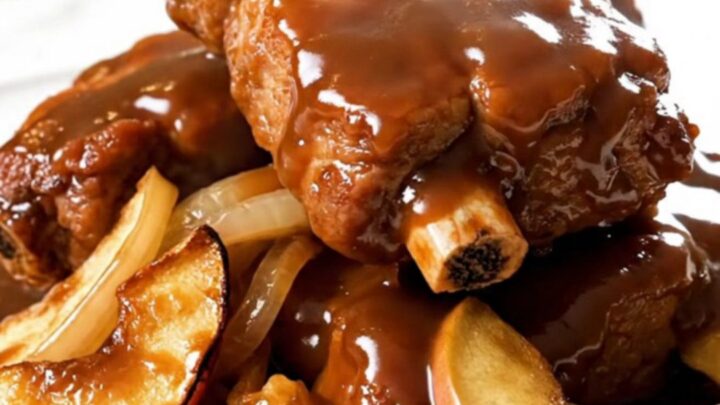
After the long cooking cycle, the kitchen will be filled with a savory aroma. The meat should be tender, and the apples and onions should be soft. The liquid in the bottom of the cooker will have transformed into a rich, flavorful gravy. Use a thermometer to confirm the ribs have reached the safe temperature, then allow them to rest briefly before serving to ensure the juices redistribute throughout the meat.
Common mistakes
A common mistake is overcrowding the slow cooker, which can prevent even heat distribution and lead to unevenly cooked meat. Ensure the ribs are arranged in a single layer.
Another error is checking the progress too frequently; every time the lid is lifted, heat and moisture escape, significantly increasing the total cooking time. Trust the slow cooker process and avoid opening the lid until the recommended cooking time is nearly complete to maintain the necessary environment.
How to tell it’s done
The pork ribs are fully cooked when they reach an internal temperature of 145°F (63°C). Visually, the meat should be very tender, showing signs of pulling away from the bone or easily flaking apart when pressed with a fork.
The sauce will have thickened slightly, coating the ribs in a glossy, savory glaze. Always verify the temperature using a digital probe thermometer inserted into the thickest part of the meat to ensure it is safe and cooked to your preference.
- Steaks, chops and roasts: 145°F (63°C) in the thickest part, then a 3-minute rest
Up next · Part 3 of 3
2 variations · storage & make-ahead · 3 answers · printable card
Tips, FAQ & printable recipe (Part 3)← Back to the ingredients (Part 1)