Desserts · Part 2 of 3: Instructions
Slow Cooker Apple and Prune Compote Step-by-step instructions
- Prep
- Cook
- Total
- Serves
- 4
Before you start
Before beginning, ensure the slow cooker is clean and placed on a stable, heat-resistant surface. Have all ingredients measured and ready to go. Peeling the apples thoroughly is essential for a smooth texture, as apple skins can become tough and stringy during the slow cooking process.
Use a sharp chef knife to ensure clean, consistent cuts for both the apples and the prunes, which helps in achieving an even cook across the entire batch.
Ingredients at a glance (5)
- 4 large apples, peeled and diced
- 1 cup Agen prunes, halved
- 1/4 cup brown sugar
- 1 tsp ground cinnamon
- 1/2 cup water
Instructions
Preparation and layering
- Prepare the fruitPeel the apples and cut them into uniform, bite-sized pieces to ensure even cooking. Halve the prunes, removing any pits if necessary. Place the diced apples and halved prunes into the bottom of the slow cooker.Look for Apples are peeled and cut into consistent pieces.Tip Keeping the pieces uniform helps the fruit cook at the same rate.
At this stage, the slow cooker should be filled with uniform pieces of peeled apple and halved prunes. The ingredients are layered to ensure that the sugar and cinnamon, when added, will distribute evenly throughout the fruit as the steam begins to circulate during the cooking process. Everything should look clean, organized, and ready for the heat.
Seasoning and moisture
- Season and combineIn a small ramekin, mix the brown sugar and ground cinnamon. Sprinkle this mixture evenly over the fruit in the slow cooker. Pour the water over the top to provide enough moisture for the stewing process.Look for Sugar and cinnamon are evenly distributed over the fruit.Tip Ensure the water is poured around the edges to help distribute the sugar.
The fruit is now topped with the cinnamon and sugar mixture, and the water has been added. The ingredients should look well-distributed, with the sugar beginning to settle slightly into the crevices between the fruit pieces. The slow cooker is now ready to be covered and started, ensuring a controlled environment for the stewing process to begin.
Stewing and reduction
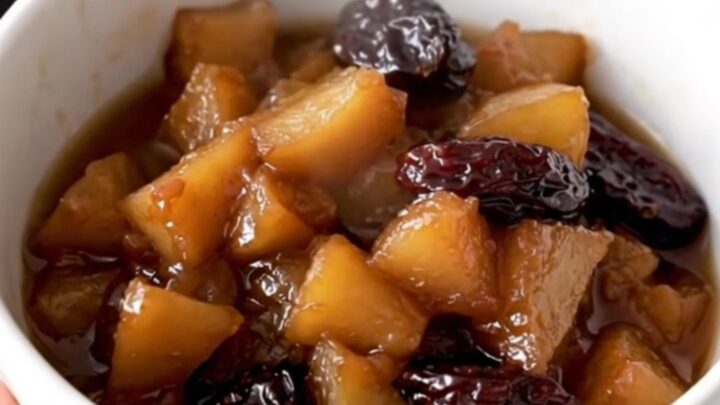
- Slow cook and serveCover the slow cooker and cook on low for 3 hours, or until the apples are very tender and the liquid has reduced into a glossy syrup. Gently stir the compote before serving warm in small bowls.Look for Apples are soft and the liquid appears as a thick, glossy syrup.Tip Allow the compote to rest for a few minutes to let the flavors meld.
After three hours, the apples are soft, and the prunes have plumped up. The mixture should smell fragrant and sweet, with the cinnamon clearly detectable.
The liquid at the bottom of the slow cooker should have transformed into a thick, glossy syrup that binds the fruit together. The compote is ready to be served warm, with a soft, jam-like texture throughout.
Common mistakes
A common mistake is cutting the apples into uneven or overly large chunks, which leads to some pieces being mushy while others remain hard. Another frequent error is using too much water, which results in a thin, watery liquid rather than a rich, concentrated syrup.
Finally, do not rush the cooking time; the low, slow heat is essential for the transformation of the fruit, and opening the lid too often will cause heat loss and extend the total cooking time significantly.
How to tell it’s done
The compote is finished when the apples are fork-tender and have lost their raw, crisp texture. The liquid should be thickened into a glossy, syrup-like consistency that coats the back of a spoon.
Because this recipe does not involve proteins, there is no internal temperature to monitor; the visual cues of soft fruit and reduced, syrupy liquid are the best indicators that the process is complete and the flavors are fully developed.
Up next · Part 3 of 3
2 variations · storage & make-ahead · 3 answers · printable card
Tips, FAQ & printable recipe (Part 3)← Back to the ingredients (Part 1)