Dinner · Part 2 of 3: Instructions
Slow Cooker Amish Pineapple Chicken Step-by-step instructions
- Prep
- Cook
- Total
- Serves
- 4
Before you start
Before beginning, ensure that the slow cooker is clean and positioned on a stable, heat-resistant surface away from any water sources. Have the chicken breasts ready and fully thawed if they were previously frozen.
Ensure the serving plate is clean and placed near the slow cooker for easy transfer once the cooking process is complete.
Gather the tongs and a meat thermometer, as these tools are essential for checking the internal temperature and safely removing the hot chicken from the vessel.
Ingredients at a glance (2)
- 2 lb boneless skinless chicken breasts
- 16 oz crushed pineapple
Instructions
Initial Preparation
- Prepare the ChickenPlace the chicken breasts into the slow cooker. Ensure they are arranged in an even layer to promote consistent cooking throughout the process. Avoid overcrowding the vessel to maintain a steady internal temperature during the long cooking time.Look for Chicken is arranged in a single layer at the bottom of the slow cooker.Tip Pat the chicken dry before placing it in the slow cooker to ensure better sauce adherence.
The chicken is evenly distributed in the base of the slow cooker, ready to receive the pineapple. There should be no signs of raw meat debris on the exterior of the cooker or the workspace, ensuring a clean and safe environment for the next phase of the cooking process.
Braising Phase
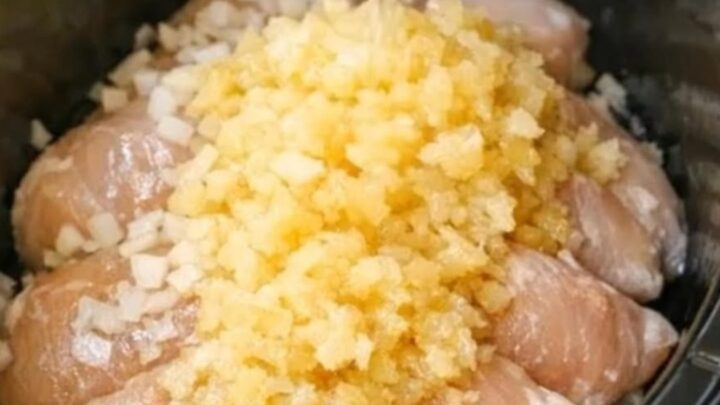
- Add Pineapple SaucePour the crushed pineapple, including all the juices, directly over the chicken breasts in the slow cooker. The liquid from the pineapple acts as a braising medium, keeping the meat moist and adding a natural sweetness that penetrates deep into the fibers of the chicken as it cooks slowly.Look for The pineapple covers the top of the chicken pieces completely.Tip Do not drain the pineapple juice, as it is essential for the final sauce consistency.
The pineapple is evenly distributed over the chicken, and the lid is secured tightly. At this point, the slow cooker should be set to the low heat setting. Verify that the unit is plugged in and the indicator light is on, confirming that the cooking cycle has successfully begun.
Final Cooking and Serving
- Cook and ServeCover the slow cooker and cook on low for four hours. Once the time is up, check that the chicken reaches an internal temperature of 165°F (74°C). Carefully remove the chicken using tongs and place it on a serving plate. Let the meat rest for at least 5 minutes before cutting into it with a fork to serve.Look for Chicken is opaque throughout and pulls apart easily with a fork.Safe temperature 165°F (74°C) internal temperature (poultry)Tip Use a meat thermometer to ensure the chicken is cooked safely.
The chicken has reached the target temperature of 165°F (74°C) and is fork-tender. The sauce should be glossy and slightly thickened. Ensure the chicken is handled carefully with tongs to prevent breaking the pieces apart before they reach the serving plate for the final rest.
Common mistakes
A common mistake is opening the slow cooker lid too frequently, which allows heat to escape and increases the total cooking time significantly. Avoid the temptation to check the meat every few minutes, as each lift of the lid resets the internal temperature recovery period.
Another error is overcooking the chicken, which can lead to a dry, stringy texture despite the presence of the pineapple sauce. Stick to the suggested timeframe for the best results.
How to tell it’s done
The chicken is considered done when it is completely opaque through the center and reaches a minimum internal temperature of 165°F (74°C). Using a food thermometer is the most reliable way to verify this, as visual cues like color can sometimes be deceiving.
The meat should be tender enough to pull apart easily with a fork, indicating that the fibers have softened sufficiently during the slow cooking process.
- Poultry: 165°F (74°C) in the thickest part
Up next · Part 3 of 3
2 variations · storage & make-ahead · 3 answers · printable card
Tips, FAQ & printable recipe (Part 3)← Back to the ingredients (Part 1)