Dinner · Part 2 of 3: Instructions
Slow-Cooked Jerk Turkey Wings Step-by-step instructions
- Prep
- Cook
- Total
- Serves
- 4
Before you start
Before beginning, ensure the turkey wings are completely thawed if previously frozen. Pat them dry with paper towels to remove excess surface moisture, which helps the seasoning adhere better.
Prepare the scallions and red bell peppers by chopping and dicing them finely to ensure they distribute evenly throughout the slow cooker. Have the jerk seasoning, lime juice, and soy sauce measured and ready to go for a seamless assembly process in the kitchen.
Ingredients at a glance (6)
- 2 lb turkey wings, cut into pieces
- 3 stalks scallions, chopped
- 1/2 cup red bell pepper, diced
- 3 tbsp jerk seasoning
- 1/4 cup lime juice
- 1/4 cup soy sauce
Instructions
Preparation and assembly
- Assemble the ingredientsPlace the turkey wing pieces into the slow cooker, ensuring they are arranged in an even layer. Scatter the chopped scallions and diced red bell pepper over the top of the wings to distribute the aromatics evenly.Look for Wings are arranged in a single layerTip Ensure the wings fit comfortably in the base of the slow cooker for even cooking.
At this stage, the slow cooker is filled with raw turkey wings, vibrant red peppers, and fresh scallions. The ingredients should be layered carefully to ensure even exposure to the heat.
Check that all components are accounted for, as this is the only time to adjust the seasoning levels before the long, slow cooking process begins.
Slow braising
- Season and braiseSprinkle the jerk seasoning over the wings and vegetables. Pour the lime juice and soy sauce over the mixture. Cover the slow cooker and cook on low for 4 to 5 hours, or until the wings are tender and reach an internal temperature of 165°F (74°C).Look for Liquid is bubbling and sauce has thickenedSafe temperature 165°F (74°C) internal temperature (poultry)Tip Using a meat thermometer ensures the wings are fully cooked through.
During the middle of the cooking process, the kitchen will fill with the aromatic scent of jerk spices and lime. The wings should be simmering gently in the liquid. Check that the liquid is not boiling aggressively; if it seems too dry, a small splash of water or broth can be added, though this is rarely necessary.
Final resting
- Final rest and servingRemove the wings from the slow cooker and let them rest for at least 5 minutes before serving. This allows the juices to redistribute and ensures the meat remains succulent. Serve warm with the extra sauce from the cooker.Look for Meat is tender and pulls away from the boneSafe temperature 165°F (74°C) internal temperature (poultry)Tip Serve with rice or vegetables to soak up the flavorful braising liquid.
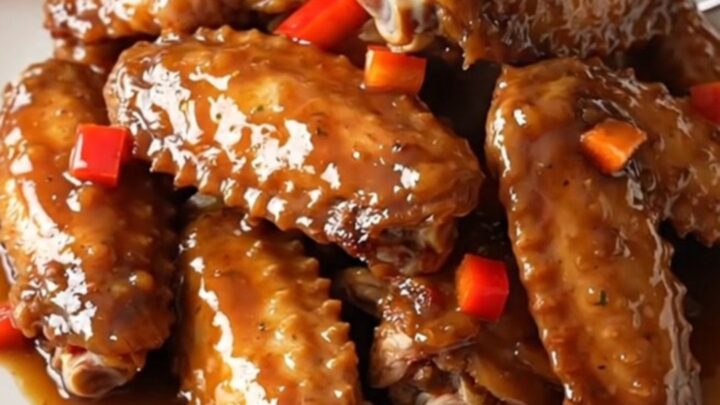
Once the wings have finished cooking, they will appear dark, glossy, and incredibly tender. The sauce should have reduced to a thicker consistency that clings to the skin. After resting for 5 minutes, the meat should be succulent and hold its structure, ready to be plated and served with the remaining braising liquid.
Common mistakes
A common mistake is overcrowding the slow cooker, which prevents even cooking and results in uneven textures. Another error is failing to ensure the wings are fully submerged or at least well-coated in the braising liquid, which can lead to dried-out edges.
Avoid lifting the lid frequently during the cooking process, as this releases heat and steam, significantly increasing the time required for the wings to reach the desired tenderness and safe temperature.
How to tell it’s done
The turkey wings are fully cooked when the meat is extremely tender and pulls away easily from the bone. The skin should be soft and translucent from the braising liquid.
Using a digital meat thermometer is the most reliable way to confirm doneness; insert it into the thickest part of the wing, avoiding the bone, to ensure it registers at least 165°F (74°C).
- Poultry: 165°F (74°C) in the thickest part
Up next · Part 3 of 3
2 variations · storage & make-ahead · 3 answers · printable card
Tips, FAQ & printable recipe (Part 3)← Back to the ingredients (Part 1)