Dinner · Part 2 of 3: Instructions
Slow-Cooked Beef Barbacoa Tacos with Pickled Red Onions Step-by-step instructions
- Prep
- Cook
- Total
- Serves
- 8
Before you start
Before starting, gather all ingredients and equipment. Remove the beef chuck roast from the refrigerator and let it sit at room temperature for up to 30 minutes. Pat it dry with paper towels to ensure a good sear. Preheat the oven to 300°F (150°C) if using an oven for the braise.
Prepare the adobo sauce by measuring all ingredients and having them ready for the blender. Warm the corn tortillas just before serving, and have the pickled red onions, cotija cheese, cilantro, and lime wedges ready to assemble the tacos.
Ingredients at a glance (15)
- 2 lb beef chuck roast
- 2 tbsp chipotle chiles in adobo sauce
- 4 cloves garlic, minced
- 1/4 cup fresh lime juice
- 2 tbsp apple cider vinegar
- 1 tsp ground cumin
- 1 tsp dried oregano
- 1 cup beef broth
- 1 tsp kosher salt
- 1/2 tsp black pepper
- 8 corn tortillas, warmed
- 1 cup pickled red onions
- 1/2 cup cotija cheese, crumbled
- 1/4 cup fresh cilantro leaves
- 1 lime, cut into wedges
Instructions
Phase 1: Build the Flavor Base
- Make the Adobo SauceIn a blender, combine the chipotle chiles in adobo, garlic, lime juice, apple cider vinegar, ground cumin, dried oregano, and beef broth. Blend until smooth and smoky red. Season with salt and black pepper to taste.Look for The sauce is smooth, deep red, and fragrant with chipotle and spices.Tip For a spicier sauce, add an extra chipotle pepper. For less heat, remove the seeds from the chiles before blending.
- Sear the BeefPat the beef chuck roast dry with paper towels. Heat a Dutch oven over medium-high heat. Sear the beef on all sides until deeply browned, about 3-4 minutes per side. Transfer the beef to a plate.Look for The beef has a dark brown crust on all sides.Tip Do not crowd the pot; sear in batches if needed to ensure even browning.
The adobo sauce is smooth, deep red, and fragrant with smoked chipotle and warm spices. The beef has a dark, caramelized crust from searing. The pot smells of toasted spices and garlic. Before moving on, ensure the sauce is well blended and the beef is evenly browned on all sides.
Phase 2: Slow Cook to Perfection
- Slow-Cook the BeefReturn the seared beef to the Dutch oven. Pour the adobo sauce over the beef, turning to coat. Cover and cook on low heat (about 300°F / 150°C) for 3.5 hours, or until the beef is fork-tender and falls apart easily. Let it rest for 3 minutes before slicing.Look for The beef is so tender that a fork pierces it with no resistance.Safe temperature 145°F (63°C) internal temperature (steaks, chops and roasts)Tip If using an oven, preheat to 300°F (150°C). For a slow cooker, cook on low for 8 hours.
- Shred the BeefRemove the beef from the cooking liquid and let it rest for 5 minutes. Using two forks, shred the beef into bite-sized pieces. Return the shredded beef to the pot with the braising juices and stir to coat. Let it soak up the sauce.Look for The beef shreds easily and is glistening with the adobo sauce.Safe temperature 145°F (63°C) internal temperature (steaks, chops and roasts)Tip For extra flavor, simmer the shredded beef in the sauce for 10 minutes before serving.
The beef is fork-tender and falls apart easily. The braising liquid has reduced slightly and is rich, glossy, and deeply flavored. The kitchen smells smoky and savory. Before shredding, let the beef rest for a few minutes so it's easier to handle and retains its juices.
Phase 3: Assemble and Serve
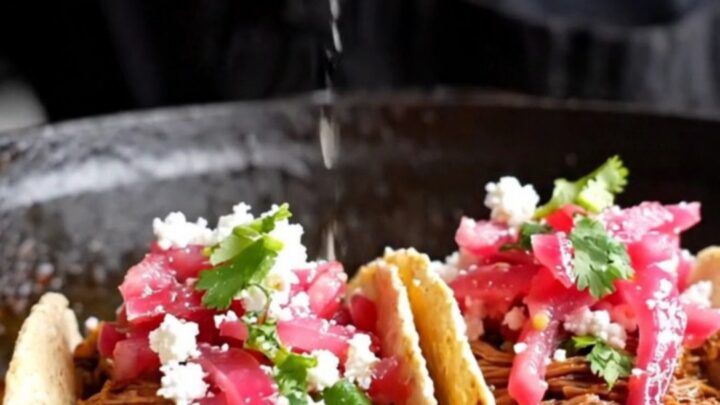
- Assemble the TacosWarm the corn tortillas in a dry skillet or over an open flame until pliable and lightly charred. Pile the shredded beef onto each tortilla. Top with pickled red onions, crumbled cotija cheese, and fresh cilantro. Serve with lime wedges on the side.Look for The tacos are loaded with juicy beef, bright pink onions, and crumbled cheese.Tip Warm tortillas in a stack wrapped in foil in the oven for 10 minutes if making many.
The corn tortillas are warm and pliable, with a light char if desired. The tacos are piled high with juicy shredded beef, bright pink pickled onions, crumbled cotija, and fresh cilantro. The lime wedges are ready for squeezing. The tacos look vibrant and appetizing, with a mix of textures and colors.
Common mistakes
One common mistake is not searing the beef properly. Searing creates a deep, caramelized crust that adds flavor to the final dish. Make sure the pot is hot enough and don't move the beef too soon—let it develop a brown crust before flipping.
Another mistake is rushing the cooking process. If the beef isn't fork-tender after 3.5 hours, continue cooking in 30-minute increments until it is. Also, don't skip letting the beef rest after cooking—this allows the juices to redistribute, ensuring the meat stays moist.
How to tell it’s done
The beef is done when it is fork-tender and easily shreds with two forks. Insert a fork into the thickest part of the roast—it should pierce with no resistance and the meat should start to pull apart.
The internal temperature of the beef should read at least 145°F (63°C) on an instant-read thermometer, but for the best texture, it should be cooked until it reaches 200-205°F (93-96°C) internally, which ensures the collagen has fully broken down.
The meat should be moist and juicy, not dry or stringy.
- Steaks, chops and roasts: 145°F (63°C) in the thickest part, then a 3-minute rest
Up next · Part 3 of 3
4 variations · storage & make-ahead · 5 answers · printable card
Tips, FAQ & printable recipe (Part 3)← Back to the ingredients (Part 1)