Dinner · Part 2 of 3: Instructions
Slow-Cook Glazed Turkey Roast with Glistening Honey-Dijon Crust Step-by-step instructions
- Prep
- Cook
- Total
- Serves
- 6
Before you start
Before you begin cooking, gather all your ingredients and equipment to ensure a smooth process. Pat the turkey roast completely dry with paper towels; removing surface moisture helps the herb mixture adhere better. Measure out your honey, Dijon mustard, and dried herbs into small bowls.
Lightly grease your slow cooker insert to prevent sticking, and prepare a baking pan by lining it with aluminum foil for easy cleanup. Having everything organized beforehand makes the transition from slow cooker to oven quick and seamless.
Ingredients at a glance (4)
- 3 lb turkey roast
- 1 tbsp dried herbs
- 1/3 cup honey
- 3 tbsp Dijon mustard
Instructions
Seasoning and Slow Cooking
- Season the turkey roastPat the turkey roast dry with paper towels to ensure the seasonings adhere properly. Rub the entire surface of the turkey roast with the dried herbs, pressing the herbs gently into the meat so they stick to all sides of the roast.Look for The roast should be evenly coated with herbs on all sides.Tip Make sure the roast is completely dry before applying the herbs to help them stick better.
- Slow-cook the roastPlace the seasoned turkey roast gently into the slow cooker. Cover with the lid and cook on low heat for 5 to 6 hours, allowing the turkey to cook in its own natural juices until it is tender and almost fully cooked.Look for The turkey should be tender and fragrant, with savory juices collecting in the pot.Tip Always cook turkey on low heat in a slow cooker to keep the breast meat from drying out.
At the end of this phase, the turkey roast will be incredibly tender and fragrant, having absorbed the herbal aromas of the dried herbs. The kitchen will be filled with a rich, savory aroma. The turkey will look pale but fully plumped, and a generous amount of savory, herb-speckled pan juices will have collected at the bottom of the slow cooker insert.
Glazing and Caramelizing
- Prepare the honey-Dijon glazeIn a small bowl, whisk together the honey and Dijon mustard until smooth and completely combined. Transfer the slow-cooked turkey roast carefully into a foil-lined baking pan, reserving the savory pan juices left behind in the slow cooker insert.Look for The glaze should be thick, smooth, and uniform in color.Tip Use a sturdy pair of tongs to transfer the hot roast without breaking it apart.
- Glaze and caramelize the roastPreheat the oven to 400°F (200°C). Generously brush the top and sides of the turkey roast with the honey-Dijon glaze. Bake the roast for 15 to 20 minutes, basting with the bubbling pan juices and remaining glaze every 5 minutes, until the crust is deep golden, sticky, and caramelized, and the internal temperature reaches 165°F (74°C).Look for The crust should be glistening, deep golden brown, and bubbling.Safe temperature 165°F (74°C) internal temperature (poultry)Tip Watch the roast closely during the last few minutes of baking to prevent the honey from burning.
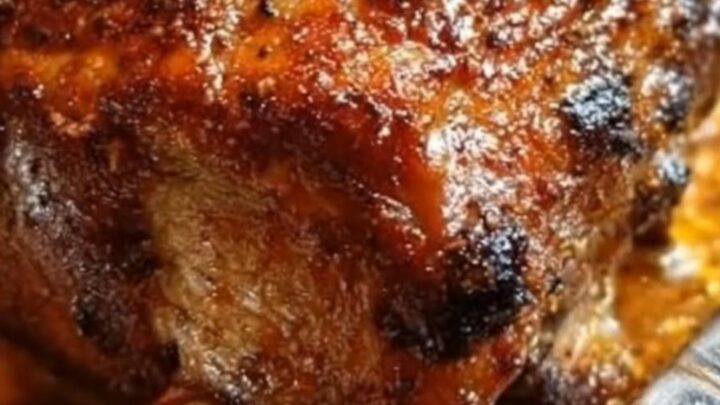
By the end of this phase, the turkey roast will have transformed into a stunning golden-brown masterpiece. The honey-Dijon glaze will be bubbling vigorously, forming a sticky, caramelized, and glistening crust over the herb-seasoned surface.
The pan juices in the foil pan will be simmering and slightly thickened, ready to be used as a rich pouring sauce.
Resting and Carving
- Rest and carve the roastRemove the caramelized turkey roast from the oven and transfer it to a cutting board or a clean foil pan. Pour the savory pan drippings around the roast. Let the turkey rest for 10 to 15 minutes to allow the juices to redistribute throughout the meat, then carefully slice into thick, juicy rounds using a sharp carving knife.Look for Steam should rise as you carve, revealing juicy, tender meat underneath the golden crust.Tip Never skip the resting period, or all the delicious juices will run out onto the board.
After resting, the turkey roast will be ready to slice. As you carve into the roast with a sharp knife, you will feel the slight resistance of the caramelized crust followed by the effortless glide through the tender meat. Rich, clear juices will pool on the cutting board, and steam will rise from each thick, juicy slice of herb-crusted turkey.
Common mistakes
One common mistake is cooking the turkey roast on the high setting in the slow cooker. High heat can cause the lean breast meat to seize and become tough, defeating the purpose of slow cooking. Another error is skipping the basting process during the final oven bake.
Basting with the pan drippings and remaining glaze is what builds that beautiful, multi-layered caramelized crust. Finally, do not carve the turkey immediately after removing it from the oven, as the juices will escape, leaving the meat dry.
How to tell it’s done
To guarantee your turkey roast is perfectly cooked and safe to eat, use a digital meat thermometer inserted into the thickest part of the roast. The turkey is fully cooked when the internal temperature reaches 165°F (74°C).
The meat should be tender and slice easily, and the juices should run clear. The exterior crust should be deep golden brown, sticky to the touch, and glistening with caramelized honey. Avoid overcooking past 165°F (74°C) to keep the breast meat exceptionally juicy.
- Poultry: 165°F (74°C) in the thickest part
Up next · Part 3 of 3
2 variations · storage & make-ahead · 4 answers · printable card
Tips, FAQ & printable recipe (Part 3)← Back to the ingredients (Part 1)