Dinner · Part 2 of 3: Instructions
Skillet Zucchini Lasagna Rolls with Garlic Marinara Step-by-step instructions
- Prep
- Cook
- Total
- Serves
- 4
Before you start
Before starting, gather all ingredients and equipment. Slice the zucchini into thin ribbons and set aside. Mince the garlic and basil, and grate the mozzarella and pecorino.
In a small bowl, mix the ricotta with the minced basil and half of the garlic. Preheat the oven to 375°F (190°C). Have the marinara sauce measured and ready. The prep takes about 20 minutes, and the baking time is 20-25 minutes, so plan accordingly.
Ingredients at a glance (7)
- 3 medium zucchini, sliced lengthwise into thin ribbons
- 1 1/2 cups whole milk ricotta
- 1/4 cup fresh basil leaves, minced
- 4 cloves garlic, minced
- 2 cups garlic marinara sauce
- 8 oz whole milk mozzarella, shredded
- 1/2 cup grated pecorino romano
Instructions
Prep and Roll
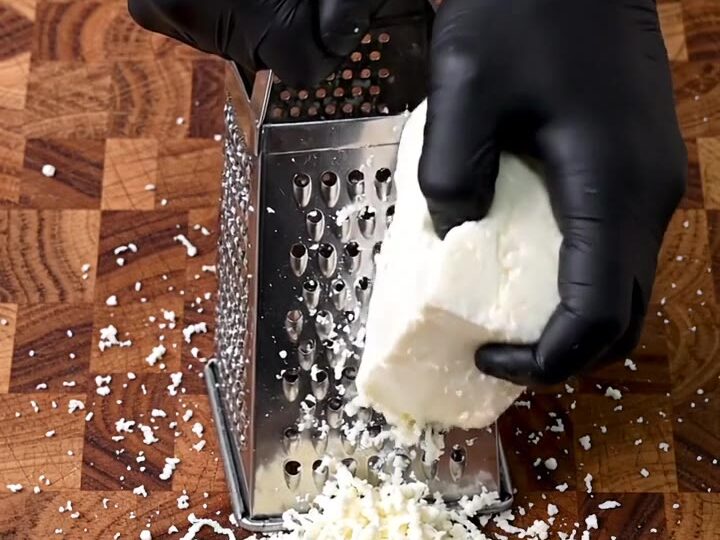
- Prep the Zucchini and FillingsSlice the zucchini lengthwise into thin ribbons, about 1/8-inch thick. Mince the garlic and basil. Grate the mozzarella on the large holes of a box grater and set aside. In a small bowl, stir together the ricotta, minced basil, and half of the minced garlic.Look for Zucchini ribbons are pliable and even; ricotta mixture is smooth and fragrant with basil.Tip Use a mandoline for perfectly even ribbons, or a vegetable peeler for thinner strips.
- Spread Ricotta on RibbonsLay the zucchini ribbons flat on a work surface. Spread a thin layer of the ricotta mixture over each ribbon, leaving a small border at the edges. The filling should be even but not overly thick, so the rolls hold together.Look for Each ribbon is lightly coated with ricotta, not dripping.Tip Use an offset spatula or the back of a spoon for even spreading.
- Roll the Zucchini SpiralsStarting at one short end, roll each zucchini ribbon tightly into a spiral. Place the rolls seam-side down as you go. You should have about 10-12 rolls depending on the width of the ribbons.Look for Rolls are tight and hold their shape without unrolling.Tip If a ribbon is too long, trim it to about 6 inches for easier rolling.
By the end of this phase, you should have a pile of zucchini ribbons, a bowl of herbed ricotta, and a plate of tight spirals. The ribbons should be pliable and even, and the rolls should hold together without unrolling. The ricotta mixture should be smooth and fragrant with basil and garlic. If the rolls are too loose, press them gently to compact them.
Assemble and Bake
- Heat the Skillet with MarinaraPlace a cast iron skillet over medium heat. Add the remaining minced garlic and the marinara sauce. Stir and bring to a gentle simmer. Let it bubble for 1-2 minutes until fragrant.Look for The sauce is bubbling gently and smells strongly of garlic.Tip Use a skillet that holds the rolls snugly in a single layer.
- Nestle the Rolls in SauceCarefully place the zucchini rolls into the simmering marinara, seam-side down, in a single layer. Spoon a little sauce over the tops to coat them lightly. The rolls should be nestled close together but not overcrowded.Look for Rolls are arranged neatly, partially submerged in sauce.Tip Use tongs to avoid breaking the delicate rolls.
- Top with MozzarellaSprinkle the shredded mozzarella evenly over the rolls, covering the tops completely. The cheese will melt and bubble as it bakes, creating a golden crust.Look for All rolls are covered with a generous layer of shredded mozzarella.Tip For extra browning, use a mix of mozzarella and a little pecorino on top.
- Bake Until Bubbling and GoldenTransfer the skillet to a preheated 375°F (190°C) oven. Bake for 20-25 minutes, until the sauce is bubbling around the edges and the cheese is melted and golden in spots. The internal temperature of the dish should reach 165°F (74°C) if checked with a thermometer.Look for Cheese is melted, bubbly, and lightly browned; sauce is simmering at the edges.Tip If the cheese browns too quickly, tent loosely with foil for the last 5 minutes.
The skillet should be filled with rolls nestled in bubbling marinara, topped with a generous layer of shredded mozzarella. As it bakes, the sauce will bubble around the edges and the cheese will melt into a golden, blistered crust.
The kitchen will smell of garlic and tomato. Check that the cheese is evenly melted and the sauce is simmering before removing from the oven.
Finish and Serve
- Finish with Fresh Basil and PecorinoRemove the skillet from the oven and let it rest for 2-3 minutes. Scatter fresh basil ribbons over the top, then sprinkle with grated pecorino romano. Serve hot directly from the skillet, pulling up a portion to show the cheese stretch.Look for Basil is bright green, pecorino adds a salty kick, and cheese pulls in long strands.Tip Let the dish rest briefly so the rolls set and are easier to serve.
After scattering fresh basil and pecorino over the hot skillet, the dish is ready. The basil should be bright green and fragrant, the pecorino adds a salty spark, and the cheese should pull into long, stretchy strands when lifted with a spoon. Serve immediately, scooping up a portion with some sauce and melted cheese for the perfect bite.
Common mistakes
One common mistake is slicing the zucchini too thick, which makes it hard to roll and leaves it undercooked. Aim for ribbons about 1/8-inch thick. Another pitfall is overfilling the ribbons with ricotta, causing the rolls to burst open during baking.
Use a thin, even layer. Also, avoid overcrowding the skillet—if the rolls are too tight, they won’t cook evenly, and if they’re too loose, they may unroll. Finally, don’t skip the resting time after baking; it helps the rolls hold their shape.
How to tell it’s done
The rolls are done when the sauce is bubbling around the edges and the cheese is melted and golden in spots. The internal temperature should reach 165°F (74°C) if measured with an instant-read thermometer.
The zucchini should be tender when pierced with a fork, but not mushy. Let the skillet rest for 2-3 minutes before serving to allow the rolls to set slightly and the cheese to firm up just enough for clean portions.
Up next · Part 3 of 3
4 variations · storage & make-ahead · 5 answers · printable card
Tips, FAQ & printable recipe (Part 3)← Back to the ingredients (Part 1)