Dinner · Part 2 of 3: Instructions
Sizzling Steak Fajita Quesadillas with the Ultimate Cheese Pull Step-by-step instructions
- Prep
- Cook
- Total
- Serves
- 4
Before you start
Get everything within arm's reach before the skillet goes on the heat, because every stage moves fast. Pat the flank steak dry and slice it thin against the grain — thin slices sear in minutes and never overwhelm the tortilla. Shred both cheeses and toss them together in one bowl so the melt is even.
Slice the peppers and onion into even strips. Soften the butter and set it out with the tortilla, spatula and cutting board. Chill the sour cream, guacamole and salsa roja until serving. A hot pan and a prepared board are the difference between a crisp quesadilla and a steamed one.
Ingredients at a glance (10)
- 8 oz flank steak, thinly sliced against the grain
- 1 cup sliced red and green bell peppers
- 1/2 yellow onion, thinly sliced
- 1 tbsp chipotle-lime seasoning
- 1 1/2 cups shredded cheddar and Oaxaca cheese
- 10 inch flour tortilla
- 1 tbsp unsalted butter, softened, for the tortilla
- Sour cream, for serving
- Guacamole, for serving
- Salsa roja, for serving
Instructions
Sear and Char
- Slice the steak thinPat the flank steak dry with paper towels, then slice it as thinly as you can against the grain, about 1/4 inch thick. Thin strips sear fast, stay juicy and tuck neatly into the quesadilla without tearing the tortilla. Keep the slices in one even pile so they cook at the same rate.Look for Uniform ribbons with no thick ends; the grain runs visibly lengthwise down each slice.Tip Freeze the steak 15 minutes first — firmer meat slices thinner with less effort.
- Sear the steak hot and fastHeat a cast-iron skillet over high heat until it just begins to smoke. Add the steak in a single layer and sear, stirring once or twice, for 2 to 3 minutes, until browned outside and cooked to 145°F (63°C) inside. Transfer the steak to a plate and let it rest at least 3 minutes before layering.Look for Deep brown crust on the edges, gray-pink throughout, juices pooling on the plate.Safe temperature 145°F (63°C) internal temperature (steaks, chops and roasts)Tip Crowding the pan steams the meat instead of searing it — work in two batches if needed.
- Char the peppers and onionIn the same hot skillet, add the sliced bell peppers and onion. Cook, tossing only every minute or so, for 4 to 5 minutes, until the edges blacken in spots and the slices soften but keep a little bite. Stir in the chipotle-lime seasoning during the last minute so it blooms in the pan drippings.Look for Blistered, smoky-edged vegetables with a spiced, slightly sweet smell from the toasted seasoning.Tip A pinch of salt here pulls out moisture so the filling never waters down the cheese.
At the end of this phase the steak sits on a plate, browned outside, cooked through to temperature, and rested with its juices settled. The peppers and onion are blistered at the edges, fragrant with toasted chipotle-lime seasoning, and glistening but not watery — if liquid pools in the pan, the heat was too low or the pan too crowded.
Taste a strip of pepper: it should be sweet and smoky with a slight bite left. Before moving on, the skillet should still be hot enough that a drop of water skitters, and the filling should look dry enough to sit on a tortilla without soaking it.
Build and Fold
- Butter the tortillaSpread the softened butter in a thin, even layer over one side of the 10-inch flour tortilla, all the way to the edge. This buttered face goes against the pan, frying the tortilla into a crisp, golden shell instead of a pale, floppy one. Set it buttered-side down on a board while you build.Look for A sheer, glossy coat of butter with no thick patches or dry corners.Tip Room-temperature butter spreads without tearing the tortilla; soften it while the steak sears.
- Build the cheese barrierScatter about half of the shredded cheddar and Oaxaca cheese over the unbuttered face of the tortilla, leaving a 1/2-inch border. This base layer melts against the tortilla and seals it, which keeps the filling locked in and stops the quesadilla from leaking as it crisps.Look for An even blanket of cheese reaching nearly to the rim on all sides.Tip Shred the cheese fresh from the block — it melts smoother than pre-shredded, which is coated to resist melting.
- Layer the filling and foldPile the rested steak over the cheese, then spoon the charred peppers and onion across the meat. Top with the remaining cheese, then fold the tortilla in half over the filling and press gently so it holds its half-moon shape. The top cheese layer bonds the filling to the tortilla as it melts.Look for A snug half-moon that closes without the filling spilling over the edges.Tip Keep the filling toward the fold line; an overfull quesadilla is hard to flip whole.
The folded quesadilla now sits as a tight half-moon on the board, buttered face out, ready for the pan. Check that the cheese reaches nearly to the rim on both faces of the fold — that border is what welds the edges shut.
The filling should be distributed evenly from fold line to open edge so every triangle gets meat and peppers. Press gently: the tortilla should hold its shape without the filling sliding. If any gap shows bare tortilla at the edge, nudge cheese into it now, because once it hits the pan there is no fixing a leak.
Crisp and Cut
- Crisp two minutes per sideHeat a lightly buttered skillet or griddle over medium heat, about 375°F (190°C) at the surface. Cook the folded quesadilla 2 minutes per side, pressing lightly with a spatula, until both faces are deep golden and the cheese inside is fully melted and stretchy. Flip once, confidently, with a wide spatula.Look for Deep golden blisters on both sides and a faint sizzle; the wedge feels rigid, not floppy.Tip Medium heat, not high — it gives the tortilla time to crisp while the cheese melts through.
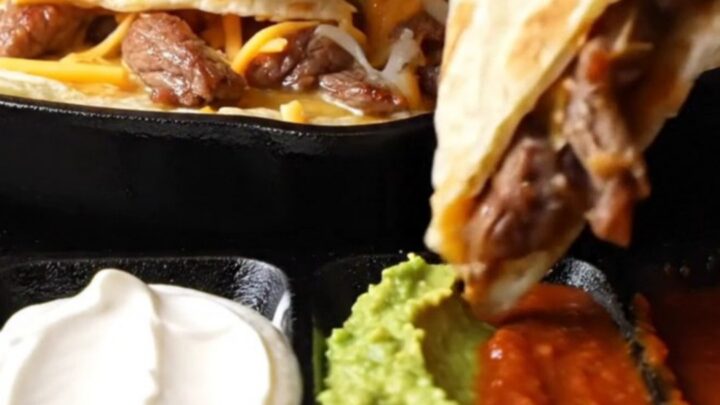
- Cut and serve with dipsSlide the quesadilla onto a cutting board and let it sit 1 minute so the cheese sets just enough to cut clean. Slice into 4 thick triangles with a pizza rocker, then serve right away with cool sour cream, guacamole and salsa roja on the side for dipping while the pull is still dramatic.Look for Long, glossy cheese strands as each triangle lifts away from the board.Tip Wipe the pizza rocker between cuts for sharp-edged triangles that show off the cross-section.
Both faces of the quesadilla are deep golden with blistered spots, the shell feels rigid rather than floppy, and the cheese inside is fully melted and glossy. When the first triangle lifts, the cheese should stretch in long strands before breaking. The steak inside reads moist and tender, never dried out. Serve immediately with the three cold dips — the pull is at its peak in the first two minutes after cutting, and the contrast between the crisp shell, the molten center and the cool sour cream is the whole point of the dish.
Common mistakes
The most common failure is crowding the pan with the steak, which drops the temperature and steams the meat gray instead of searing it brown — work in a single layer and in batches if necessary. Skipping the steak rest is the second: the juices end up soaking the tortilla from the inside.
Overfilling is the classic quesadilla error; a heaped tortilla cannot be flipped without spilling, and the extra filling releases steam that softens the crust. High heat burns the butter before the cheese melts through. And pre-shredded cheese, coated against clumping, melts into a grainy paste rather than a pull.
How to tell it’s done
The steak is done when it reaches 145°F (63°C) at its thickest point, reads uniformly pink-to-gray with a browned exterior, and has rested at least 3 minutes off the heat. The vegetables are done when blistered and softened but not collapsed. The quesadilla itself is done when both faces are deep golden and rigid to a light press, the cheese is fully melted and stretchy, and the interior steams when a triangle is pulled apart. If the shell colors before the cheese melts, lower the heat and give it another 30 seconds per side.
- Steaks, chops and roasts: 145°F (63°C) in the thickest part, then a 3-minute rest
Up next · Part 3 of 3
4 variations · storage & make-ahead · 5 answers · printable card
Tips, FAQ & printable recipe (Part 3)← Back to the ingredients (Part 1)