Dinner · Part 2 of 3: Instructions
Shrimp Dirty Rice Skillet Step-by-step instructions
- Prep
- Cook
- Total
- Serves
- 4
Before you start
Before turning on the stove, ensure all your ingredients are prepped and ready to go. Measure out the Cajun seasoning, dice the bell peppers, and finely chop the fresh chives. If using fresh shrimp, make sure they are fully peeled, deveined, and patted dry.
Having your pre-cooked rice measured and sitting at room temperature will also make the final tossing step seamless. Because this skillet recipe cooks quickly once the heat is on, having everything within arm's reach ensures nothing overcooks.
Ingredients at a glance (7)
- 1 lb large shrimp, peeled and deveined
- 1 tbsp Cajun seasoning
- 1/2 lb ground beef
- 1/2 lb ground pork sausage
- 1 cup diced green bell pepper
- 3 cups cooked white rice, cooled
- 2 tbsp finely diced chives, for serving
Instructions
Searing the Cajun Shrimp
- Season the ShrimpIn a medium bowl, toss the peeled and deveined shrimp with the Cajun seasoning until every piece is evenly coated. Let them rest in the refrigerator for a few minutes before cooking to allow the spices to adhere to the shrimp.Look for The shrimp should be uniformly coated in the reddish spice mixture.Tip Ensure the shrimp are thoroughly patted dry with paper towels before seasoning so the spices stick perfectly.
- Sear the ShrimpHeat a heavy skillet over medium-high heat. Add the seasoned shrimp in a single layer and sear for one to two minutes per side, until they are opaque and reach an internal temperature of 145°F (63°C). Transfer the cooked shrimp to a clean plate and set aside.Look for The shrimp should turn bright pink and develop a beautiful caramelized crust.Safe temperature 145°F (63°C) internal temperature (shellfish)Tip Do not crowd the skillet; cook the shrimp in batches if necessary to get a perfect sear.
The shrimp should be bright pink, opaque, and beautifully caramelized on both sides. You should hear a lively sizzle in the pan, and the aroma of toasted Cajun spices should fill the air.
Ensure the shrimp is immediately transferred to a clean plate once it reaches its safe temperature to prevent overcooking.
Browning the Savory Meats
- Brown the Meats and PeppersIn the same skillet, add the ground beef, ground pork sausage, and diced green bell pepper over medium heat. Cook, breaking up the meat with a wooden spoon, for six to eight minutes until the meats are completely browned and reach a safe internal temperature of 160°F (71°C).Look for The meats should be fully browned with no pink remaining, and the peppers should be tender.Safe temperature 160°F (71°C) internal temperature (ground meat)Tip Scrape up the browned bits left from the shrimp at the bottom of the pan to infuse the meat with extra flavor.
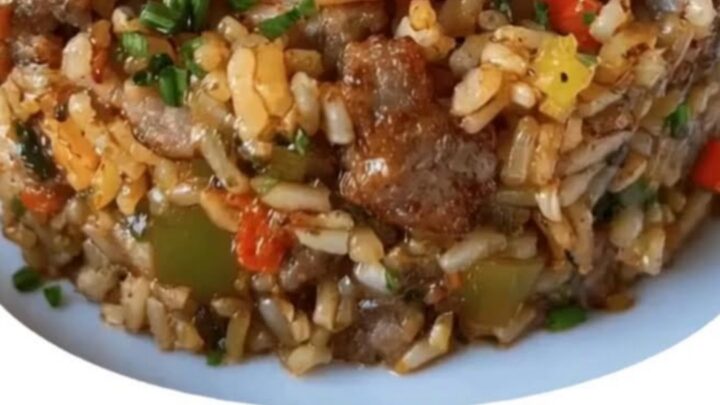
The ground beef and sausage should be completely browned with no remaining pink spots, and the diced bell peppers should be tender yet retain a slight bite. The skillet will have a rich, savory aroma of cooked meats and sweet peppers, with a layer of flavorful drippings at the bottom of the pan.
Tossing and Garnishing
- Toss the RiceReduce the heat to medium-low and add the cooled cooked white rice to the skillet with the browned meats and peppers. Toss everything together continuously for three to four minutes, ensuring the rice is heated through and has absorbed the savory pan juices.Look for The rice should be steaming hot and have an even, golden-brown dirty rice color.Tip Using cold, day-old rice prevents the grains from breaking and turning mushy during this step.
- Plate and GarnishDivide the steaming dirty rice among plates, or press it into a cylinder mold on a clean white plate for an elegant presentation. Top the rice with the seared Cajun shrimp and scatter the finely diced chives over the top before serving.Look for The dish should be beautifully arranged with vibrant green chives contrasting against the golden shrimp and savory rice.Tip Serve immediately while piping hot to enjoy the contrast of the juicy shrimp and fluffy rice.
The rice should be thoroughly incorporated, steaming hot, and evenly coated with the savory pan drippings and spices, taking on a beautiful golden-brown color. The dish is complete when the seared shrimp is placed on top and the fresh, bright green chives are scattered over the surface.
Common mistakes
One common mistake is crowding the skillet when searing the shrimp. If there are too many shrimp in the pan at once, they will release moisture and steam instead of searing, resulting in a rubbery texture and a lack of caramelization. Cook them in batches if necessary.
Another pitfall is using freshly cooked, hot rice, which turns the dish gummy. Always use cooled, dry rice. Finally, do not drain all the fat from the browned meats; leaving a small amount in the pan is essential for flavoring and lubricating the rice grains.
How to tell it’s done
Telling when this dish is fully cooked relies on checking the temperatures of the raw proteins. The shrimp is perfectly done when it is opaque and firm to the touch, reaching an internal temperature of 145°F (63°C).
The ground beef and sausage mixture must be cooked until thoroughly browned and no longer pink, reaching a safe internal temperature of 160°F (71°C). Once these temperatures are verified, the rice only needs to be tossed until it is heated through and steaming before serving.
- Shellfish: 145°F (63°C) in the thickest part
- Ground meat: 160°F (71°C) in the thickest part
Up next · Part 3 of 3
2 variations · storage & make-ahead · 3 answers · printable card
Tips, FAQ & printable recipe (Part 3)← Back to the ingredients (Part 1)