Dinner · Part 2 of 3: Instructions
Short Rib Grilled Cheese with Smoked Gouda and Pickled Onions Step-by-step instructions
- Prep
- Cook
- Total
- Serves
- 1
Before you start
Set everything on the counter before the griddle goes on, because this sandwich comes together fast. Pull the braised beef from the refrigerator and let it sit briefly while you shred; slightly warm meat pulls apart in long, clean strands. Give the pan jus a few seconds of warmth so it coats rather than clumps. Drain the pickled onions in a strainer and pat them dry. Soften the bone-marrow butter so it spreads without tearing the sourdough, and cut two thick slices of bread.
Ingredients at a glance (6)
- 6 oz red-wine braised beef short rib, boneless (store-bought or made ahead)
- 2 tbsp reduced braising pan jus from the short ribs
- 4 slices smoked Gouda
- 1/3 cup quick-pickled red onions, drained well
- 2 slices thick-cut sourdough bread, cut about 1 inch thick
- 2 tbsp bone-marrow butter, softened (or regular butter)
Instructions
Shred and season the filling
- Shred the braised short ribPull the boneless braised short rib apart with two forks, discarding any pockets of fat. Aim for loose, irregular strands rather than a fine shred, since larger fibers stay juicy and give the sandwich its hearty bite. Work while the beef is still slightly warm, when it pulls apart most easily.Look for The meat separates into glossy, tender strands with almost no resistance.Tip Chill the beef briefly if it feels too soft to shred cleanly; firm meat gives longer, more defined strands.
- Moisten the beef with pan jusFold the reduced braising pan jus through the shredded beef until every strand glistens. The jus is the flavor engine of the sandwich, so coat evenly rather than pooling it at the bottom. If the beef looks dry, add a teaspoon more jus; it should look moist and glossy but never leak from the bread.Look for Each strand shines and holds together in a loose mound without dripping.Tip Warm the jus for a few seconds first so it coats the beef instead of seizing into a jelly.
- Drain the pickled onionsTip the quick-pickled red onions into a small strainer and let the vinegar drain off for a minute, then pat them gently with a paper towel. Wet onions slide the filling apart and steam the bread from the inside, so this minute of draining keeps the melt intact and the crust crisp.Look for The onions look bright magenta and feel barely damp, not dripping.Tip Pat them twice if the pickling liquid is thin; drier onions stay crunchy against the melty cheese.
By the end of this phase the filling is built and waiting beside the stove. The shredded beef sits in a loose, glossy mound, every strand coated with reduced jus and shining without dripping. The pickled onions are drained, bright magenta, and barely damp to the touch.
Taste a strand of beef: it should be deeply savory with a whisper of wine. If it tastes flat, fold in a little more jus now, before assembly, because seasoning the filling directly is far more effective than salting the sandwich later.
Griddle at 365°F
- Butter the sourdough thicklySpread the softened bone-marrow butter evenly over one face of each sourdough slice, all the way to the edges. Thin, patchy spots brown unevenly and tear, so take a moment to smooth a full layer. The marrow butter carries beefy depth into the crust as it foams and fries.Look for The buttered faces look evenly coated with a satiny, opaque layer.Tip Butter the bread, not the pan; direct contact guarantees an even, golden crust.
- Heat the griddle to 365°FSet a cast-iron skillet or flat griddle over medium heat and let it come to a steady 365°F, about 3 minutes. Flick a fleck of butter onto the surface: it should sizzle immediately without smoking. A reliable temperature is what turns marrow butter into a deep-gold crust instead of scorched spots.Look for A test fleck of butter sizzles on contact and leaves no dark residue.Tip Cast iron holds heat steadily; once it hits temperature, lower the flame slightly to keep 365°F.
- Build the sandwichPlace one slice of sourdough buttered side down on the griddle. Layer on two slices of smoked Gouda, then the glossy shredded beef, then the drained pickled onions, then the remaining Gouda. Cap with the second slice, buttered face up. Cheese both above and below the beef anchors the filling as it melts.Look for The stack stands tall but stable, with cheese sealing top and bottom.Tip Tear one Gouda slice to patch gaps; full edge-to-edge coverage stops filling from escaping.
- Griddle 3 minutes per sideGriddle the sandwich for about 3 minutes, pressing lightly with a spatula, until the underside is deep golden. Flip carefully and griddle 3 minutes more, until the Gouda melts fully into the tender beef fibers and the beef is heated through to 145°F (63°C). Check the center of the filling with an instant-read thermometer, then transfer the sandwich to a board and let it rest at least 3 minutes so the juices settle.Look for Both faces are uniformly deep gold and the cheese flows at the edges.Safe temperature 145°F (63°C) internal temperature (steaks, chops and roasts)Tip Press gently only; heavy pressure squeezes out the jus and flattens the layers.
The phase is complete when the sandwich leaves the griddle with a deep-gold, uniformly crisp crust on both faces, the smoked Gouda visibly melted into the beef, and the filling reading 145°F (63°C) at its center. Press the surface gently: it should feel crisp with a slight give from the molten cheese beneath.
Listen for a faint sizzle fading as the sandwich rests, and smell toasted bread and smoky cheese, never burnt butter. If the cheese still holds its slice shape at the edges, give it another minute on the second side over slightly lower heat.
Slice and serve hot
- Slice diagonallyAfter the rest, slice the sandwich diagonally with a sharp serrated knife, using a gentle sawing motion so the crust shatters instead of compressing the filling. The molten Gouda will have set just enough to hold the layers together while still stretching slowly as the halves separate.Look for The cross-section shows distinct layers and a slow, glossy cheese stretch.Tip Wipe the knife between cuts for clean edges that show off the filling.
- Serve the melt hotServe immediately, while the crust crackles and the smoked Gouda still stretches. If the beef has cooled below serving temperature, warm the shredded meat before assembling rather than reheating the finished sandwich, which keeps the crust crisp and the cheese molten.Look for Steam rises from the cut face and the crust audibly crunches at the first bite.Tip Hold the halves upright on the board for a moment so the filling settles before plating.
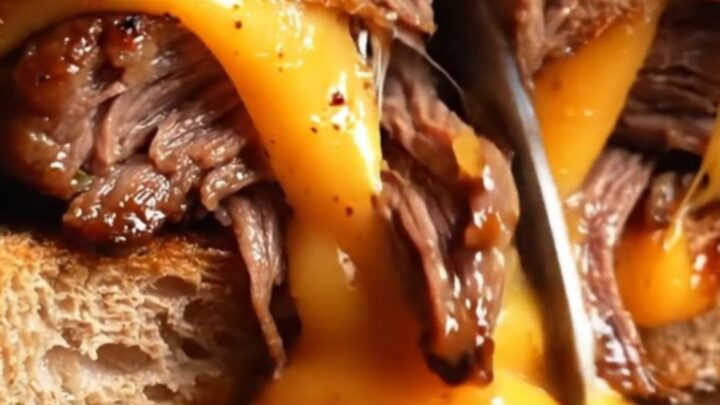
After the rest, the sandwich cuts cleanly on the diagonal with a loud, satisfying crunch. The cross-section shows distinct layers: golden crust, melted Gouda, glossy shredded beef, bright pink onions, and cheese again, with a slow stretch as the halves pull apart. Serve at once, while steam rises from the cut face. If the filling shifts when sliced, the rest was too short; a minute longer next time lets the cheese set just enough to hold everything together.
Common mistakes
The most common failure is a wet filling. Undrained onions and cold, jelly-like jus release moisture that steams the crumb and slides the layers apart, so drain and pat the onions and warm the jus before folding it in. The second mistake is rushing the heat: above 365°F the marrow butter scorches before the Gouda melts, leaving bitter spots and a cool center.
Below it, the bread dries out while waiting for the cheese. Patchy buttering is the third trap; uncovered spots tear and brown unevenly. Finally, do not press hard with the spatula, which squeezes the jus into the bread and flattens the layers you built.
How to tell it’s done
The sandwich is done when both faces are deep golden with no pale patches, the Gouda has melted completely into the beef fibers, and the filling reads 145°F (63°C) on an instant-read thermometer at its center. Three minutes per side at 365°F is the guide, but trust the crust color, the flowing cheese and the thermometer more than the clock.
Lift a corner: the underside should be crisp and uniformly browned, not dark or spotty. Let the sandwich rest at least 3 minutes after the griddle so the juices settle and the cheese holds the layers, then cut diagonally and listen for the crunch.
- Steaks, chops and roasts: 145°F (63°C) in the thickest part, then a 3-minute rest
Up next · Part 3 of 3
4 variations · storage & make-ahead · 5 answers · printable card
Tips, FAQ & printable recipe (Part 3)← Back to the ingredients (Part 1)