Dinner · Part 2 of 3: Instructions
Sheet Pan Sausage and Onion Bake, Ready in 40 Minutes Step-by-step instructions
- Prep
- Cook
- Total
- Serves
- 4
Before you start
Take the sausages out of the refrigerator while the oven preheats, so they are not ice-cold when they hit the heat — an even start means an evenly cooked interior. Set out a rimmed sheet pan, a large mixing bowl, tongs and an instant-read thermometer.
Peel and slice the onions first, since they take the longest prep step; 1/4-inch half-moons are the target thickness. Measure the oil, salt and pepper so everything is within reach, and clear a rack in the center of the oven. Nothing here needs marinating or waiting, so once the onions are sliced and the oven reads 425°F (220°C), the pan can go in immediately.
Ingredients at a glance (5)
- 1 1/2 lb fresh Italian sausages (about 6 links)
- 3 yellow onions, sliced into half-moons
- 3 tbsp olive oil
- 1 tsp kosher salt
- 1/2 tsp freshly ground black pepper
Instructions
Oven On, Onions Sliced
- Heat the oven and prep the panPosition a rack in the center of the oven and preheat to 425°F (220°C). A fully hot oven is essential — the sausages need immediate, intense heat to brown before they overcook. While the oven heats, take the sausages out of the refrigerator so they lose some of their chill, which helps them cook evenly from edge to center.Look for The oven reads 425°F on the dial or thermometer before the pan goes in.Tip Preheating for a full 15 minutes matters more here than with most recipes; a cool oven steams the sausages instead of browning them.
- Slice the onionsPeel the onions and slice them into even half-moons about 1/4 inch thick. Uniform slices are the secret to even caramelization: thinner pieces melt into sweetness, thicker ones hold a little bite. Toss the slices in a large bowl with 2 tablespoons of the olive oil, the kosher salt and the black pepper until every piece is glossy.Look for Every onion slice glistens with oil and no dry, pale patches remain.Tip A sharp chef's knife makes this fast; a dull one crushes the onion and releases extra water, which slows browning.
Phase one ends with a fully preheated 425°F (220°C) oven and a bowl of glossy, evenly seasoned onion slices. The half-moons should look uniform — no thick wedges hiding among thin slivers — and every piece should shine with oil, which is what carries the salt into the roast.
The sausages should be out of the refrigerator, losing their chill. Before moving on, confirm the rack sits in the oven's center: too high and the casings scorch before the onions caramelize; too low and the bottoms brown before the tops do. If the onions wept a lot of liquid into the bowl, pour it off — that water would steam the pan.
The Roast
- Build the sheet panPour the remaining 1 tablespoon of olive oil onto a rimmed sheet pan and spread it with a paper towel. Scatter the seasoned onions over the pan, then nestle the sausages on top, spaced at least an inch apart. Leave the center of the pan relatively open — crowded food traps steam, and steam is the enemy of browned edges.Look for The sausages sit in a single layer with visible gaps between them and onions peeking underneath.Tip A light coating of oil on the bare pan helps the onions release cleanly after roasting instead of tearing.
- Roast and turnRoast for 20 minutes, then pull the pan out and, using tongs, turn each sausage and stir the onions from the edges toward the center, where they brown fastest. Return the pan to the oven for another 10 to 15 minutes. The onions under the sausages soak up the rendered fat, turning glossy and deeply golden.Look for The onions are deep golden brown and the sausage casings look taut and browned on at least two sides.Tip Rotate the pan front to back when you turn the sausages; most home ovens have hot spots that brown one side faster.
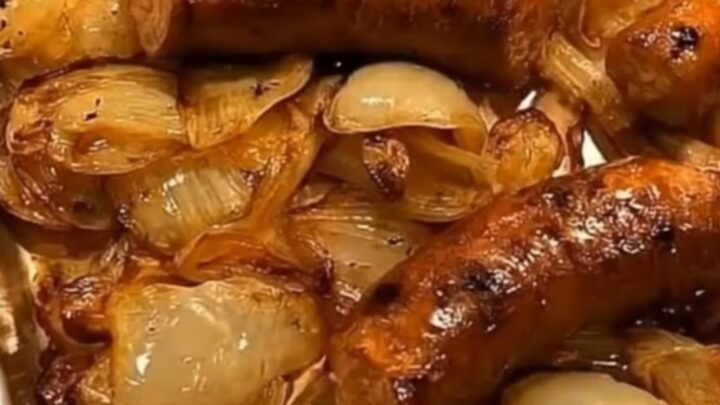
Phase two delivers the visual payoff. After the first 20 minutes the casings should be browning and the onions relaxing; after the turn and the final 10 to 15 minutes, the onions are deep golden and jammy, the pan smells sweet and savory, and the sausages have taut, browned casings on at least two sides. Listen for a gentle sizzle when the pan comes out — silence means too much steam and too little heat. Check that no fat is pooling in more than a shallow sheen; if it is, drain a little before returning the pan. The onions should look glossy, not dry or burnt at the edges.
Temperature, Rest, Plate
- Check the temperatureInsert an instant-read thermometer into the center of the thickest sausage. It should read at least 160°F (71°C). If any link falls short, return the pan to the oven for 5 more minutes and test again in a different sausage. The onions should be jammy and caramelized, clinging to the pan in glossy ribbons.Look for Every tested sausage reads 160°F or above at its thickest point.Safe temperature 160°F (71°C) internal temperature (ground meat)Tip Angle the thermometer through the end of the link toward the center for the most accurate reading.
- Rest and serveLet the sausages rest on the pan for at least 3 minutes before serving so the juices redistribute instead of running out at the first cut. Give the onions a final stir, scraping up any browned bits, then pile them onto a platter or individual plates and arrange the sausages on top. Serve hot, straight from the pan.Look for The onions glisten and no juice floods out when a sausage is cut.Tip Those browned bits scraped from the pan are pure flavor — make sure they end up on the plate, not the paper towels.
The final phase is about certainty and timing. Every sausage tested with an instant-read thermometer must read at least 160°F (71°C) at its thickest point — test the largest link, not just one convenient one. The onions should scrape off the pan in glossy ribbons with the browned bits attached. After at least 3 minutes of rest, the first cut should release moist, juicy meat rather than a rush of liquid. If anything falls short on temperature, the pan goes back for 5 minutes; nothing else about the dish suffers from a short return trip to the oven.
Common mistakes
The most common error is crowding: too many links and onions on one pan traps steam, and everything grays instead of browning. Use two pans rather than one overloaded one. The second mistake is under-roasting the onions out of caution — pale, watery onions mean the pan needs another 5 to 10 minutes; the onions can go darker than looks strictly necessary and will only improve.
Skipping the halfway turn is the third: without it, one side of each sausage stays pale and the center onions never meet the drier edges of the pan. Finally, do not rely on color alone for doneness; use the thermometer, every time.
How to tell it’s done
Two checks tell the story. First, the thermometer: insert it into the center of the thickest link, ideally angled through the end, and look for at least 160°F (71°C) — sausages can look browned well before they are cooked through, so this is the only trustworthy signal.
Second, the pan itself: the onions should be deep golden to mahogany brown, jammy where they sat under the sausages and slightly crisp at the edges, with the rendered fat absorbed rather than pooling in large amounts. The casings should feel taut under the tongs and release a little juice when pressed. Rest the sausages at least 3 minutes after roasting so the juices settle before the first cut.
- Ground meat: 160°F (71°C) in the thickest part
Up next · Part 3 of 3
4 variations · storage & make-ahead · 5 answers · printable card
Tips, FAQ & printable recipe (Part 3)← Back to the ingredients (Part 1)