Dinner · Part 2 of 3: Instructions
Easy Sheet Pan Coconut Chicken Tenders with Pineapple Step-by-step instructions
- Prep
- Cook
- Total
- Serves
- 4
Before you start
Before beginning, ensure the oven is fully preheated to 400°F (200°C) to allow for even cooking from the start. Prepare the baking sheet by lining it with parchment paper to prevent sticking.
Have all ingredients measured and ready, especially the melted butter, which should be warm but not hot. Ensure the chicken is patted dry to help the honey and crust adhere properly.
Ingredients at a glance (7)
- 1 lb chicken tenders
- 2 cups pineapple chunks
- 1 cup red pepper chunks
- 2 tbsp honey
- 1/2 cup shredded coconut
- 1/2 cup panko breadcrumbs
- 3 tbsp melted butter
Instructions
Assembly and Seasoning
- Prepare the sheet panPreheat the oven to 400°F (200°C). Line a large rimmed baking sheet with parchment paper to ensure easy cleanup. Arrange the chicken tenders in a single layer on the prepared pan, leaving a little space between each piece. Distribute the pineapple chunks and red pepper chunks evenly around the chicken tenders to ensure everything cooks uniformly.Look for Arrange chicken and vegetables without overcrowding.Tip Using a large enough pan prevents steaming, helping the crust become crispy.
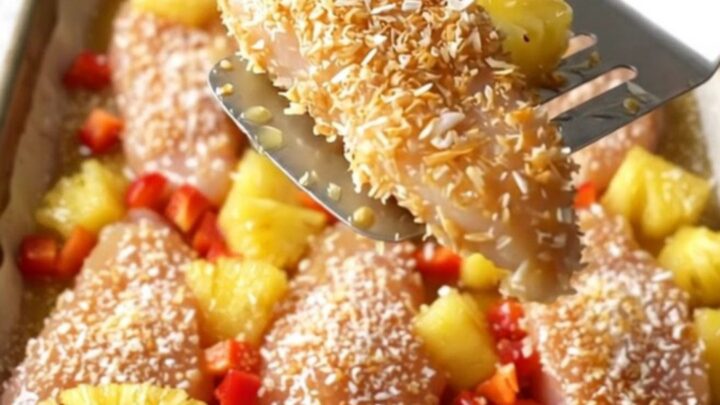
The pan should be neatly arranged with the chicken, pineapple, and peppers in a single layer. The chicken should be lightly brushed with honey and evenly coated with the coconut-panko mixture. It should look organized and ready for the oven, with the melted butter drizzled over the top to promote even browning.
Baking Process
- Season and coatLightly brush the chicken tenders with honey to provide a sweet base. Combine the shredded coconut and panko breadcrumbs in a small bowl, then sprinkle this mixture generously over each chicken tender. Finally, drizzle the melted butter evenly over the coconut-panko crust to help it brown beautifully in the oven.Look for Ensure the coconut and panko mixture is evenly distributed.Tip Press the coating gently into the chicken if necessary to help it adhere.
As the chicken bakes, the kitchen should fill with the aroma of toasted coconut and caramelized fruit. The crust should gradually change from pale to a rich, golden brown.
The pineapple and peppers should soften and release their juices, creating a flavorful environment that keeps the chicken succulent throughout the process.
Resting and Serving
- Bake until goldenPlace the baking sheet into the oven and bake for 18 to 20 minutes, or until the coconut crust is crisp and golden brown. Ensure the chicken reaches an internal temperature of 165°F (74°C). Remove from the oven and let the chicken rest for at least 3 minutes before serving to allow the juices to redistribute for the best texture.Look for The crust should look golden brown and crispy.Safe temperature 165°F (74°C) internal temperature (poultry)Tip Avoid burning the coconut by checking the oven during the final few minutes.
After removing the pan from the oven, the chicken should look crispy and vibrant. The resting period is crucial; the chicken should be left undisturbed for at least 3 minutes to allow the juices to stabilize. This ensures that every bite is moist and flavorful, rather than dry or unevenly textured upon serving.
Common mistakes
A common mistake is overcrowding the pan, which causes the chicken to steam instead of roast, resulting in a soggy crust. Another error is using too much butter, which can lead to a greasy finish; drizzle it sparingly.
Finally, ensure the chicken is not left out at room temperature for more than 30 minutes before cooking to maintain food safety standards.
How to tell it’s done
The chicken is done when the internal temperature reaches 165°F (74°C). The coconut crust should appear deep golden brown and feel firm to the touch.
The pineapple chunks should have slightly caramelized edges, and the red peppers should be tender. Always use a meat thermometer to confirm safety, ensuring the chicken is cooked through without becoming dry.
- Poultry: 165°F (74°C) in the thickest part
Up next · Part 3 of 3
2 variations · storage & make-ahead · 3 answers · printable card
Tips, FAQ & printable recipe (Part 3)← Back to the ingredients (Part 1)