Dinner · Part 1 of 3: Ingredients
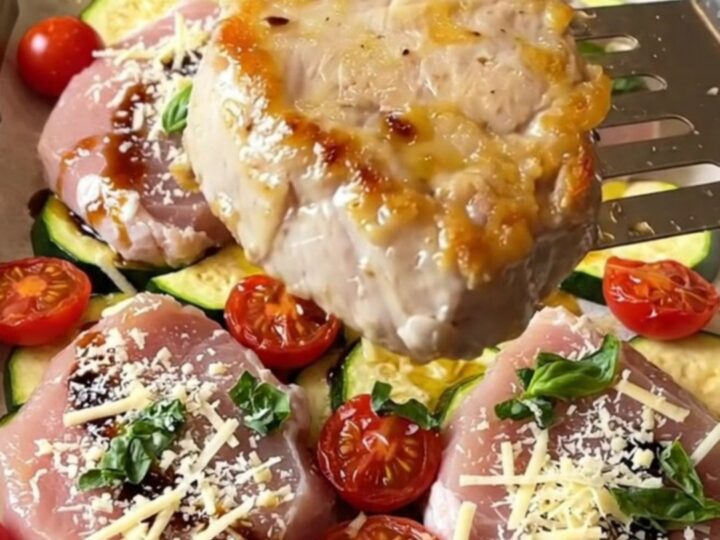
Sheet Pan Bruschetta Pork Tenderloin for a Fast Dinner
- Prep
- Cook
- Total
- Serves
- 4
Simplify your dinner routine with this vibrant sheet pan bruschetta pork tenderloin. By combining lean protein and fresh garden vegetables on a single tray, you eliminate complex prep work while maximizing flavor.
This dish is designed for busy evenings when quality matters, offering a sophisticated result with minimal cleanup. Whether cooking for a family or a quick meal for two, the combination of balsamic sweetness and savory parmesan transforms basic ingredients into a restaurant-quality experience right in your home oven.
Sheet pan cooking is the ultimate solution for efficient meal preparation, especially when working with quick-cooking proteins like pork tenderloin. This method allows the natural juices from the pork to mingle with the roasted cherry tomatoes and zucchini, creating a light, flavorful pan sauce without the need for extra fats or heavy thickeners.
The addition of balsamic glaze provides a tangy contrast, while the parmesan cheese adds a salty, nutty finish that complements the sweetness of the roasted vegetables. Following this straightforward process ensures that every component is perfectly cooked, leaving you with a delicious, cohesive meal that requires very little active time in the kitchen.
Ingredients
Main Ingredients
- 1 lb pork tenderloin, cut into 1-inch medallions
- 2 medium zucchini, sliced into half-moons
- 1 pint cherry tomatoes, halved
Seasoning
- 2 tbsp balsamic glaze
- 1 tbsp olive oil
Topping
- 1/4 cup grated parmesan cheese
- 2 tbsp fresh basil, chopped
Why this recipe works
The sheet pan method utilizes high-heat roasting to caramelize the sugars in the balsamic glaze and cherry tomatoes. This process creates a depth of flavor that is difficult to achieve with other cooking techniques. Because the pork is sliced into medallions before roasting, it cooks rapidly while remaining incredibly tender, avoiding the common issue of overcooking the center of a whole tenderloin.
Arranging the ingredients in a single layer ensures that hot air circulates freely around each piece of meat and vegetable. This prevents steaming, which can occur if the pan is overcrowded, and instead promotes even browning.
The combination of ingredients creates a balanced plate, where the acidity of the tomatoes cuts through the richness of the pork, resulting in a harmonious final dish that feels light yet satisfying.
Notes and substitutions
For the best results, use a high-quality balsamic glaze. If only balsamic vinegar is available, simmer it in a small saucepan over medium heat until it reduces by half and coats the back of a spoon. This reduction is vital for the signature flavor profile of this dish. When selecting pork tenderloin, look for firm, pink meat without excessive silver skin, which can be easily trimmed away with a sharp knife.
The choice of equipment significantly impacts the final outcome. A heavy aluminum sheet pan conducts heat efficiently, ensuring that the bottom of the medallions browns properly without burning.
Parchment paper is essential for easy cleanup and prevents the balsamic glaze from sticking to the pan. While fresh basil is traditional for the finish, ensure it is added only after the cooking process to maintain its bright green color and fresh, peppery aroma.
- balsamic glaze: a reduction of balsamic vinegar simmered until thickened
- zucchini: yellow summer squash or sliced bell peppers
Equipment
- Large aluminum sheet pan
- Parchment paper
- Chef knife
- Cutting board
- Metal spatula
Up next · Part 2 of 3
3 steps · 20 min of cooking · what to look for at each stage
Step-by-step instructions (Part 2)