Appetizers · Part 2 of 3: Instructions
Savory Garlic Butter Pepperoni Focaccia Rolls Step-by-step instructions
- Prep
- Cook
- Total
- Serves
- 8
Before you start
Before beginning, ensure all ingredients are at room temperature to allow for easier handling and assembly.
Preheat the oven to 425 degrees well in advance, and gather all necessary equipment, including a sharp serrated knife and a pastry brush, to ensure a seamless workflow once the dough is ready to be filled and rolled.
Ingredients at a glance (6)
- 1 lb focaccia dough, prepared
- 4 tbsp garlic herb butter, softened
- 1/2 cup marinara sauce
- 8 oz mozzarella cheese, shredded
- 20 slices pepperoni
- 2 tbsp parmesan herb butter, melted
Instructions
Dough preparation
- Prepare the dough baseRoll out the prepared focaccia dough into a large rectangular shape on a lightly floured surface. Ensure the dough is even in thickness to guarantee uniform baking across the entire sheet.Look for dough is smooth and elasticTip Use a rolling pin to maintain an even rectangular shape for easier rolling later.
The dough should be rolled out into an even rectangle with a smooth surface. It should be elastic enough to hold the filling without tearing. Check that the thickness is uniform across the entire rectangle to ensure consistent baking throughout the process.
Rolling and slicing
- Fill and roll the doughSpread the softened garlic herb butter evenly over the surface of the dough. Layer the marinara sauce, shredded mozzarella cheese, and pepperoni slices across the dough. Roll the dough up tightly into a log, then carefully slice into eight equal rounds using a sharp serrated knife.Look for cheese is evenly distributedTip Chill the log for ten minutes before slicing to keep the rounds intact.
The log should be rolled tightly, with the filling securely encased within the layers of dough. When slicing, use a gentle sawing motion to avoid squashing the rolls.
The individual rounds should be uniform in size and neatly arranged in the skillet for even heat exposure.
Baking and finishing
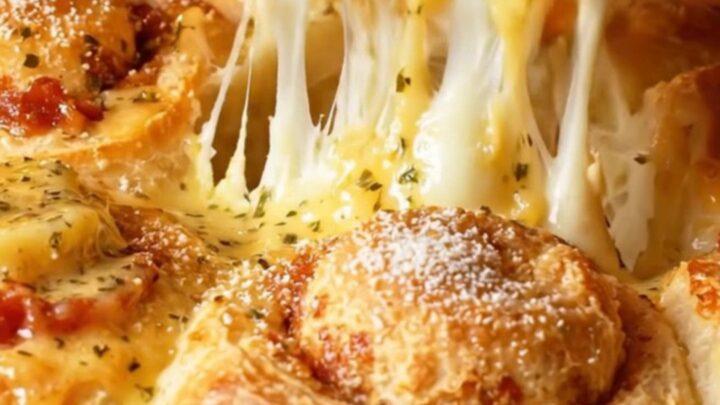
- Bake and finishArrange the rolls in a skillet and bake at 425 degrees until the cheese is blistered and the crust is golden brown. Remove from the oven and immediately brush with the melted parmesan herb butter for an extra savory finish.Look for crust is golden brownTip Serve immediately while the cheese is still gooey and the butter is aromatic.
The rolls should be golden brown with visible blistering on the cheese. The aromatic steam should be released as they are removed from the oven. Applying the parmesan herb butter immediately ensures it soaks into the hot crust for maximum flavor.
Common mistakes
A common mistake is overfilling the dough, which can lead to the rolls losing their structure and leaking cheese during the baking process. Additionally, failing to roll the dough tightly enough can result in gaps between the layers.
Ensure the dough is rolled snugly and that the edges are sealed properly before slicing into individual rounds to maintain the desired shape and texture.
How to tell it’s done
The rolls are finished when the exterior crust turns a deep golden brown and the mozzarella cheese is bubbling and slightly charred in spots.
The internal temperature should be set, and the dough should spring back when lightly pressed. The total bake time should be monitored closely to avoid burning the edges of the rolls while ensuring the center is fully cooked through.
Up next · Part 3 of 3
2 variations · storage & make-ahead · 3 answers · printable card
Tips, FAQ & printable recipe (Part 3)← Back to the ingredients (Part 1)