Desserts · Part 2 of 3: Instructions
Salted Caramel Pecan Dubai Chocolate Bar with Crispy Kataifi Step-by-step instructions
- Prep
- Cook
- Total
- Serves
- 8
Before you start
Before starting, ensure all ingredients are measured and ready. Chop the chocolate finely for even melting. Thaw the kataifi if frozen and spread it on a baking sheet. Toast the pecans lightly if not already toasted. Have a clean, dry mold ready. The caramel comes together quickly, so having everything prepped will make the process smooth.
Ingredients at a glance (7)
- 12 oz milk chocolate, finely chopped
- 1 cup granulated sugar
- 6 tbsp unsalted butter, cut into pieces
- 1/2 cup heavy cream
- 1/2 tsp flaky sea salt, plus more for topping
- 1 cup kataifi (shredded phyllo), thawed if frozen
- 1/2 cup pecans, toasted and roughly chopped
Instructions
Crafting the Caramel and Crunch
- Make the Salted CaramelIn a medium saucepan over medium heat, melt the granulated sugar, stirring occasionally with a rubber spatula, until it turns a deep amber color. Carefully add the butter and stir until melted and combined. Slowly pour in the heavy cream while stirring—the mixture will bubble vigorously. Cook for 1-2 minutes until smooth and thickened. Remove from heat and stir in the flaky sea salt. Let the caramel cool slightly while you prepare the filling.Look for The caramel turns a rich amber and coats the back of a spoon.Tip Use a heavy-bottomed saucepan to prevent scorching. Stir gently to avoid splatters.
- Toast the Kataifi and PecansPreheat the oven to 350°F (175°C). Spread the kataifi on a baking sheet lined with parchment paper and toast for 5-7 minutes until golden and crisp. Add the chopped pecans to the sheet for the last 2 minutes of toasting. Remove from the oven and let cool slightly.Look for The kataifi is golden brown and crisp; the pecans smell fragrant.Tip Keep an eye on the kataifi—it browns quickly. Stir once halfway through.
- Fold the FillingIn a medium bowl, combine the toasted kataifi and pecans. Pour the warm salted caramel over the mixture and fold gently with a spatula until every piece is coated. The filling should be sticky and clump together slightly.Look for The caramel coats the kataifi and pecans evenly, forming a cohesive filling.Tip Work quickly while the caramel is still warm for easier mixing.
The caramel should be a deep amber color, smooth and glossy. The kataifi and pecans should be toasted until fragrant and golden.
When combined, the filling should be sticky and clump together, with the caramel coating every strand. The aroma is nutty and buttery, with a hint of caramelized sugar. This phase sets the foundation for the bar's texture.
Assembling the Chocolate Bar
- Temper the ChocolatePlace the chopped milk chocolate in a microwave-safe bowl. Microwave in 30-second intervals, stirring after each, until almost fully melted. Continue stirring until completely smooth and shiny. The chocolate should be at about 87°F (31°C) when ready to use.Look for The chocolate is glossy and fluid, with no lumps.Tip If the chocolate gets too hot, stir in a few reserved pieces to cool it down.
- Shell the MoldPour about two-thirds of the melted chocolate into the mold. Use a spoon or pastry brush to coat the bottom and sides evenly, creating a thick shell. Tap the mold gently on the counter to release air bubbles. Place the mold in the refrigerator for 5 minutes to set the shell.Look for The chocolate shell is firm and evenly coated.Tip Reserve the remaining chocolate for sealing the bar.
- Layer the FillingRemove the mold from the fridge. Spoon the caramel-kataifi filling evenly over the chocolate shell, pressing it down gently and leaving a small border at the edges. The filling should be about 1/2 inch thick.Look for The filling is evenly distributed and covers the entire shell.Tip Avoid overfilling to allow room for the top chocolate layer.
- Seal with ChocolatePour the remaining melted chocolate over the filling, spreading it to the edges to seal completely. Tap the mold again to release any air bubbles. Sprinkle a pinch of flaky sea salt over the top if desired.Look for The chocolate top is smooth and covers the filling entirely.Tip Work quickly so the chocolate doesn't set before sealing.
The chocolate shell should be firm and evenly coated on the bottom and sides. The filling should be spread evenly, leaving a small border. The top chocolate layer should cover the filling completely, sealing it in. Tap the mold to release air bubbles. The bar should look neat and glossy, with no cracks or gaps.
Chilling and Final Reveal
- Chill and SetPlace the mold in the refrigerator and chill for at least 20 minutes, or until the chocolate is completely firm to the touch. The bar should release easily from the mold when ready.Look for The chocolate is firm and the bar releases cleanly from the mold.Tip Chilling longer (up to 1 hour) makes slicing cleaner.
- Unmold and ServeCarefully invert the mold onto a cutting board and lift it off. The chocolate bar should come out in one piece. Use a sharp knife to break or slice the bar into pieces. Serve immediately for the best crunch and gooey caramel pull.Look for The bar is glossy, crisp, and filled with a sticky caramel center.Tip If the bar sticks, run the mold under warm water for a few seconds.
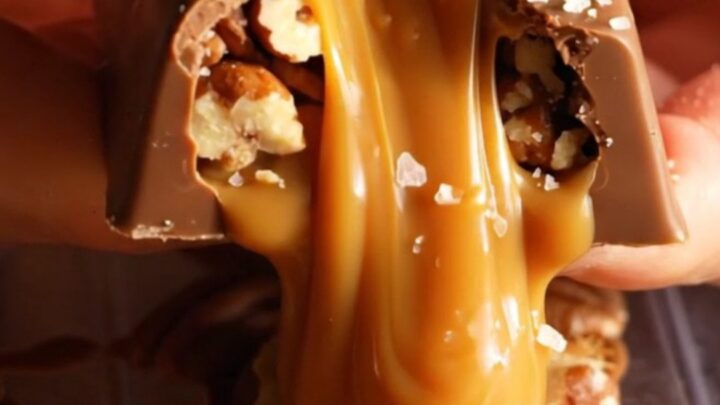
After chilling, the chocolate should be firm and the bar should pop out of the mold easily. The surface should be smooth and shiny. When you break the bar, you should hear a crisp snap and see the caramel stretch and ooze.
The kataifi should remain crunchy, and the pecans should add a satisfying bite. The finished bar is a beautiful mosaic of textures and flavors.
Common mistakes
One common mistake is overheating the chocolate, which causes it to seize or lose its shine. Always melt gently and stir frequently. Another pitfall is not toasting the kataifi enough—it should be deeply golden and crisp, otherwise it will become chewy in the caramel.
Also, be careful not to overfill the mold with filling; leave a border so the top chocolate layer can seal properly. Finally, ensure the chocolate shell is thick enough to hold the filling without cracking.
How to tell it’s done
The bar is done when the chocolate shell is firm to the touch and the bar releases cleanly from the mold. If you tap the bottom of the mold and the bar feels solid, it's ready.
For the best texture, chill for at least 20 minutes. The caramel should be set but still gooey when you break the bar. If the bar seems too soft after chilling, return it to the fridge for a few more minutes.
Up next · Part 3 of 3
4 variations · storage & make-ahead · 5 answers · printable card
Tips, FAQ & printable recipe (Part 3)← Back to the ingredients (Part 1)