Desserts · Part 2 of 3: Instructions
Molten Salted Caramel Chocolate Fondant Tartlets Step-by-step instructions
- Prep
- Cook
- Total
- Serves
- 4
Before you start
Before starting, ensure the baked chocolate tart shells are completely cool and ready to fill. If they are store-bought, remove them from their packaging and place them on a baking sheet. Measure out all the ingredients: chop the dark chocolate into small pieces, cut the butter into cubes, and have the eggs and sugar ready.
Set up a double boiler or a heatproof bowl over a pot of simmering water for melting the chocolate. Preheat the oven to 375°F (190°C) so it is fully hot when the tartlets are ready to bake. Have a timer nearby to keep track of the 8-minute bake.
Ingredients at a glance (8)
- 4 baked chocolate tart shells (store-bought or made ahead)
- 2 tbsp salted butter caramel
- 4 oz dark chocolate (70% cacao), chopped
- 1/2 cup unsalted butter, cut into pieces
- 2 large eggs
- 1/4 cup granulated sugar
- 2 tbsp all-purpose flour
- fleur de sel, for sprinkling, to taste
Instructions
Assemble and Fill
- Prepare the Filling and BatterSpoon 2 tablespoons of salted butter caramel into each baked chocolate tart shell, spreading it evenly over the bottom. In a medium heatproof bowl, combine the chopped dark chocolate and butter. Melt over a pot of simmering water, stirring occasionally, until smooth. Remove from heat and let cool slightly. In a separate bowl, whisk the eggs and sugar until pale and slightly thickened, then whisk in the melted chocolate mixture. Fold in the flour until just combined.Look for The caramel forms an even layer, and the batter is glossy and smooth without lumps.Tip Ensure the melted chocolate is not too hot when added to the eggs to avoid scrambling them.
- Fill the Tart ShellsDivide the fondant batter evenly among the tart shells, filling each almost to the top. The batter should cover the caramel completely. Smooth the tops with a small offset spatula or the back of a spoon.Look for The batter is level with the rim and the caramel is hidden underneath.Tip Do not overfill; leave a tiny bit of space for the batter to rise slightly.
At this stage, the tart shells are filled with a layer of caramel and topped with the chocolate fondant batter. The batter should be glossy and smooth, and the caramel should be completely covered.
The filled shells should look neat and level, ready for the oven. Take a moment to ensure that the batter is evenly distributed and that there are no air bubbles on the surface.
Bake to Molten Perfection
- Bake the TartletsPlace the filled tart shells on a baking sheet. Bake at 375°F (190°C) for exactly 8 minutes, until the tops are set and a delicate crust forms, but the centers remain molten.Look for The tops look firm and slightly cracked, and the edges are just pulling away from the shell.Safe temperature 160°F (71°C) internal temperature (egg dishes)Tip Set a timer for 8 minutes; overbaking will set the centers completely.
After 8 minutes in the oven, the tartlets will have risen slightly and the tops will be set with a delicate crust that may have a few cracks. The edges will look dry, but the centers will still look soft and slightly jiggly. The kitchen will smell richly of chocolate and caramel. Remove them from the oven immediately—this is the moment they are perfectly molten inside.
Finish and Serve
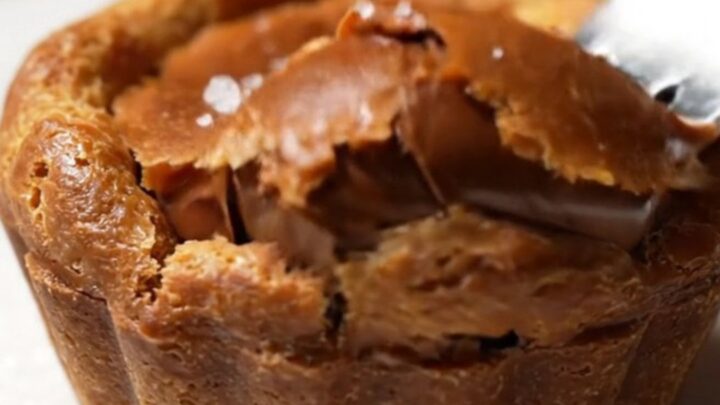
- Finish and ServeRemove the tartlets from the oven and let them cool on a rack for 2 minutes. Sprinkle each with a pinch of fleur de sel. Serve warm, using a spoon to break through the crust and reveal the molten caramel and chocolate.Look for The crust is crisp, and the filling flows slowly when the tartlet is cut.Tip Serve immediately for the best molten texture; the centers will set as they cool.
After a brief rest, the tartlets are sprinkled with fleur de sel and served warm. When you cut into one with a spoon, the crust should crack crisply, and the molten chocolate and caramel should flow out together in a glossy ribbon. The texture is a contrast of crisp, silky, and gooey. Serve immediately for the full effect, as the centers will firm up as they cool.
Common mistakes
One common mistake is overbaking the tartlets, which results in a fully set center and no molten flow. Stick to the 8-minute mark and trust the visual cues. Another issue is using a runny caramel that seeps into the batter and makes the texture uneven; use a thick caramel that holds its shape.
Also, be careful not to overmix the batter once the flour is added, as this can develop gluten and make the tartlets tough. If the melted chocolate is too hot when added to the eggs, it can scramble them; let it cool for a few minutes before combining. Finally, do not skip the fleur de sel—it enhances the caramel and chocolate flavors beautifully.
How to tell it’s done
The tartlets are done when the tops are set and have formed a delicate crust that is slightly cracked, and the edges just begin to pull away from the sides of the tart shells. The centers should still look moist and slightly soft when you gently jiggle the baking sheet.
To be certain the eggs are cooked through, insert an instant-read thermometer into the center of one tartlet; it should register at least 160°F (71°C). If it reads below that, return the tartlets to the oven for 1-2 minutes more, checking again. Remember that the centers will continue to set slightly as they cool, so it is better to underbake slightly than overbake.
- Egg dishes: 160°F (71°C) in the thickest part
Up next · Part 3 of 3
4 variations · storage & make-ahead · 5 answers · printable card
Tips, FAQ & printable recipe (Part 3)← Back to the ingredients (Part 1)