Dinner · Part 2 of 3: Instructions
Rustic Wine-Braised Chicken in Cast Iron Step-by-step instructions
- Prep
- Cook
- Total
- Serves
- 4
Before you start
Before you begin cooking, measure out all of your ingredients and place them within arm's reach of the stove. Peel the pearl onions completely, keeping them whole so they retain their shape during the braise.
Pat the chicken drumsticks completely dry with paper towels; removing excess surface moisture is key to achieving a deep, golden-brown sear in the hot bacon fat rather than steaming the meat.
Ingredients at a glance (4)
- 4 oz bacon lardons
- 8 chicken drumsticks
- 1 cup pearl onions, peeled
- 1 1/2 cups dry red wine
Instructions
Crisping the Bacon
- Render and Crisp the BaconPlace the bacon lardons in a cold, heavy cast-iron skillet. Turn the heat to medium and cook, stirring occasionally, until the bacon is deeply browned and crispy. Use a slotted spoon to transfer the crispy bacon to a plate, leaving the rendered fat in the skillet.Look for The bacon should be crispy and the fat fully rendered.Tip Starting the bacon in a cold skillet helps render more fat without burning.
The bacon lardons should be deeply browned and crispy, having rendered a generous amount of flavorful fat into the bottom of the skillet.
The kitchen will fill with a rich, smoky aroma, and the rendered fat should be clear and bubbling gently, ready for searing the chicken.
Searing Chicken and Onions
- Sear the Chicken DrumsticksIncrease the heat to medium-high and place the chicken drumsticks in the hot bacon fat. Sear for about 4 to 5 minutes per side, turning with tongs, until they develop a rich, golden-brown crust on all sides. Transfer the chicken to the plate with the bacon.Look for The chicken skin should be deeply golden and crispy.Tip Avoid moving the chicken too much during the first few minutes to get a good sear.
- Sauté the Pearl OnionsAdd the peeled pearl onions to the remaining fat in the skillet. Sauté over medium heat for 3 to 4 minutes, stirring frequently, until the onions are lightly browned and glazed on the outside. Remove the onions and set them aside on the plate.Look for The onions should be fragrant and lightly browned.Tip Keep the onions whole so they do not fall apart during the braise.
The chicken drumsticks should feature a beautiful, even golden-brown crust on all sides, and the pearl onions should be lightly browned and glazed on the exterior. The bottom of the skillet will have developed a dark, caramelized layer of flavorful browned bits.
Braising and Reducing
- Deglaze the SkilletPour the dry red wine into the hot skillet. Use a wooden spoon to scrape up all the caramelized browned bits stuck to the bottom of the pan. Bring the wine to a rapid simmer and let it bubble for 2 minutes to reduce slightly and burn off the alcohol.Look for The wine should bubble rapidly and release a rich aroma.Tip Scraping the bottom of the pan incorporates maximum flavor into the gravy.
- Braise the Chicken to TendernessReturn the seared chicken drumsticks, crispy bacon lardons, and glazed pearl onions to the skillet, nesting them into the wine. Reduce the heat to medium-low, cover, and simmer gently for 25 to 30 minutes. Remove the lid and simmer uncovered for another 5 to 10 minutes until the gravy is thick and glossy, and the chicken reaches an internal temperature of 165°F (74°C).Look for The chicken should be tender and the sauce thick and velvety.Safe temperature 165°F (74°C) internal temperature (poultry)Tip Simmering uncovered at the end concentrates the red wine into a rich glaze.
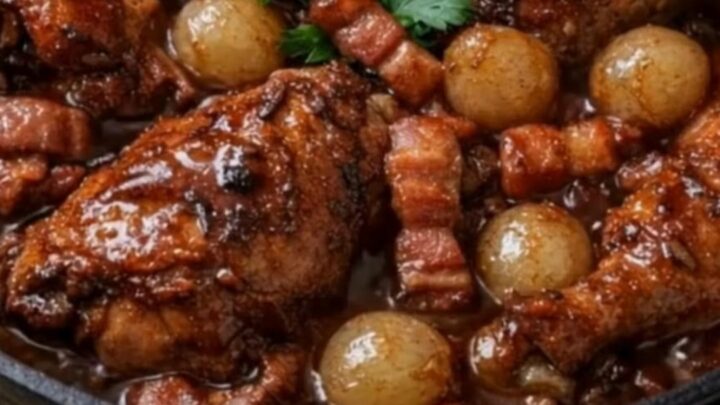
The red wine should be reduced by more than half, transforming into a thick, glossy, and velvety gravy that clings to the tender chicken. The chicken skin will be a rich mahogany color, and the pearl onions will be completely tender and translucent.
Common mistakes
One common mistake is rushing the searing process or crowding the skillet. Searing the chicken too quickly or packing the pieces too closely together lowers the pan temperature, causing the chicken to steam and turn gray rather than develop a rich, golden crust.
Work in batches if necessary to give each drumstick plenty of space. Another mistake is using a low-quality wine, which can leave a harsh, acidic, or metallic taste in the finished reduction.
How to tell it’s done
The chicken is perfectly done when the meat is incredibly tender and begins to pull away slightly from the bone. To ensure food safety, always insert a meat thermometer into the thickest part of the drumstick without touching the bone.
The internal temperature must register at least 165°F (74°C) to ensure the poultry is fully and safely cooked through.
- Poultry: 165°F (74°C) in the thickest part
Up next · Part 3 of 3
2 variations · storage & make-ahead · 3 answers · printable card
Tips, FAQ & printable recipe (Part 3)← Back to the ingredients (Part 1)