Dinner · Part 2 of 3: Instructions
Rustic Cranberry Orange Glazed Chicken Skillet Step-by-step instructions
- Prep
- Cook
- Total
- Serves
- 4
Before you start
Before beginning, ensure all ingredients are measured and ready, as the cooking process moves quickly once the skillet is hot. Pat the chicken thighs dry with paper towels to ensure a superior sear; excess moisture prevents the skin from crisping properly.
Remove the chicken from the refrigerator about 20 minutes before cooking to allow it to come closer to room temperature, which helps ensure even cooking. Have your tongs and a meat thermometer ready nearby to monitor the process effectively throughout the various cooking stages.
Ingredients at a glance (4)
- 4 pieces chicken thighs, bone-in and skin-on
- 1 cup fresh cranberries
- 1/2 cup orange juice
- 3 sprigs fresh thyme
Instructions
Searing the Chicken
- Sear the ChickenPlace the chicken thighs skin-side down in a hot cast-iron skillet. Cook over medium-high heat until the skin is golden brown and crispy, about 8 minutes. Carefully turn the pieces over using tongs to brown the other side for another 5 minutes.Look for skin becomes golden brown and crispyTip Ensure the skillet is hot before adding the chicken to achieve a deep sear.
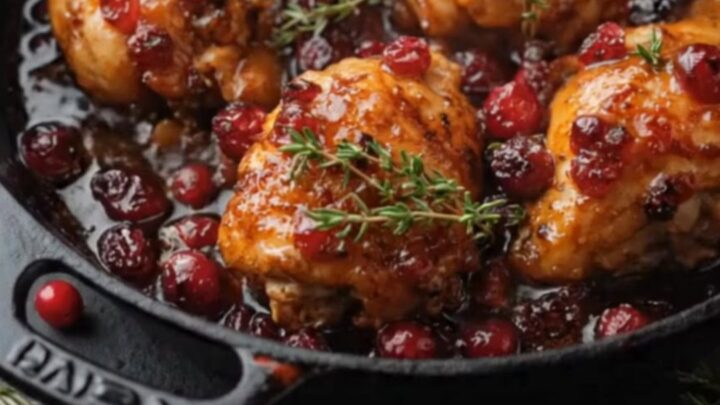
The chicken should have a deep, mahogany-colored crust on both sides. The kitchen should smell like rendered chicken fat and toasted skin. If the skin is sticking to the skillet, it is not yet ready to be flipped; wait until it releases naturally before turning.
Simmering the Glaze
- Simmer with GlazeReduce the heat to medium. Add the fresh cranberries, orange juice, and fresh thyme sprigs into the skillet around the chicken. Allow the mixture to simmer gently, letting the cranberries soften and the orange juice reduce into a thick, glossy sauce that coats the chicken.Look for sauce is thick and glossyTip Baste the chicken occasionally with the simmering liquid for maximum flavor absorption.
The cranberries should have burst, releasing their vibrant color and juices into the skillet. The mixture should be bubbling steadily, with the orange juice reducing and thickening into a syrupy consistency that smells fragrant, fruity, and slightly tangy from the fresh thyme.
Finishing and Resting
- Finish CookingContinue simmering until the chicken is cooked through and reaches an internal temperature of 165°F (74°C). Remove the skillet from the heat and let the chicken rest for 5 minutes before serving to ensure the juices redistribute properly throughout the meat.Look for meat is tender and juices run clearSafe temperature 165°F (74°C) internal temperature (poultry)Tip Use a meat thermometer to check the thickest part of the thigh near the bone.
The chicken should be fully opaque and tender when pierced with a fork. The glaze should be dark, sticky, and clinging to the chicken pieces. Ensure the meat has reached the safe temperature before removing it from the heat to rest and set the flavors.
Common mistakes
A common mistake is overcrowding the skillet, which lowers the temperature and causes the chicken to steam rather than sear, resulting in soggy skin. Always cook in batches if your skillet is small.
Another error is adding the liquid too early; wait until the chicken skin is fully browned and crispy before introducing the orange juice and cranberries.
Finally, do not rush the resting period; resting the chicken for at least 5 minutes is vital for the juices to settle, ensuring every bite is moist and flavorful.
How to tell it’s done
The chicken is done when it is tender, the skin is deeply golden, and the internal temperature reaches 165°F (74°C). The sauce should be thick enough to coat the back of a spoon with a glossy, syrup-like consistency.
If the sauce remains too thin, simmer for an additional minute or two before testing the temperature again. Always verify the temperature by inserting a thermometer into the thickest part of the thigh, avoiding the bone, to ensure the meat is safely and perfectly cooked throughout.
- Poultry: 165°F (74°C) in the thickest part
Up next · Part 3 of 3
2 variations · storage & make-ahead · 4 answers · printable card
Tips, FAQ & printable recipe (Part 3)← Back to the ingredients (Part 1)