Dinner · Part 2 of 3: Instructions
Rustic Coq au Vin with Bacon and Pearl Onions Step-by-step instructions
- Prep
- Cook
- Total
- Serves
- 4
Before you start
Before beginning, ensure all ingredients are measured and ready. Peel the pearl onions by blanching them in boiling water for thirty seconds, then slipping off the skins.
Pat the chicken drumsticks dry with paper towels to ensure a perfect sear, and keep the bacon chilled until the moment it hits the pan to help it render properly.
Ingredients at a glance (4)
- 6 oz bacon lardons
- 8 pieces chicken drumsticks
- 1 cup pearl onions
- 2 cups red wine
Instructions
Rendering the Bacon
- Render the BaconPlace the bacon lardons into a cold cast-iron skillet. Turn the heat to medium and cook until the bacon is crispy and has rendered its fat. Remove the bacon with tongs, leaving the fat in the skillet.Look for The bacon looks crispy and golden brown.Tip Keep the heat moderate to ensure the fat renders slowly without burning the bacon pieces.
The bacon should be rendered until crispy, leaving behind a generous amount of flavorful fat in the skillet. Ensure the heat remains steady so the fat clarifies without becoming dark or burnt.
The kitchen should smell smoky and savory, signaling that the base for the stew is ready for the next stage of the cooking process.
Braising the Chicken
- Sear and BraiseAdd the chicken drumsticks to the hot bacon fat. Sear until browned on all sides. Pour in the red wine and add the pearl onions. Cover and simmer until the chicken reaches an internal temperature of 165°F (74°C).Look for The sauce is bubbling and the chicken is tender.Safe temperature 165°F (74°C) internal temperature (poultry)Tip Ensure the chicken is fully submerged in the wine sauce for even cooking.
The chicken should be browned on all sides, and the red wine should be simmering gently. As the liquid reduces, the pearl onions will soften and absorb the flavors of the wine and bacon fat. The house will be filled with a deep, earthy aroma that indicates the braising process is working to tenderize the chicken pieces.
Finishing the Sauce
- Final ReductionRemove the lid and increase the heat slightly to reduce the sauce until it reaches a thick, glossy consistency. Add the cooked bacon back to the pan, toss to coat, and let the dish rest for at least 5 minutes before serving.Look for The sauce coats the back of a spoon.Tip Watch the sauce closely during the final reduction to prevent it from becoming too salty.
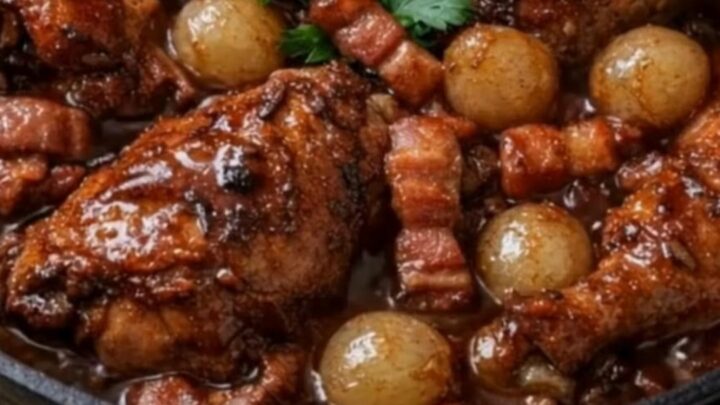
The final sauce should be thick, shiny, and rich in color. When the bacon is reintroduced, the entire dish should look cohesive and vibrant. The chicken should be falling-apart tender, and the sauce should have a balanced, savory depth that clings beautifully to the meat and onions, ready to be served immediately.
Common mistakes
Avoid overcrowding the skillet during the searing phase, as this will cause the chicken to steam rather than brown. If the pan is too crowded, sear the chicken in two smaller batches.
Additionally, do not rush the reduction phase; if the sauce is too thin, it will lack the desired intensity and mouthfeel that makes this classic dish so special and satisfying to eat.
How to tell it’s done
The chicken is perfectly cooked when the meat is tender and pulls away easily from the bone, reaching a safe internal temperature of 165°F (74°C).
The sauce should be glossy, thick enough to coat the back of a spoon, and have a deep, rich color. Let the dish rest for at least 5 minutes before serving to allow the juices to redistribute throughout the meat.
- Poultry: 165°F (74°C) in the thickest part
Up next · Part 3 of 3
2 variations · storage & make-ahead · 3 answers · printable card
Tips, FAQ & printable recipe (Part 3)← Back to the ingredients (Part 1)