Dinner · Part 2 of 3: Instructions
Rustic Baked Chicken Drumsticks with Potatoes and Peppers Step-by-step instructions
- Prep
- Cook
- Total
- Serves
- 4
Before you start
Before starting the cooking process, ensure that all ingredients are properly prepped and measured. Wash and dry the potatoes and red peppers thoroughly. Cut the potatoes into even wedges so they cook at the same rate as the chicken drumsticks.
Slice the red peppers into thick strips to prevent them from burning during the long roasting time. Pat the chicken drumsticks dry with paper towels to remove excess moisture, which is key to achieving crispy skin. Preheat the oven to 400°F (204°C) to ensure a hot roasting environment.
Ingredients at a glance (5)
- 8 chicken drumsticks
- 1 1/2 lbs potatoes, cut into wedges
- 2 red peppers, sliced
- 2 tbsp spices
- 3 sprigs herbs
Instructions
Prepping and Seasoning
- Prepping the Vegetables and OvenPreheat the oven to 400°F (204°C). In a large mixing bowl, combine the cut potatoes and sliced red peppers. Season them with the spices. Toss thoroughly until everything is evenly coated.Look for The vegetables should be completely coated in spices.Tip Ensure the potatoes are cut into even wedges so they cook at the same rate.
- Seasoning the Chicken DrumsticksPat the chicken drumsticks dry with paper towels to remove excess moisture. Place them in a separate bowl and season them evenly with the spices, ensuring the skin is well-coated for optimal crispiness.Look for The chicken skin should look dry before seasoning.Tip Drying the skin thoroughly is the secret to getting a blistered, crispy texture.
At the end of this initial preparation phase, the chicken drumsticks, potatoes, and red peppers should be thoroughly coated in the fragrant spice mixture. The spices should be evenly distributed, leaving no dry patches on the poultry or vegetables. The kitchen will begin to smell of warm spices. The oven should be fully preheated to the correct temperature, ready to receive the roasting pan for the cooking process.
The Initial Roast
- Arranging the Roasting PanArrange the spiced potatoes and red peppers in a single layer in a large, heavy-duty roasting pan. Place the chicken drumsticks on top of the vegetable bed, leaving some space between the pieces so they roast rather than steam.Look for The ingredients should not be crowded or piled high.Tip Spacing the drumsticks allows the hot oven air to circulate and crisp the skin evenly.
- The Initial RoastPlace the roasting pan in the preheated oven and bake at 400°F (204°C) for 35 minutes. The chicken skin will begin to render its natural fat, and the vegetables underneath will start to soften and brown at the edges.Look for You should hear a gentle sizzling sound from the oven.Tip Do not open the oven door too often to keep the roasting temperature stable.
During this roasting phase, the chicken skin will begin to render its fat and turn a light golden color, while the potatoes start to soften and brown at the edges.
The red peppers will soften and release their sweet aroma, mixing with the savory chicken juices accumulating at the bottom of the pan. You should hear a steady, gentle sizzling sound coming from the oven as the ingredients cook, signaling that the rendering process is well underway.
Basting and Crisping
- Basting and Final CrispingCarefully remove the pan from the oven and scatter the herbs over the dish. Use a large spoon to gather the hot, sizzling pan juices from the bottom of the pan and generously spoon them over the blistered chicken skin. Return the pan to the oven and bake for an additional 10 to 15 minutes, until the chicken skin is deeply golden and crispy, and the internal temperature of the poultry reaches 165°F (74°C).Look for The chicken skin should be blistered and golden, and the juices must run clear.Safe temperature 165°F (74°C) internal temperature (poultry)Tip Basting with the rendered pan juices adds deep flavor and creates a beautiful glisten.
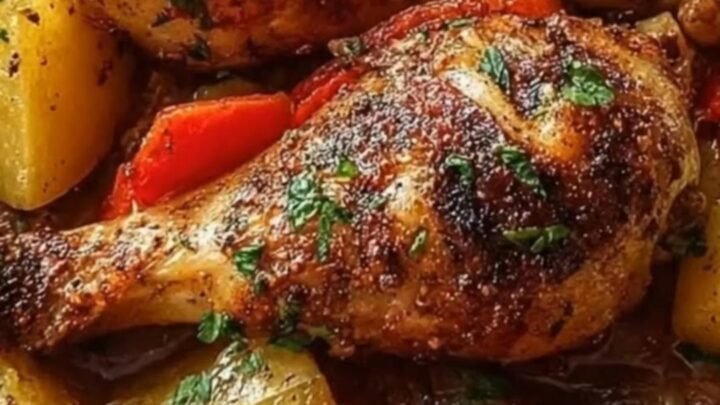
By the end of the final phase, the chicken drumsticks will have a deeply blistered, crispy, golden-brown skin that sizzles with herbs. The potatoes will be tender on the inside with crisp, browned edges, and the red peppers will be beautifully caramelized and tender. The pan juices will be bubbling vigorously, and the entire kitchen will be filled with an incredibly rich, savory aroma of roasted poultry and herbs.
Common mistakes
One of the most common mistakes is crowding the roasting pan, which traps steam and prevents the chicken skin from crisping and the potatoes from browning. Ensure there is some space between the drumsticks and the vegetable pieces.
Another error is failing to pat the chicken dry before seasoning; excess moisture on the skin will steam rather than roast. Lastly, skipping the basting step near the end of cooking will result in a drier chicken skin rather than the glistening, flavorful exterior shown in the video.
How to tell it’s done
To determine if the dish is fully cooked, insert an instant-read meat thermometer into the thickest part of the chicken drumsticks, avoiding the bone. The internal temperature must register at least 165°F (74°C) to be safe for consumption.
Visually, the chicken skin should be crispy, deeply golden, and blistered, while the juices should run completely clear when the meat is pierced. The potatoes should be easily pierced with a fork, showing a soft, fluffy interior under their browned crust.
- Poultry: 165°F (74°C) in the thickest part
Up next · Part 3 of 3
2 variations · storage & make-ahead · 4 answers · printable card
Tips, FAQ & printable recipe (Part 3)← Back to the ingredients (Part 1)