Dinner · Part 1 of 3: Ingredients
Rosemary Thyme Butter Pork Shoulder: Dump It In and Forget It
- Prep
- Cook
- Total
- Serves
- 8
This slow cooker pork shoulder is the definition of set-it-and-forget-it cooking. With just a handful of ingredients—pork, garlic, rosemary, thyme, and a stick of butter—you get a deeply flavorful, pull-apart tender roast that tastes like you fussed for hours.
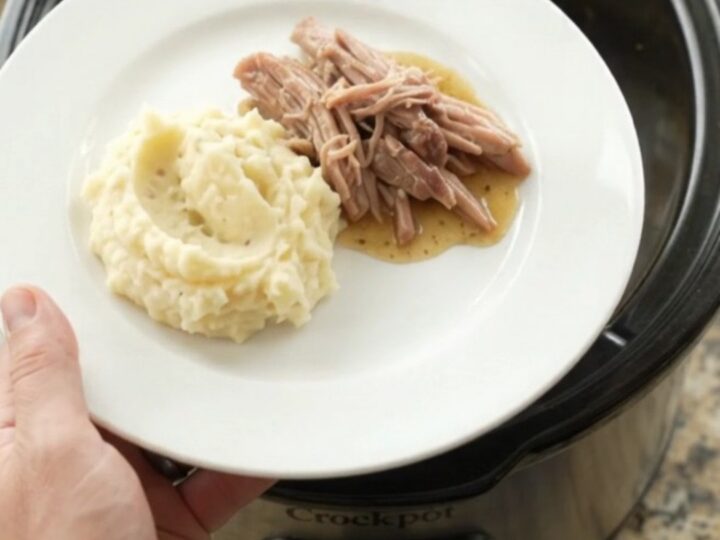
The hands-on time is under 10 minutes, and the slow cooker does the rest, filling your kitchen with an incredible aroma. Serve it over mashed potatoes or on buns for an effortless dinner that feels special any night of the week.
This recipe is a celebration of simplicity. A well-marbled pork shoulder roast is seasoned with aromatic garlic and fresh herbs, then topped with a whole stick of butter. As it cooks low and slow, the fat renders, the meat becomes spoon-tender, and the butter melds with the natural juices to create a rich, savory pan sauce.
The result is juicy, succulent pork that shreds effortlessly and tastes incredible. Whether you're feeding a crowd or meal-prepping for the week, this dish delivers big flavor with minimal effort.
Ingredients
- 4 lb boneless Boston butt pork shoulder roast
- 12 cloves garlic, smashed
- 4 sprigs fresh rosemary
- 6 sprigs fresh thyme
- 1 stick salted butter
Why this recipe works
The magic of this recipe lies in the cut of meat. Pork shoulder, also known as Boston butt, is marbled with fat and connective tissue that breaks down during long, slow cooking.
This collagen-to-gelatin transformation is what gives the meat its fork-tender, melt-in-your-mouth texture. Cooking it low and slow in a covered pot traps steam and creates a moist environment that prevents the meat from drying out, ensuring every bite is juicy and succulent.
The combination of aromatics and butter is a classic flavor trio. Garlic and fresh herbs like rosemary and thyme are robust enough to stand up to the rich pork, while the butter adds a silky richness and helps carry the flavors.
As the butter melts, it bastes the meat and emulsifies with the cooking juices, creating a glossy, flavorful sauce that coats every strand of shredded pork. This simple technique yields a dish that tastes far more complex than its ingredient list suggests.
Notes and substitutions
For the best results, choose a pork shoulder with good marbling. The fat keeps the meat moist during the long cooking time. If your roast has a thick fat cap, you can trim it slightly, but leave some for flavor. Boston butt is ideal, but a picnic shoulder also works; just allow extra cooking time if it's larger. Fresh herbs are key here—dried herbs can be used in a pinch, but they won't have the same bright, aromatic quality.
A 6-quart slow cooker is perfect for this recipe. If using a smaller one, ensure the roast fits comfortably with room for the herbs. The butter adds richness, so there's no need for extra oil. If you don't have a slow cooker, this can be braised in a Dutch oven at 300°F (150°C) for 3-4 hours, covered. The result will be equally delicious, just be sure to check the liquid level occasionally.
- Fresh rosemary: Use 1 tablespoon dried rosemary, but add it with the garlic so it softens during cooking.
- Fresh thyme: Use 1 teaspoon dried thyme, added at the same time as the dried rosemary.
- Salted butter: Unsalted butter works; add 1/2 teaspoon salt to the roast before cooking.
Equipment
- Slow cooker (6-quart or larger)
- Tongs
- Two forks for shredding
- Measuring spoons
- Cutting board
- Chef's knife
Up next · Part 2 of 3
4 steps · 8 h of cooking · what to look for at each stage
Step-by-step instructions (Part 2)