Dinner · Part 1 of 3: Ingredients
Root Beer Honey Hickory Baby Back Ribs: Easy Slow Cooker
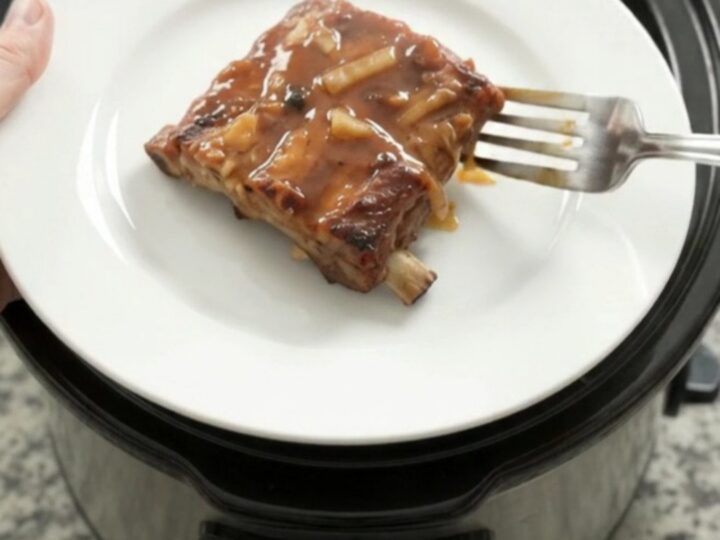
- Prep
- Cook
- Total
- Serves
- 4
Here’s a dinner that asks almost nothing of you: two racks of baby back ribs, a can of root beer, a handful of sweet onion, and a generous pour of honey hickory barbecue sauce. You dump it all into the slow cooker, lid on, and walk away. Hours later, the kitchen smells like a backyard cookout, and the ribs are so tender they practically fall off the bone. This is the kind of meal that makes a weekday feel like a weekend—no grill, no smoker, no babysitting.
These root beer honey hickory baby back ribs are the ultimate set-and-forget dinner. The root beer does double duty: its sugars help tenderize the meat and its spices—think vanilla, sarsaparilla, and wintergreen—infuse the pork with a subtle sweetness that pairs perfectly with the sticky barbecue glaze.
As the ribs cook low and slow, the sauce melds with the root beer and onion into a rich, caramelized braising liquid that coats every bite. Serve them straight from the slow cooker or on a platter with extra sauce spooned over the top. Either way, you’ll have a crowd-pleasing meal that tastes like you spent hours at the grill—but you didn’t.
Ingredients
- 2 racks baby back pork ribs (about 1 1/2 lb each)
- 1 cup diced sweet onion (about 1 medium)
- 12 fl oz root beer (not diet)
- 1 cup honey hickory barbecue sauce
Why this recipe works
The magic of these ribs lies in the combination of low heat and a sweet, acidic braising liquid. Cooking at a gentle simmer for hours breaks down the collagen in the pork, turning tough connective tissue into gelatin that keeps the meat moist and tender.
The root beer adds a layer of sugar that helps the meat caramelize around the edges, while its carbonation and mild acidity work to tenderize the fibers without making the meat tangy. The result is meat that pulls away from the bone with the slightest tug, yet still holds its shape when you lift it.
The honey hickory barbecue sauce contributes both sweetness and a smoky depth that echoes the flavor of a charcoal grill. As the sauce and root beer mingle over the long cooking time, they reduce and thicken into a glossy glaze that clings to the ribs. The sweet onion melts into the liquid, adding a mild savory note that balances the sweetness.
Because the slow cooker traps steam, the ribs essentially braise in their own juices, which keeps them exceptionally moist. The final step—letting the ribs rest before serving—allows the juices to redistribute, so every slice is as succulent as the last.
Notes and substitutions
For the best results, choose baby back ribs that are meaty and have a good amount of marbling. They should be pinkish-red, not pale, and have a thin layer of fat on top. If the racks are too long for your slow cooker, cut them in half—this also makes them easier to fit and serve. Sweet onion, such as Vidalia or Walla Walla, adds a mild, sweet flavor that complements the barbecue sauce. If you only have yellow onions, that’s fine; they’ll just be a bit more pungent.
Root beer is the star of the braising liquid. Use a good-quality, cane-sugar-sweetened root beer—not diet, as the artificial sweeteners won’t caramelize the same way. The spices in root beer, like vanilla and sarsaparilla, are what give the ribs their unique flavor.
Honey hickory barbecue sauce is widely available; if you can’t find it, use a thick barbecue sauce and add a tablespoon of honey. You can also swap the root beer for cola or ginger ale, but the flavor will be slightly different. A 6-quart slow cooker is ideal; if yours is smaller, cut the racks into pieces.
- honey hickory barbecue sauce: any thick barbecue sauce, such as brown sugar bourbon or smoky chipotle, plus 1 tablespoon honey
- root beer: cola or ginger ale (not diet) for a similar sweet, spiced note
- sweet onion: yellow onion or shallots, diced
Equipment
- 6-quart or larger slow cooker
- cutting board
- chef's knife
- measuring cups
- tongs
- carving fork
Up next · Part 2 of 3
5 steps · 6 h of cooking · what to look for at each stage
Step-by-step instructions (Part 2)