Dinner · Part 2 of 3: Instructions
Root Beer BBQ Short Ribs: 5-Ingredient Crockpot Dinner Step-by-step instructions
- Prep
- Cook
- Total
- Serves
- 4
Before you start
Before starting, pat the short ribs dry with paper towels and trim any excessively thick fat caps, leaving a thin layer for flavor. Dice the sweet onion into small, even pieces so they soften and caramelize during the long cook.
Measure the root beer and barbecue sauce so everything is ready to pour. Have a 6-quart slow cooker clean and ready. No other prep is needed—this recipe is designed to be assembled in minutes.
Ingredients at a glance (4)
- 3 lb bone-in beef short ribs
- 1 medium sweet onion, diced
- 1 1/2 cups root beer
- 1 1/2 cups thick Kansas City-style barbecue sauce
Instructions
Assemble and Layer
- Layer the Ribs and AromaticsPlace the beef short ribs in the bottom of a 6-quart slow cooker, arranging them in a single layer as much as possible. Scatter the diced sweet onion evenly over the ribs. Pour the root beer around and over the meat, making sure the onions are moistened but the ribs are not fully submerged.Look for The ribs sit in a shallow pool of root beer with onions scattered on top.Tip Trim any large fat caps from the ribs before adding, but leave some fat for flavor and tenderness.
- Add the Barbecue SaucePour the thick Kansas City-style barbecue sauce over the ribs and onions, using a spatula to spread it into an even layer. Do not stir; the sauce will melt and combine with the root beer as the slow cooker heats.Look for The sauce forms a glossy mahogany blanket over the ribs.Tip Choose a sauce with a thick, molasses-like texture so it clings to the meat.
The slow cooker holds a single layer of short ribs topped with diced onion and a pour of root beer. The barbecue sauce sits on top, creating a thick, dark swirl. The raw meat is visible in places, and the onion pieces are scattered evenly. This is a messy, rustic layering—do not stir, as the layers will meld during cooking.
Slow-Cook and Tenderize
- Slow-Cook the RibsCover the slow cooker and cook on low for 6 to 8 hours, until the meat is fork-tender and nearly falling off the bone. Avoid opening the lid during the first 4 hours to keep the heat steady. Let it rest for 3 minutes before slicing.Look for The sauce bubbles gently around the edges after a few hours.Safe temperature 145°F (63°C) internal temperature (steaks, chops and roasts)Tip Low and slow is key; high heat can make the meat tough.
- Check for TendernessAfter 6 hours, test a rib with a fork. The meat should pull apart easily and show no resistance. If not tender, continue cooking in 30-minute increments until it reaches the desired texture. Let it rest for 3 minutes before slicing.Look for The meat shreds with light pressure from a fork.Safe temperature 145°F (63°C) internal temperature (steaks, chops and roasts)Tip The internal temperature should read at least 145°F (63°C), but tenderness is the real test.
After several hours, the sauce is bubbling gently around the edges and the kitchen smells sweet and smoky. The ribs have darkened and the onions have softened into the liquid.
A fork inserted into the meat meets little resistance, and the meat begins to pull away from the bone. The sauce has thickened slightly and coats the ribs with a sticky sheen.
Rest and Serve
- Rest the RibsTurn off the slow cooker and let the ribs rest in the sauce for 5 to 10 minutes. This allows the juices to redistribute and the sauce to thicken slightly.Look for The sauce settles and coats the meat.Safe temperature 145°F (63°C) internal temperature (steaks, chops and roasts)Tip Resting also makes the ribs easier to handle without breaking apart.
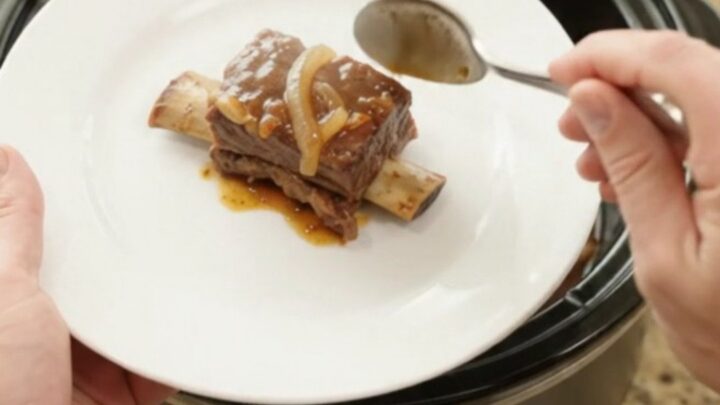
- Serve the RibsUsing a fork or tongs, carefully lift each rib from the slow cooker, letting excess sauce drip back. Place on a serving plate and spoon additional sauce and onions over the top.Look for The ribs glisten with sticky sauce and the onions are caramelized.Tip Serve with crusty bread or over mashed potatoes to soak up the sauce.
The ribs rest in the sauce, which has turned glossy and deep mahogany. When lifted, the meat holds together but is clearly tender, with sauce dripping slowly. The onions have melted into silky strands. The plate receives a single rib, glistening and steaming, with extra sauce spooned over the top.
Common mistakes
A common mistake is opening the slow cooker too often, which lets heat escape and extends cooking time. Another is using a lean cut of beef, which will turn dry instead of tender. Overcrowding the slow cooker can prevent even cooking, so leave a little space between ribs.
Skipping the rest time can cause the meat to fall apart too easily when lifted. Finally, using a thin barbecue sauce can result in a watery final dish; choose a thick, sticky variety.
How to tell it’s done
The ribs are done when the meat is fork-tender and easily pulls away from the bone, typically after 6 to 8 hours on low. To check, insert a fork into the thickest part of a rib; it should slide in with little resistance and the meat should begin to separate.
The internal temperature should read at least 145°F (63°C) for food safety, but the true test is texture. The sauce should be slightly thickened and glossy, with the onions fully softened and caramelized. Let the ribs rest briefly before serving to allow the juices to settle.
- Steaks, chops and roasts: 145°F (63°C) in the thickest part, then a 3-minute rest
Up next · Part 3 of 3
4 variations · storage & make-ahead · 5 answers · printable card
Tips, FAQ & printable recipe (Part 3)← Back to the ingredients (Part 1)