Desserts · Part 2 of 3: Instructions
Roasted Ruby Plum Galette with Almond Frangipane Step-by-step instructions
- Prep
- Cook
- Total
- Serves
- 8
Before you start
Before starting, ensure the puff pastry is thawed if frozen. Preheat the oven to 400°F (200°C) and line a baking sheet with parchment paper. Have all ingredients measured and ready.
The plums should be ripe but firm, and the marzipan white chocolate should be cold for easy grating. If making your own frangipane, prepare it in advance and keep it chilled until ready to use.
Ingredients at a glance (7)
- 1 sheet puff pastry, thawed if frozen
- 6 ripe purple plums, pitted and sliced into wedges
- 1/2 cup almond frangipane cream
- 2 oz almond marzipan white chocolate, grated
- 1/4 cup sliced almonds
- 2 tbsp honey
- 1/4 cup vanilla icing
Instructions
Preparing the Components
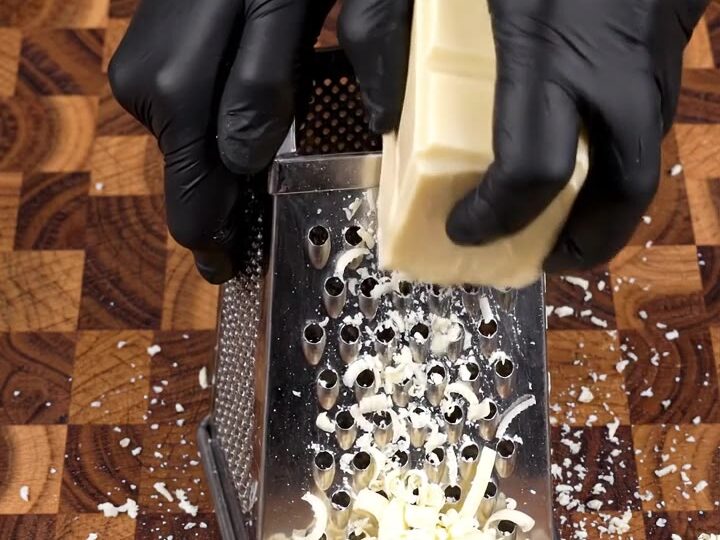
- Prep the Plums and ChocolatePreheat the oven to 400°F (200°C). Rinse the plums, cut them in half, and remove the pits. Slice each half into thin wedges, about 1/4-inch thick. Grate the almond marzipan white chocolate on a box grater into a pile of fine curls. Set both aside.Look for The plum wedges should be uniform in thickness for even roasting.Tip If the plums are very ripe, handle them gently to avoid bruising.
- Roll Out the PastryOn a lightly floured surface, roll the puff pastry sheet into a rough 12-inch circle, about 1/8-inch thick. Transfer the pastry to a parchment-lined baking sheet. Chill the pastry in the refrigerator for 10 minutes while preparing the filling.Look for The pastry should be cold and firm before filling.Tip Keep the pastry cold to ensure a flaky crust.
At this stage, the plums are sliced into even wedges, the marzipan chocolate is grated into fine curls, and the puff pastry is rolled and chilled. The pastry should be cold and firm, and the plums should be vibrant and fresh. The grated chocolate should be fluffy, not clumped. Everything is ready for assembly.
Assembling the Galette
- Spread the FrangipaneRemove the pastry from the refrigerator. Spread the almond frangipane cream evenly over the center, leaving a 2-inch border uncovered. The frangipane layer should be about 1/4-inch thick.Look for The frangipane should be spread smoothly, not too thick.Tip If the frangipane is too stiff, soften it slightly at room temperature.
- Arrange the Plum WedgesStarting from the outer edge of the frangipane, arrange the plum wedges in concentric rings, overlapping them slightly. Continue until the entire surface is covered. Scatter the grated marzipan white chocolate over the plums.Look for The plums should form a neat, overlapping pattern.Tip Overlap the wedges tightly to prevent gaps during baking.
- Fold the Pastry BorderFold the uncovered pastry border inward over the plums, pleating as needed to create a rustic crust. Press gently to seal the folds. Scatter the sliced almonds over the exposed plum filling.Look for The crust should be folded evenly, with the filling exposed in the center.Tip Don't worry about perfection—the rustic look is part of the charm.
The frangipane is spread evenly, the plum wedges are arranged in concentric rings, and the pastry border is folded over to create a rustic crust.
The sliced almonds are scattered on top. The galette looks colorful and inviting, with the pastry border neatly pleated. The filling is exposed in the center, ready for baking.
Baking and Finishing
- Bake the GaletteBake the galette in the preheated oven for 30–35 minutes, until the pastry is golden brown and the plums are tender and jammy. The frangipane should be set. Remove from the oven and let cool on the baking sheet for 5 minutes.Look for The crust is deep golden and the plums have released their juices.Tip If the edges brown too quickly, tent with foil.
- Glaze and ServeWhile the galette is still warm, brush the honey generously over the plum filling. Drizzle the vanilla icing over the top. Let the galette rest for a few minutes, then slice and serve warm.Look for The glaze should be glossy and the icing drizzled in a zigzag pattern.Tip Serve with a scoop of vanilla ice cream or a dollop of crème fraîche.
The galette has baked to a golden brown, with the plums jammy and glossy. The honey glaze and vanilla icing have been applied, giving it a beautiful shine. The aroma is buttery and fruity. The galette is ready to be sliced and served warm, with the filling set and the pastry crisp.
Common mistakes
One common mistake is overfilling the galette with too much frangipane or fruit, which can cause the pastry to become soggy. Keep the frangipane layer thin and arrange the plums in a single layer. Another pitfall is not chilling the pastry before baking, which can cause it to shrink or lose its flakiness.
Always keep the pastry cold until just before it goes into the oven. Also, be careful not to overbake, as the plums can become too dry. Check the galette at the 25-minute mark and cover the edges with foil if they are browning too quickly.
How to tell it’s done
The galette is done when the pastry is deep golden brown and puffed, and the plums are tender and have released their juices, creating a glossy, jammy appearance. The frangipane should be set and no longer jiggly. A knife inserted into the center should come out clean.
The internal temperature of the filling should be at least 165°F (74°C) if you want to be precise, though this is not a protein dish. Let the galette cool for at least 5 minutes before glazing and serving to allow the filling to set slightly.
Up next · Part 3 of 3
4 variations · storage & make-ahead · 5 answers · printable card
Tips, FAQ & printable recipe (Part 3)← Back to the ingredients (Part 1)