Appetizers · Part 2 of 3: Instructions
Bone Marrow Garlic Bread with Confit Garlic Step-by-step instructions
- Prep
- Cook
- Total
- Serves
- 4
Before you start
Before you begin, heat your oven to 450°F (230°C) and line a rimmed baking sheet with aluminum foil for easy cleanup. Take the marrow bones out of the refrigerator and let them sit at room temperature for no more than 30 minutes before roasting. Have all your ingredients measured and ready.
Cut the top off the garlic head to expose the cloves, and pick the thyme leaves from the stems if you prefer. Prepare the parsley by rinsing and drying it thoroughly. Finally, make sure your grill or grill pan is clean and hot before you start toasting the bread.
Ingredients at a glance (7)
- 2 split beef marrow bones
- 1 whole head of garlic
- 2 tbsp olive oil
- 4 sprigs fresh thyme
- 4 slices thick sourdough bread
- 1/2 tsp flaky Maldon salt
- 1/4 cup fresh parsley leaves
Instructions
Roast to bubbling
- Roast the marrow and garlicHeat the oven to 450°F (230°C). Place the split marrow bones on a rimmed baking sheet lined with foil. Cut the top off the whole garlic head to expose the cloves. Drizzle both with olive oil and scatter thyme sprigs over and around. Roast for 18 minutes until the marrow is bubbling and the garlic is soft and caramelized. Let it rest for 3 minutes before slicing.Look for The marrow should be molten and the garlic golden and jammy.Safe temperature 145°F (63°C) internal temperature (steaks, chops and roasts)Tip If the marrow bones are very large, roast a few minutes longer.
- Cool slightlyRemove the baking sheet from the oven and let it rest for 5 minutes. This brief rest allows the marrow to set just enough to handle without burning your fingers.Look for The marrow should be slightly thickened but still very soft.Tip Use tongs to handle the hot bones.
After roasting, the kitchen will smell intensely savory and garlicky. The marrow should be visibly bubbling and have a glossy, translucent appearance. The garlic cloves will be soft and caramelized, with a deep golden color.
The thyme will be fragrant and slightly crisped. The bones should be hot and sizzling. Let them rest for 5 minutes before proceeding. This is the foundation of the dish, so make sure the marrow is fully rendered and the garlic is completely tender.
Mash and grill
- Mash marrow and garlicSqueeze the roasted garlic cloves directly into the marrow canoe, the hollow of the bone. Use a fork to mash the garlic and marrow together until well combined. Sprinkle with flaky Maldon salt and stir to distribute.Look for The mixture should be a smooth, glossy paste.Tip If the marrow is too hot, let it cool another minute before mashing.
- Grill the sourdoughPlace the sourdough slices over an open flame or on a hot grill pan. Toast for 90 seconds per side until charred and crisp with grill marks. Remove from heat.Look for The bread should be deeply toasted with a smoky char.Tip If using a grill pan, work in batches to avoid crowding.
The mashed marrow and garlic should form a smooth, glossy paste with a rich, nutty aroma. The flaky salt will add a pleasant crunch. The sourdough should be toasted until it has deep char marks and a smoky scent. It should feel crisp and dry to the touch. The bread will be hot and ready to be slathered. The contrast between the warm, fatty spread and the crisp, charred bread is the heart of this dish.
Slather and finish
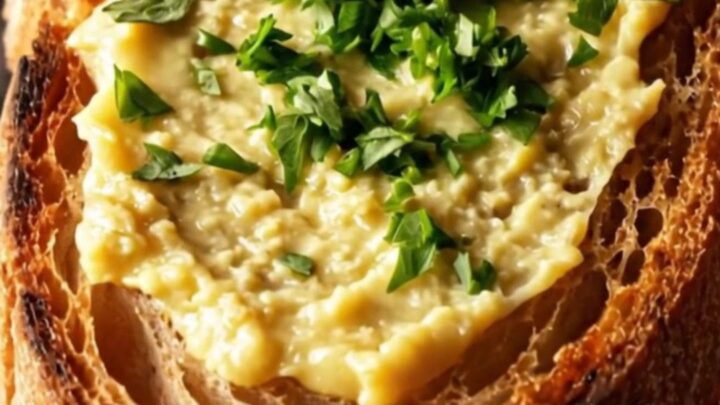
- Slather and serveSpread the marrow-garlic butter generously over each slice of grilled sourdough. Top with fresh parsley leaves. Serve immediately while the bread is crisp and the marrow is warm.Look for The butter should melt slightly into the warm bread.Tip For a more elegant presentation, slice the toast into fingers.
The final dish should look irresistible: the bread is dark and charred, topped with a golden, glistening layer of marrow-garlic butter. The fresh parsley adds a pop of green and a fresh, herbal aroma. When you take a bite, you'll hear a satisfying crunch followed by the rich, savory spread. The parsley should be bright and crisp, not wilted. Serve immediately to enjoy the full textural contrast.
Common mistakes
One common mistake is not roasting the marrow long enough. If the marrow is still firm and pale, it won't have that luscious, spreadable texture. Another is using thin bread that becomes soggy under the rich topping; choose thick, sturdy slices.
Overmashing the garlic can make it pasty, but a few small chunks are fine for texture. Also, don't skip the resting time after roasting—it allows the marrow to set slightly and makes it easier to handle. Finally, be sure to season generously with salt; the marrow and bread need it to bring out their flavors.
How to tell it’s done
The marrow is done when it is bubbling around the edges and has a soft, jelly-like consistency. The garlic is ready when the cloves are deeply golden and can be easily pierced with a knife. The internal temperature of the marrow should reach at least 145°F (63°C) for food safety.
After roasting, let the bones rest for at least 3 minutes before handling. The bread is done when it is deeply charred and crisp on both sides. The final dish should be served immediately while the bread is still crunchy and the marrow is warm and spreadable.
- Steaks, chops and roasts: 145°F (63°C) in the thickest part, then a 3-minute rest
Up next · Part 3 of 3
4 variations · storage & make-ahead · 5 answers · printable card
Tips, FAQ & printable recipe (Part 3)← Back to the ingredients (Part 1)