Desserts · Part 2 of 3: Instructions
Rich Three-Layer Chocolate Fudge Cake Step-by-step instructions
- Prep
- Cook
- Total
- Serves
- 12
Before you start
Before beginning the assembly, ensure that all three chocolate cake layers are completely cooled to room temperature. If the cake is even slightly warm, the frosting will melt and slide off the sides. Gather your offset spatula and cake stand so that everything is within reach once you start the layering process.
Having a clean, flat workspace is essential for maintaining the stability of the cake as you stack the layers. Ensure you have a sharp, thin knife or a dedicated cake server ready for the final plating, as this will help you achieve clean, beautiful slices that showcase the layers perfectly.
Ingredients at a glance (2)
- 3 count chocolate cake layers, baked and cooled
- 2 cups chocolate fudge frosting
Instructions
Base Layer Assembly
- Prepare the cake basePlace one chocolate cake layer on the center of your cake stand. Using an offset spatula, spread a thin, even layer of chocolate fudge frosting across the top surface to act as the base for the next layer.Look for Ensure the cake is level and the frosting covers the edges.Tip Use a chilled cake stand to keep the frosting firm during assembly.
The first layer should be securely positioned on the cake stand. Check that the frosting is spread evenly to the very edge of the cake, as this provides the foundation for the subsequent layers and ensures the final result is perfectly level and stable. The frosting should be smooth and free of large air bubbles, creating a solid base that will support the weight of the remaining cake layers without any risk of shifting or sliding during the assembly.
Stacking and Frosting
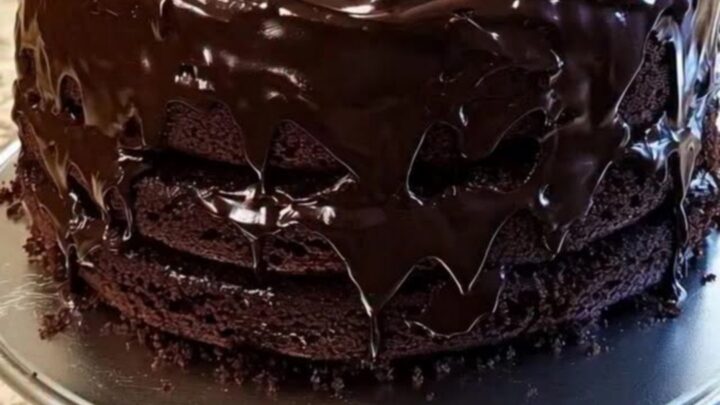
- Stack and frost the layersPlace the second cake layer directly on top of the frosted base. Repeat the frosting process, then add the final third layer. Carefully spread the remaining chocolate fudge frosting over the top and down the sides of the cake, creating a smooth, glossy, and uniform finish.Look for The frosting should appear smooth with a slight sheen.Tip Clean your offset spatula frequently to maintain a smooth look.
As you stack the final layers, verify that they are aligned vertically. The frosting on the sides should be smooth and free of large gaps. The final appearance should be uniform, with the glossy frosting providing a professional look that invites immediate enjoyment.
Check that the frosting covers the sides completely, filling in any gaps between the layers to create a seamless, cohesive appearance that highlights the rich, dark color of the chocolate fudge frosting.
Final Plating
- Serve the cakeAllow the frosted cake to set in a cool area for twenty minutes before slicing. Use a sharp cake server to cut a tall, moist slice, ensuring you capture all three layers. Transfer the slice to a dessert plate and serve immediately. Ensure that any custard-based components within the cake are cooked to an internal temperature of 160°F (71°C) to ensure safety.Look for The slice should hold its shape when lifted.Safe temperature 160°F (71°C) internal temperature (egg dishes)Tip Dip your knife in warm water and wipe it dry for clean slices.
The cake is ready once the structure feels firm and the frosting has achieved a set, glossy finish. When you lift a slice, it should remain intact, showing the distinct layers. The texture should be moist and the flavor profile rich, consistent with a high-quality fudge cake. Ensure that the slice is transferred carefully to a dessert plate, maintaining the integrity of the layers and the smooth finish of the frosting for an elegant presentation.
Common mistakes
A common mistake is rushing the cooling process; warm cake will ruin the texture of the frosting. Another error is applying too much pressure while spreading, which can tear the delicate cake crumb. Always work with a light hand to maintain the integrity of the layers.
Avoid over-frosting the edges, as this can lead to messy drips that detract from the clean, professional look of the cake. Finally, ensure that your cake layers are level before you begin stacking; uneven layers can cause the entire structure to lean, making it difficult to achieve a uniform finish on the sides.
How to tell it’s done
The cake is ready to serve once the frosting has set, which typically takes about twenty minutes at room temperature. The cake should be stable and the frosting should appear glossy and firm to the touch, indicating it is ready to be sliced cleanly without losing its structure.
If you are using any components that contain eggs, ensure they have reached an internal temperature of at least 160°F (71°C) during the initial baking process to ensure safety. The final slice should hold its shape, with the frosting remaining intact against the moist crumb of the cake layers.
- Egg dishes: 160°F (71°C) in the thickest part
Up next · Part 3 of 3
2 variations · storage & make-ahead · 3 answers · printable card
Tips, FAQ & printable recipe (Part 3)← Back to the ingredients (Part 1)