Desserts · Part 2 of 3: Instructions
Rich Chocolate Marshmallow Layered Dessert Step-by-step instructions
- Prep
- Cook
- Total
- Serves
- 12
Before you start
Before beginning, ensure all necessary ingredients are measured and ready on the counter. Preheat the oven to the required temperature to allow it to stabilize. Grease the baking dish thoroughly with butter or non-stick spray, paying special attention to the corners to ensure easy removal.
Prepare the melted chocolate for the final drizzle by placing it in a heat-proof bowl and melting it gently over a saucepan of simmering water or in the microwave in short intervals.
Ingredients at a glance (3)
- 2 cups chocolate brownie or cake mix, prepared
- 3 cups mini marshmallows
- 1/4 cup melted chocolate, for drizzle
Instructions
Base preparation
- Prepare the basePreheat the oven to 350°F (175°C). Prepare the chocolate brownie mix according to the package instructions using the required eggs, oil, and water. Pour the batter into a greased 9x13 inch glass baking dish, spreading it evenly to the corners.Look for The batter should be spread into a smooth, even layer in the baking dish.Safe temperature 160°F (71°C) internal temperature (egg dishes)Tip Ensure the baking dish is well-greased so the final slices lift out cleanly without sticking.
The batter should be thick, glossy, and uniform in color. Check that there are no dry pockets of mix remaining in the bowl. Once poured, the surface should be perfectly level and spread to the very edges of the baking dish to ensure even thickness across the entire dessert.
Marshmallow topping
- Bake and add marshmallowsBake the brownie base for 15 minutes. Remove the dish from the oven and scatter the mini marshmallows generously over the top of the partially baked brownie. Return the dish to the oven for an additional 5 minutes until the marshmallows are puffed and soft.Look for The marshmallows should look soft, slightly melted, and golden brown on top.Tip Do not overbake the marshmallows, or they will lose their signature fluffy texture.
The marshmallows should be distributed in a single, even layer covering the entire surface of the brownie.
After the second baking phase, they should look soft and slightly expanded, with a uniform golden hue on the top. Avoid any areas where the marshmallows look burnt or excessively dark.
Cooling and finishing
- Cool and drizzleRemove the dessert from the oven and allow it to cool completely on a wire rack for at least one hour. Once cooled, drizzle the melted chocolate over the marshmallow layer using a spoon or piping bag. Slice into squares and serve immediately.Look for The chocolate drizzle should be set and the dessert should be firm enough to slice cleanly.Tip For the cleanest slices, chill the pan in the refrigerator for 30 minutes before cutting.
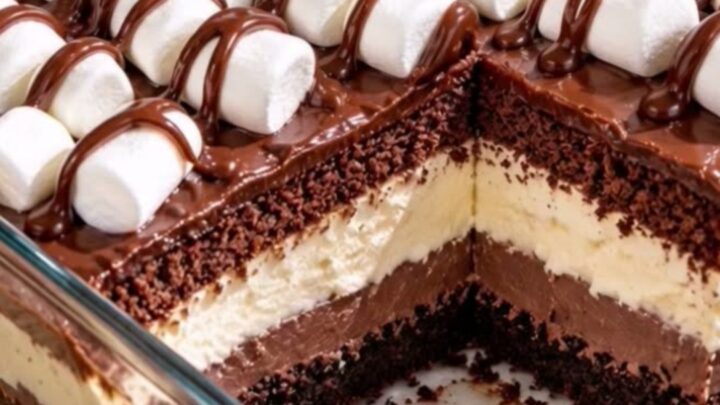
The dessert must be completely cool to the touch before the final chocolate drizzle is applied. The texture should feel firm and stable when touched. The final drizzle should be smooth and glossy, creating a striking contrast against the pale marshmallows and the dark chocolate base below.
Common mistakes
A common mistake is failing to allow the brownie base to cool sufficiently before drizzling the chocolate, which causes the topping to melt into the marshmallows rather than sitting on top.
Another error is overbaking the marshmallows, leading to a chewy, tough texture instead of a soft, pillowy one. Ensure the oven is fully preheated to avoid uneven rising and baking of the brownie layer.
How to tell it’s done
The dessert is done when the brownie base is set and a toothpick inserted into the center comes out with a few moist crumbs attached, indicating it is not overbaked.
The marshmallows should be soft, puffed, and lightly toasted on the surface. The internal temperature of the egg-based brownie must reach 160°F (71°C) to be safely cooked through before cooling.
- Egg dishes: 160°F (71°C) in the thickest part
Up next · Part 3 of 3
2 variations · storage & make-ahead · 3 answers · printable card
Tips, FAQ & printable recipe (Part 3)← Back to the ingredients (Part 1)