Desserts · Part 1 of 3: Ingredients
Rich Chocolate Icebox Cake for Easy Entertaining
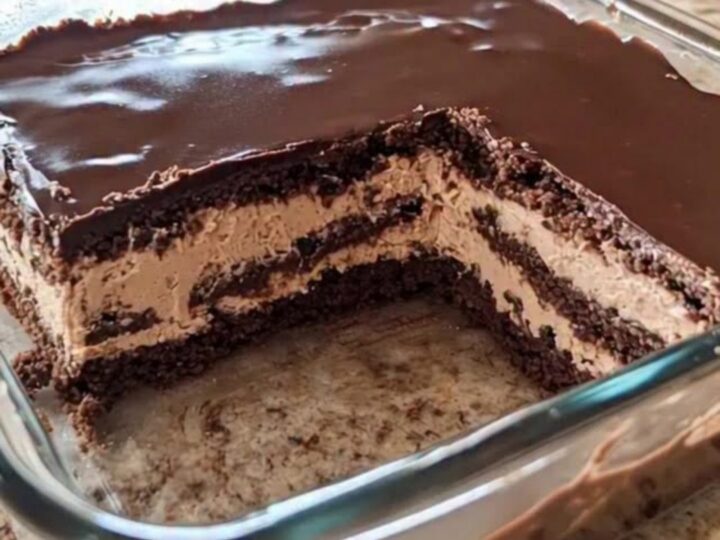
- Prep
- Cook
- Total
- Serves
- 8
Indulge in the velvety, rich layers of a classic chocolate icebox cake. This no-bake dessert relies on the magic of time, allowing crisp wafers to transform into a soft, cake-like texture while soaking up the luscious chocolate mousse.
It is an elegant, fuss-free solution for any dinner party or celebration, requiring minimal effort but offering maximum impact. Prepare it in advance to ensure the flavors meld perfectly, creating a sophisticated treat that consistently impresses guests with its deep chocolate profile and smooth, creamy finish.
The chocolate icebox cake is a timeless refrigerator dessert that excels in simplicity and texture. By layering thin chocolate wafers with airy chocolate mousse, you create a structure that softens over time into a cohesive, sliceable cake.
The addition of a warm, glossy ganache topping provides a final touch of richness, sealing the dessert with a professional, mirror-like sheen. This recipe is designed for ease, utilizing simple assembly techniques to achieve a complex, multi-layered result that is as visually appealing as it is delicious, making it an essential addition to any dessert repertoire.
Ingredients
Layers
- 1 package chocolate wafer cookies
- 2 cups chocolate mousse, store-bought or made ahead
Topping
- 1 cup chocolate ganache, store-bought or made ahead
Why this recipe works
The method of layering cookies with a creamy filling works because the moisture from the mousse is absorbed by the wafers over several hours. This process, known as osmosis, softens the cookies while maintaining their structural integrity, resulting in a cake-like consistency without the need for baking.
The choice of thin, crisp cookies is critical, as they provide the best surface area for moisture absorption while maintaining a distinct layer that contrasts beautifully with the smooth mousse.
Using a glass baking dish allows for the visual display of the layers, which is a hallmark of this dessert. The cold temperature of the refrigerator is essential for setting the mousse and ganache, ensuring that the cake remains stable when served.
This gradual chilling process also allows the flavors to mature, resulting in a more intense chocolate experience. The final ganache layer acts as a moisture barrier and adds a luxurious mouthfeel that balances the texture of the softened wafers.
Notes and substitutions
Choose high-quality chocolate wafers for the best flavor, as they provide the foundation for the entire dish. If chocolate wafers are unavailable, thin crisp ginger snaps or high-quality chocolate graham crackers can be used, though they will slightly alter the final flavor profile. Ensure the chocolate mousse is chilled to a spreadable consistency before beginning the assembly process to prevent the layers from sliding or mixing prematurely during the stacking stage.
An offset spatula is the preferred tool for spreading the mousse and ganache because it provides superior control, allowing for a perfectly level surface. If you do not have an offset spatula, the back of a large spoon can be used, provided it is cleaned frequently to maintain a smooth finish. The glass baking dish is recommended for its transparency, which helps in monitoring the progress of the layers during assembly and ensuring the final presentation is visually striking.
- chocolate wafer cookies: graham crackers or thin butter cookies
- chocolate mousse: whipped chocolate ganache or stabilized whipped cream
Equipment
- 8-inch square glass baking dish
- offset spatula
- spoon
Up next · Part 2 of 3
3 steps · 10 min of cooking · what to look for at each stage
Step-by-step instructions (Part 2)