Desserts · Part 2 of 3: Instructions
Rich and Crunchy Chocolate Biscuit Cake Step-by-step instructions
- Prep
- Cook
- Total
- Serves
- 12
Before you start
Before beginning the preparation, ensure all ingredients are measured and ready. The chocolate should be chopped into uniform pieces to promote even melting. Line the cake pan with parchment paper, allowing enough paper to extend over the edges for easy lifting later.
Have a sturdy spatula ready for mixing and pressing the mixture into the pan. If the kitchen is warm, consider clearing space in the refrigerator for the cake to set immediately after assembly to ensure it chills effectively without delay.
Ingredients at a glance (2)
- 8 oz tea biscuits, broken into small pieces
- 14 oz semisweet chocolate, chopped
Instructions
Preparation of Ingredients
- Prepare the BaseLine an 8-inch square cake pan with parchment paper, leaving an overhang on the sides for easy removal. Break the tea biscuits into small, bite-sized pieces by hand or by placing them in a bag and crushing them lightly. Set the broken biscuit pieces aside in a large mixing bowl while preparing the chocolate fudge mixture.Look for The biscuits should be broken into uneven, bite-sized chunks.Tip Keep the pieces varied in size to ensure a nice texture.
At the end of this phase, the tea biscuits are broken into appropriately sized pieces and the cake pan is prepared with parchment paper. The biscuits should be in a large bowl, ready for the chocolate mixture.
All ingredients should be measured accurately, and the workstation should be clean, ensuring a smooth transition into the melting process. Check that the parchment paper is positioned correctly to avoid any issues when transferring the final mixture to the pan later.
Melting the Chocolate Fudge
- Create the Chocolate FudgeCombine the chopped semisweet chocolate in a heatproof bowl set over a saucepan of simmering water. Stir the mixture gently and continuously until the chocolate is fully melted and the mixture is smooth and glossy. Ensure no water splashes into the chocolate mixture to prevent seizing. Remove from heat immediately once perfectly smooth.Look for The mixture should be glossy, smooth, and fully melted.Tip Use a low heat setting to avoid burning the chocolate.
The chocolate is melted into a perfectly smooth, glossy fudge. The mixture should be uniform in color and texture, with no visible lumps of unmelted chocolate. It is crucial that the mixture is removed from the heat immediately once it reaches this stage to prevent the chocolate from seizing. Verify that no steam or water has entered the bowl during the process, maintaining the integrity of the fudge for the final assembly.
Assembly and Chilling
- Assemble and ChillPour the warm melted chocolate over the prepared biscuit pieces in the mixing bowl. Stir thoroughly until every biscuit piece is evenly coated with the thick chocolate fudge. Transfer the mixture into the prepared cake pan and press it down firmly with a spatula to create an even, compact layer. Refrigerate the cake for at least two hours until completely set before slicing into squares.Look for The cake is firm to the touch after chilling.Tip Level the top with a spatula for a professional finish.
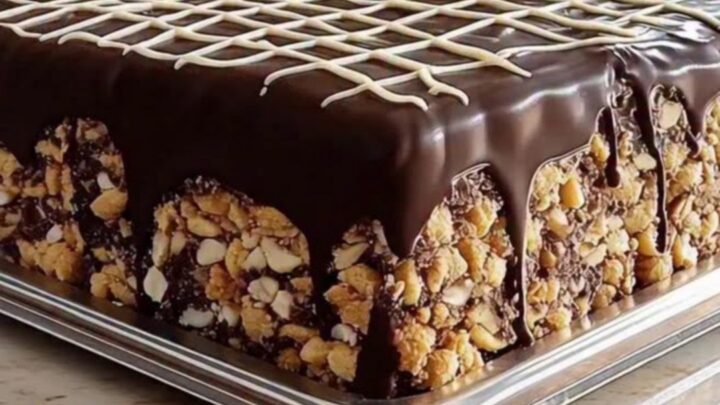
The biscuit pieces are thoroughly coated in the chocolate fudge and pressed firmly into the pan to create a compact, even layer. The surface should look smooth and uniform. After the chilling period, the cake will be firm to the touch and ready to be sliced. Verify that the cake has set completely throughout by pressing the center; it should feel solid and cold. Once set, the cake can be lifted from the pan using the parchment paper overhang.
Common mistakes
A common mistake is overheating the chocolate, which can cause the fats to separate and lead to a greasy or gritty texture. Always use gentle, indirect heat and stir constantly.
Another error is failing to press the mixture firmly enough into the pan, which can result in a crumbly cake that falls apart upon slicing. Ensure the biscuits are broken into pieces that are not too small, as larger chunks provide the characteristic crunch and visual appeal that make this dessert so distinctive.
How to tell it’s done
The cake is considered done when the chocolate mixture has fully set and feels firm when pressed gently with a finger. It should not feel tacky or soft in the center. Once chilled for the required time, the surface will be smooth, glossy, and hold its shape perfectly.
Use a sharp knife or a pie server to slice the cake into squares, ensuring the blade is clean to achieve crisp edges that show off the beautiful internal layers of biscuits and chocolate.
Up next · Part 3 of 3
2 variations · storage & make-ahead · 3 answers · printable card
Tips, FAQ & printable recipe (Part 3)← Back to the ingredients (Part 1)