Desserts · Part 2 of 3: Instructions
Raspberry Jam Oat Crumble Bars Step-by-step instructions
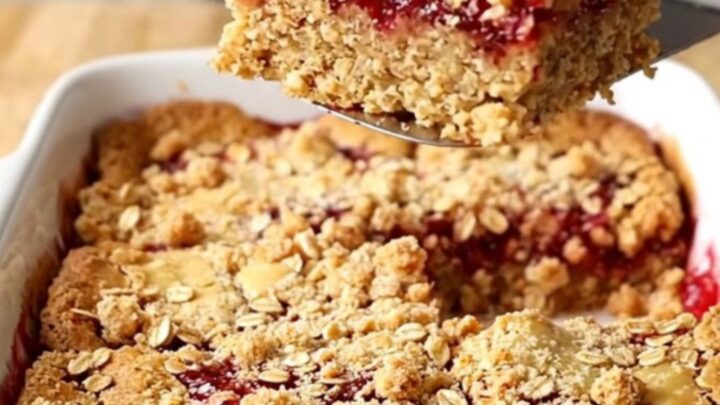
- Prep
- Cook
- Total
- Serves
- 12
Before you start
Before beginning, ensure your oven is preheated to 350°F (175°C) so it is ready when the assembly is finished. Ensure the baking dish is clean and dry; there is no need to grease the dish as the natural oils in the oat mixture prevent sticking.
Having all ingredients measured before starting will streamline the assembly process and ensure the crust is pressed while the mixture is fresh and workable.
Ingredients at a glance (2)
- 3 cups oat crumbs
- 1 1/2 cups raspberry jam
Instructions
Crust preparation
- Prepare the basePress two-thirds of the oat crumbs firmly into the bottom of a 9x13-inch baking dish to form a solid, even base for the bars.Look for The crust should be firm and cover the entire bottom of the baking dish without any gaps.Tip Using the back of a measuring cup helps to press the crust down firmly and evenly.
The mixture should look like coarse, buttery crumbs. When you squeeze a small amount in your hand, it should hold together without feeling overly greasy. The pressed crust should cover the entire bottom of the baking dish, creating a flat and uniform surface that is ready to receive the jam layer without any gaps or holes.
Layering and baking
- Layer and bakeSpread the raspberry jam evenly over the pressed oat crust. Sprinkle the remaining oat crumbs over the top of the jam. Bake in a preheated oven at 350°F (175°C) for 30 minutes, or until the top is golden brown and the jam is bubbling at the edges.Look for The edges of the jam should look bubbly and the crumble topping should have a deep golden color.Tip Ensure the jam is spread to the edges to get a consistent flavor in every bite.
The jam should be spread to within a quarter-inch of the edges to prevent burning, while the top layer of crumbs should be scattered unevenly to create texture.
Upon removing from the oven, the bars should be golden and fragrant. The jam should have turned a vibrant, deep red and be actively bubbling, indicating the sugars have concentrated.
Cooling and setting
- Cool and serveRemove the baking dish from the oven and allow the bars to cool completely in the dish for at least 20 minutes before cutting into neat squares. This cooling period is essential to ensure the jam sets properly and the bars hold their shape when lifted.Look for The bars are ready when they feel firm to the touch and the jam has thickened.Tip Cooling in the refrigerator for an extra hour makes cutting even cleaner and easier.
The bars must be completely cool before you attempt to slice them. If you cut into them while they are still hot, the jam will be too fluid and the bars will lose their shape. A properly cooled bar will have a firm, set center and a crispy top that stays intact when lifted from the dish with a spatula.
Common mistakes
A common mistake is using jam that is too runny, which can lead to a messy bar that does not hold its shape. Always use a thick fruit preserve or jam for the best structural results.
Another error is failing to press the bottom crust firmly enough, which results in a crumbly base that falls apart when sliced. Take the time to ensure the base is packed tightly into the corners of the pan for clean, professional-looking squares every time.
How to tell it’s done
The bars are done when the top crumble is a uniform golden brown and the raspberry jam filling is visibly bubbling at the edges of the pan. Do not rely solely on the timer; visual cues are the most accurate indicator of success.
The center should feel firm when gently pressed with a spatula, indicating that the oats have set. If the top begins to brown too quickly before the jam is bubbling, loosely tent the dish with aluminum foil.
Up next · Part 3 of 3
2 variations · storage & make-ahead · 3 answers · printable card
Tips, FAQ & printable recipe (Part 3)← Back to the ingredients (Part 1)