Desserts · Part 2 of 3: Instructions
Raspberry Almond Nougat White Chocolate Bars: No-Bake, Crisp and Easy to Cut Step-by-step instructions
- Prep
- Cook
- Total
- Serves
- 16
Before you start
Gather everything before you start, because the base comes together quickly once the cream is hot. Chill the white chocolate block for about 10 minutes so it grates cleanly into soft curls rather than smearing. Set out the wooden board, the chef's knife, the box grater and a mixing bowl.
Line the baking tray or square pan with parchment, leaving some overhang on the sides so you can lift the slab out later. Pat the fresh raspberries dry with paper towels, measure the almonds, caramel and white chocolate chunks, and have the raspberry sauce open and ready for swirling. Keep the sliced almonds in a small dish near the tray so you can scatter them before the base starts to firm.
Ingredients at a glance (8)
- 1 cup whole almonds, toasted and chopped
- 1/2 cup soft caramel pieces, chopped
- 4 oz white chocolate chunks, chopped
- 1 cup fresh raspberries, chopped
- 8 oz white chocolate block, for grating
- 1 cup heavy cream
- 1/2 cup raspberry sauce (store-bought or made ahead)
- 1/4 cup sliced almonds, for scattering
Instructions
Chop and grate everything
- Chop the nougat mix-insChop the almonds, caramel pieces, white chocolate chunks and fresh raspberries on a wooden board with a chef's knife. Keep the pieces roughly even in size so every bar gets a balanced bite of each one.Look for Pieces should be roughly even, with raspberries cut into neat chunks and no large clumps left.Tip Pat the raspberries dry first so they do not release extra juice into the base.
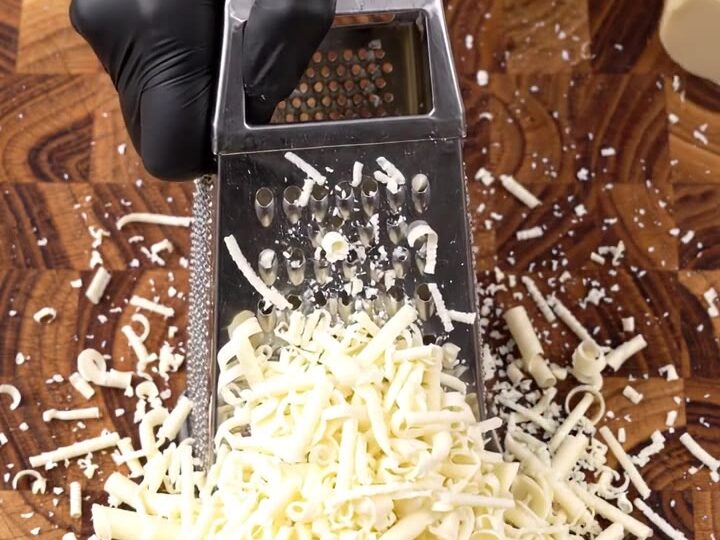
- Grate the white chocolateGrate the white chocolate block on a box grater, using the large holes, until it forms soft curls and shavings. Set the shavings aside in a bowl so they stay cool and loose.Look for The grater should produce soft curls and fine shavings that fall loosely.Tip Chill the block for 10 minutes first to make grating cleaner and easier.
Your mix-ins should be chopped into roughly even pieces, with the raspberries cut into neat chunks and no large clumps left on the board. The white chocolate block should now be a bowl of soft curls and fine shavings that fall loosely from the grater. Nothing should look smeared or melted at this point, and the cold chocolate should feel firm to the touch.
Check that every ingredient for the nougat base is cut and ready before you warm the cream, because the base needs to be folded together promptly and without pauses. If any chunk is too large to fold easily, chop it smaller now. A tidy workspace at this stage makes the next steps far less hurried and keeps the texture even from start to finish.
Build the creamy white base
- Make the creamy white baseHeat the heavy cream in a small saucepan over medium heat until it is steaming, but not boiling. Pour it over the grated white chocolate, let it sit for one minute, then fold gently until smooth and glossy.Look for The mixture should look smooth, glossy and evenly melted with no streaks.Tip Stir gently and steadily so the base stays silky rather than grainy.
- Fold in the mix-insFold the chopped almonds, caramel pieces, white chocolate chunks and raspberries into the creamy white base until evenly distributed. Work quickly so the mixture stays spreadable.Look for Every spoonful should show almond pieces, caramel flecks and raspberry bits.Tip Fold with a spatula from the bottom of the bowl to keep the mix-ins intact.
- Spread and swirl the raspberry sauceLine a baking tray or square pan with parchment and spread the mixture evenly across it. Spoon the raspberry sauce over the surface and drag a knife through it in long ribbons, then scatter the sliced almonds on top.Look for Bright red ribbons should run through the pale surface in visible swirls.Tip Use only two or three passes with the knife so the ribbons stay distinct.
The cream should be steaming gently and not bubbling, and once poured over the grated white chocolate it should melt the shavings into a smooth, glossy base. Stir slowly until there are no streaks or lumps. The base should look even and pale, with a thick but spreadable texture.
Before you fold in the mix-ins, lift the spatula and let a little of the mixture fall back into the bowl: it should drop in a smooth, unbroken ribbon. If you see grainy flecks, stir a little longer over very gentle heat, and stop as soon as the mixture is uniform. Then fold the chopped almonds, caramel, white chocolate chunks and raspberries through the base until they are evenly spread.
Spread, swirl and set
- Set and press the slabRefrigerate the tray for at least 2 hours until the mixture is a firm slab. Press the surface gently with the back of a spatula to even it out, then lift the parchment out of the pan.Look for The surface should feel firm and the slab should hold its shape when lifted.Tip Chill the tray flat so the slab sets evenly without cracks.
- Cut into neat barsUsing a sharp chef's knife, cut the firm slab into neat rectangular bars. Wipe the blade between cuts to keep the edges clean and the raspberry ribbons visible.Look for Cut edges should look clean, with pale white chocolate and red raspberry flecks visible.Tip Warm the knife slightly under hot water and dry it before each cut for sharper edges.
The mixture should now be spread evenly across the parchment-lined tray, with the mix-ins visible in every area and the surface reasonably flat. The raspberry sauce should be swirled over the top in bright red ribbons that contrast clearly with the pale base, and the sliced almonds should cover the surface in a single even layer.
Refrigerate the tray flat until the slab feels firm when pressed gently with a fingertip, which usually takes at least two hours. The slab should hold its shape when lifted by the parchment and should look set and matte. If the surface still looks soft or the ribbons have blurred, give it more time in the refrigerator before pressing and cutting.
Common mistakes
Take your time with each step, and the result will be worth every minute spent in the kitchen. Keep all tools and bowls close at hand on the counter so the cooking flow stays calm, clean and steady from start to finish.
How to tell it’s done
Take your time with each step, and the result will be worth every minute spent in the kitchen. Keep all tools and bowls close at hand on the counter so the cooking flow stays calm, clean and steady from start to finish.
Up next · Part 3 of 3
4 variations · storage & make-ahead · 5 answers · printable card
Tips, FAQ & printable recipe (Part 3)← Back to the ingredients (Part 1)