Desserts · Part 2 of 3: Instructions
Quick No-Bake Chocolate Mousse Cake with Cocoa Dusting Step-by-step instructions
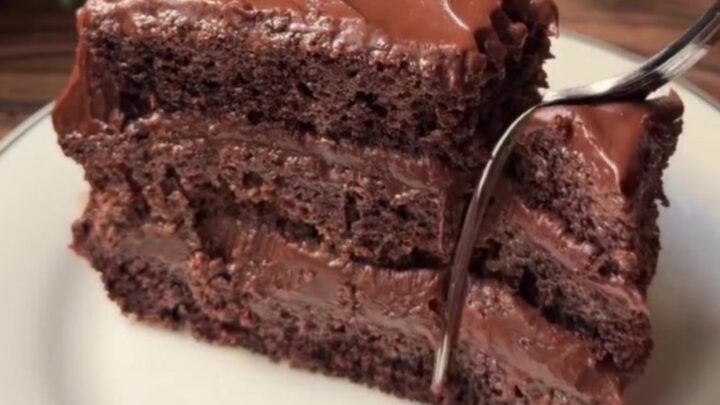
- Prep
- Cook
- Total
- Serves
- 8
Before you start
Before starting, ensure you have a springform pan ready. If using a homemade biscuit base, prepare it and press it into the pan, then chill it while you make the filling. Measure all ingredients accurately.
Chop the chocolate into small, uniform pieces so they melt evenly. Have your whisk, saucepan, and offset spatula ready. The chilling time is essential, so allow at least 4 hours before serving.
Ingredients at a glance (7)
- 1/2 cup milk
- 2 tbsp sugar
- 1 tbsp heaping cornstarch
- 1 1/2 cups heavy cream
- 200 g chopped milk and dark chocolate
- biscuit base (store-bought or made ahead), to taste
- unsweetened cocoa powder, for dusting, to taste
Instructions
Thicken the Custard
- Whisk the milk mixtureIn a saucepan, combine the milk, sugar, and cornstarch. Whisk until the cornstarch is fully dissolved and no lumps remain. Place the saucepan over medium heat.Look for The mixture should be smooth and slightly frothy before heating.Tip Whisk continuously to prevent the cornstarch from clumping.
- Thicken the mixtureCook over medium heat, whisking constantly, until the mixture thickens and comes to a gentle simmer. It should coat the back of a spoon.Look for The mixture will turn from thin to pudding-like and start to bubble.Tip Keep whisking to avoid scorching the bottom.
The milk mixture should be smooth and thickened, clinging to the whisk. It will have a pudding-like consistency and just begin to bubble.
Stir constantly to avoid scorching. Once it coats the back of a spoon, it's ready for the next step.
Melt the Chocolate
- Add the creamRemove the saucepan from the heat. Stir in the heavy cream until fully incorporated. The mixture should be smooth and creamy.Look for The mixture will thin out slightly with the cream, then become uniform.Tip Use a spatula to scrape the sides and ensure everything is combined.
- Melt the chocolateAdd the chopped milk and dark chocolate to the hot cream mixture. Stir gently until the chocolate is completely melted and the mixture is glossy and silky.Look for The chocolate should melt smoothly without any lumps.Tip If needed, return to low heat briefly, but do not boil.
The cream mixture will be warm and silky. As you stir in the chocolate, it will turn glossy and deeply brown. All chocolate should be fully melted, with no lumps. The mixture should be uniform and velvety.
Chill and Finish
- Pour over the biscuit basePour the warm chocolate custard cream over the prepared biscuit base in the springform pan. Use an offset spatula to smooth the top evenly.Look for The top should be level and the cream should spread to the edges.Tip Tap the pan gently on the counter to release air bubbles.
- Chill until setRefrigerate the cake for at least 4 hours, or until the mousse is firmly set. The texture should be firm but still creamy.Look for The surface should be set and not wobble when gently shaken.Tip Chill uncovered for the first hour, then cover to prevent condensation.
- Dust and serveJust before serving, dust the top generously with unsweetened cocoa powder. Slice with a sharp knife and serve cold.Look for The cocoa creates a rich, dark finish.Tip Warm the knife under hot water and wipe dry for clean slices.
The poured mousse should be smooth and level. After chilling, it will be firm to the touch and sliceable. The cocoa dusting should create a thick, even layer. The cake should release cleanly from the pan.
Common mistakes
One common mistake is overheating the milk mixture, which can cause the cornstarch to clump. Whisk constantly and remove from heat as soon as it thickens. Another is adding the chocolate too quickly; stir gently to allow it to melt slowly.
If the chocolate seizes, it may be due to moisture; try adding a splash of warm cream. Ensure the cake is fully chilled before slicing to avoid messy cuts.
How to tell it’s done
The mousse cake is done when the top is set and no longer jiggles when the pan is gently shaken. The texture should be firm but still creamy, and a knife inserted into the center should come out clean.
The chocolate should be fully set and sliceable. If the cake is too soft, refrigerate for an additional hour. The cocoa powder dusting is added just before serving to keep it fresh and vibrant.
Up next · Part 3 of 3
4 variations · storage & make-ahead · 5 answers · printable card
Tips, FAQ & printable recipe (Part 3)← Back to the ingredients (Part 1)