Dinner · Part 2 of 3: Instructions
Quick Grated Onion Mini Meatballs with Garlic Yogurt Step-by-step instructions
- Prep
- Cook
- Total
- Serves
- 4
Before you start
Before starting, set up your workspace: have a large bowl for the meat mixture, a box grater, a baking sheet lined with parchment paper, and a shallow bowl for flour and another for cold water.
Bring a large pot of salted water to a boil just before you begin coating the meatballs. Measure out all ingredients and keep the meat mixture chilled until ready to shape. The 30-minute chill time is crucial for firming the meatballs, so plan accordingly.
Ingredients at a glance (10)
- 300 g ground beef
- 1 grated onion
- 2 tbsp minced fresh parsley
- 1 tsp salt
- 1/2 tsp black pepper
- 1 cup all-purpose flour
- 1 cup cold water
- 1 cup thick garlic yogurt
- 2 tbsp butter
- 1 tsp hot red pepper flakes
Instructions
Prepare the Meatballs
- Make the Meat MixtureIn a large bowl, combine the ground beef, grated onion, minced parsley, salt, and black pepper. Use your hands to knead the mixture for 2 to 3 minutes until it becomes smooth and pliable. The grated onion releases moisture that helps bind the meat, so keep kneading until everything is evenly distributed and the mixture holds together when pressed.Look for The mixture should be cohesive and slightly sticky but not wet.Tip Grate the onion directly over the bowl to catch all the juices.
- Shape the Mini MeatballsRoll the meat mixture into tiny, chickpea-sized meatballs, about 1/2 inch in diameter. Place them on a baking sheet in a single layer. You should get about 40 to 50 mini meatballs. Once all are shaped, refrigerate the tray for 30 minutes to let them firm up, which makes them easier to coat and prevents them from falling apart during boiling.Look for The meatballs should be uniform and hold their shape when rolled.Tip Wet your hands slightly to prevent sticking while rolling.
After mixing, the meat should be smooth and hold together when pressed. The shaped meatballs should be uniform and firm after chilling. They should not stick to your hands or the tray, and they should be ready for coating without falling apart.
Coat and Boil
- Coat the MeatballsPlace the flour in a shallow bowl and the cold water in another bowl. Working in batches, dredge the chilled meatballs in the flour, shaking off any excess. Dip them briefly into the cold water, then roll them in the flour again. Repeat this process four times total for each meatball to build a thin, even dumpling skin. Set the coated meatballs on a clean plate.Look for Each meatball should have a thin, even flour coating that feels dry to the touch.Tip Work quickly to keep the coating from becoming gummy.
- Boil the DumplingsBring a large pot of salted water to a rapid boil. Carefully drop the coated meatballs into the boiling water in batches, making sure not to overcrowd the pot. Cook for 5 minutes, or until the meatballs float to the surface and the coating is tender. Use a slotted spoon to transfer the cooked dumplings to a plate.Look for The dumplings will float and the coating will look slightly translucent and tender.Safe temperature 160°F (71°C) internal temperature (ground meat)Tip Keep the water at a rolling boil to ensure even cooking.
The coated meatballs should have a dry, powdery surface from the flour. As they boil, the coating will turn from white to slightly translucent, and the meatballs will float to the top.
The water should be gently boiling, and the dumplings should look plump and tender.
Finish and Serve
- Make the Chili ButterIn a small skillet, melt the butter over medium heat. Add the hot red pepper flakes and stir for 30 seconds until fragrant and the butter is bubbling. Remove from heat and set aside.Look for The butter should be sizzling and the pepper flakes should be fragrant.Tip Keep an eye on the butter so it doesn't brown too much.
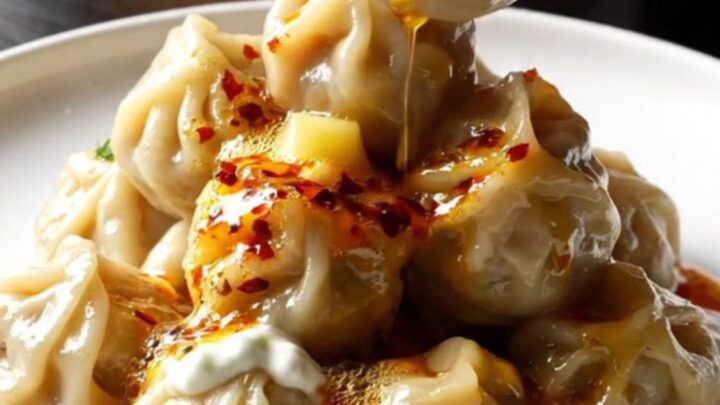
- Assemble and ServeSpoon the thick garlic yogurt over the cooked dumplings on a serving plate. Drizzle with the hot chili butter, making sure to include some of the red pepper flakes. Serve immediately while warm.Look for The yogurt should be thick and creamy, and the chili butter should sizzle on contact.Tip For extra freshness, sprinkle with a little chopped parsley before serving.
The yogurt should be thick and creamy, and the chili butter should be sizzling when drizzled. The dish should look vibrant with the white yogurt, red chili flakes, and golden butter. Serve immediately to enjoy the contrast of temperatures and textures.
Common mistakes
One common mistake is overworking the meat mixture, which can make the meatballs dense. Knead just until combined. Another is skipping the chilling step—without it, the meatballs may fall apart during coating or boiling.
Also, avoid overcrowding the pot; cook in batches to keep the water at a rolling boil. Finally, don't skip the four-layer coating; it's essential for the dumpling skin texture.
How to tell it’s done
The dumplings are done when they float to the surface and have cooked for a full 5 minutes. The coating will look slightly translucent and tender, and the meat inside should reach an internal temperature of 160°F (71°C).
To be sure, cut one open—the meat should be evenly browned with no pink remaining. The yogurt topping is ready as is, and the chili butter should be bubbling and fragrant.
- Ground meat: 160°F (71°C) in the thickest part
Up next · Part 3 of 3
4 variations · storage & make-ahead · 5 answers · printable card
Tips, FAQ & printable recipe (Part 3)← Back to the ingredients (Part 1)