Dinner · Part 2 of 3: Instructions
Quick Chicken and Cabbage Stir Fry with Chili Glaze Step-by-step instructions
- Prep
- Cook
- Total
- Serves
- 2
Before you start
Before beginning, ensure all ingredients are chopped, measured, and placed within arm's reach of the stove. Stir frying is an extremely fast process, often lasting only a few minutes, which leaves no time for prep work once the heat is on.
Prepare a small bowl for the chili glaze so it is ready to be poured at the right moment. Having everything organized allows you to focus on the heat management and timing required to achieve that perfect sear.
Ingredients at a glance (4)
- 1 lb chicken breast, thinly sliced
- 1/2 head green cabbage, shredded
- 1/4 cup savory chili glaze
- 2 tbsp chopped scallions
Instructions
Prep and Mise en Place
- Prepare the ingredientsThinly slice the chicken into bite-sized strips. Shred the cabbage into thin ribbons and chop the scallions. Ensure all ingredients are ready before heating the wok, as the cooking process moves very quickly.Look for Chicken should be uniform in size for even cooking.Tip Slice chicken against the grain for maximum tenderness.
All ingredients should be sliced to uniform sizes and set near the stove. The kitchen should be well-ventilated, as the high-heat searing will produce smoke. Check that the cabbage is dry after washing, as excess water will cause steaming rather than the desired char, which would compromise the texture and overall flavor of the final dish.
High Heat Searing
- Sear the chicken and vegetablesHeat a wok over high heat until smoking. Add the chicken strips and sear until browned on all sides. Add the cabbage and toss vigorously until the cabbage is wilted but retains a slight crispness.Look for The wok should be smoking hot to achieve a good sear.Safe temperature 165°F (74°C) internal temperature (poultry)Tip Do not overcrowd the pan to ensure the ingredients sear rather than steam.
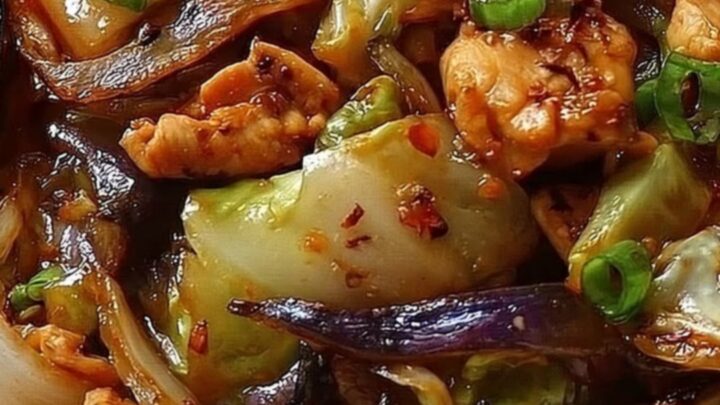
The chicken and cabbage should be sizzling loudly in the wok. The chicken pieces should have visible browning on the edges, and the cabbage should be wilting and showing signs of charring. If the pan appears dry or the ingredients are sticking, add a small amount of high-smoke-point oil, but ensure the pan returns to temperature immediately to keep the sear going.
Glazing and Serving
- Glaze and finishDrizzle the chili glaze over the chicken and cabbage. Toss everything together until the sauce bubbles and coats the ingredients in a glossy, savory layer. Remove from heat, garnish with chopped scallions, and serve immediately.Look for The sauce should thicken and become glossy.Tip Keep tossing to prevent the sugars in the glaze from burning.
The sauce should be bubbling vigorously and coating the chicken and cabbage in a thick, shiny layer. The aroma should be savory and slightly spicy.
Once the sauce has reduced to a sticky consistency, remove the wok from the heat immediately to avoid overcooking the vegetables. Garnish with the fresh scallions to add a bright, crisp contrast to the warm, glazed dish.
Common mistakes
A common mistake is overcrowding the wok, which drops the pan temperature and prevents the ingredients from searing properly. Cook in batches if your wok or skillet is not large enough to hold all the ingredients in a single layer.
Another error is adding the sauce too early; the sugars in the glaze can burn quickly if exposed to high heat for an extended period, leading to a bitter taste rather than a savory, glossy finish.
How to tell it’s done
The chicken is done when it is opaque throughout and reaches an internal temperature of 165°F (74°C). Use a meat thermometer to check the thickest piece to ensure it is cooked through safely.
The cabbage should be bright in color with slightly softened stems and charred edges, indicating it has been cooked long enough to release its natural sweetness while maintaining a crisp-tender bite that complements the texture of the chicken.
- Poultry: 165°F (74°C) in the thickest part
Up next · Part 3 of 3
2 variations · storage & make-ahead · 3 answers · printable card
Tips, FAQ & printable recipe (Part 3)← Back to the ingredients (Part 1)