Desserts · Part 2 of 3: Instructions
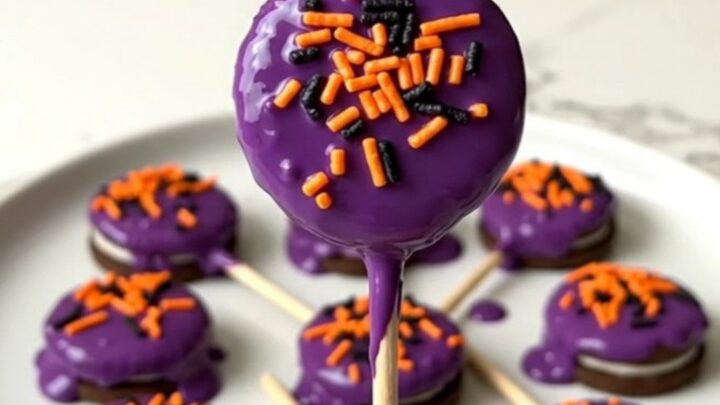
Purple Potion Cookie Pops for Spooky Parties Step-by-step instructions
- Prep
- Cook
- Total
- Serves
- 12
Before you start
Before beginning, ensure all ingredients are at room temperature to prevent the candy coating from seizing. Organize your workspace by lining a baking sheet with parchment paper, which will act as a non-stick surface for the finished pops.
Have your sprinkles ready in a small bowl for quick access. Clear enough space in your refrigerator or on your counter to allow the pops to set undisturbed for at least fifteen minutes, ensuring they remain perfectly shaped and ready for display.
Ingredients at a glance (4)
- 12 pieces chocolate sandwich cookies
- 12 pieces lollipop sticks
- 1 cup purple candy melts
- 2 tbsp orange and black sprinkles
Instructions
Assembling the pops
- Prepare the cookiesCarefully insert a lollipop stick into the center of each chocolate sandwich cookie. Gently twist the stick to ensure it penetrates the cream filling securely without breaking the cookie layers apart. Lay the prepared pops in rows on a parchment-lined baking sheet to keep them stable while you prepare the dipping station.Look for The stick should be held firmly in the center of the cookie filling.Tip If the cookie is too hard, use a small knife to create a tiny pilot hole in the filling.
The sticks should be centered firmly within the cookie filling. Each cookie should remain intact, with no cracks or visible damage. Ensure all twelve cookies are lined up on the parchment paper so they are ready for the dipping stage.
If any cookies feel loose on their sticks, adjust them before moving forward to ensure they are stable enough for the coating process.
Dipping and decorating
- Dip and coatMelt the purple candy in a microwave-safe bowl in thirty-second increments, stirring until completely smooth. Dip each cookie pop into the purple candy, ensuring it is evenly coated. Allow the excess to drip off before placing it back on the parchment-lined sheet. Immediately shower the wet candy coating with orange and black sprinkles to ensure they adhere properly.Look for The candy should be fully melted and smooth, with no lumps remaining.Tip Work with one cookie at a time so the coating remains wet for the sprinkles.
The candy should be a vibrant purple color and completely smooth. Each cookie should be coated uniformly, with the excess candy allowed to drip off back into the bowl. The sprinkles should be distributed evenly across the surface of the wet candy. Check that the coating covers the edges of the cookies completely to seal them and provide a clean, finished appearance.
Final setting
- Set and serveTransfer the finished pops to a clean, flat surface or keep them on the baking sheet until the candy coating has fully hardened. This usually takes about fifteen minutes at room temperature. Once the coating is set and firm to the touch, arrange the pops on a white serving plate and present them immediately to guests for a festive snack.Look for The purple coating should be completely opaque and firm when touched.Tip Avoid touching the coating until it has completely set to prevent fingerprints.
The pops should be resting undisturbed on the parchment paper. The candy coating should appear dull or firm, indicating that it has cooled down completely. Carefully lift one pop to check that the coating does not smear. Once they are firm, they are ready to be transferred to a serving plate. The pops should feel solid and secure on their sticks.
Common mistakes
A common mistake is melting the candy at too high a temperature, which can cause it to burn or become clumpy. Always use short bursts in the microwave and stir frequently. Another error is waiting too long to apply the sprinkles.
The candy sets quite quickly, so it is important to have the decorations ready and apply them immediately after dipping to ensure they stick securely. If the coating is too thick, the pop may become heavy and slide off the stick, so aim for a thin, even layer.
How to tell it’s done
The cookie pops are considered done when the purple candy coating has fully set and is no longer tacky to the touch. The surface should appear smooth, matte or slightly glossy depending on the brand of candy used, and the sprinkles should be firmly embedded in the coating.
There is no internal temperature to monitor for this recipe as it does not involve cooking raw ingredients, but the visual firmness of the outer shell is the primary indicator of completion.
Up next · Part 3 of 3
2 variations · storage & make-ahead · 3 answers · printable card
Tips, FAQ & printable recipe (Part 3)← Back to the ingredients (Part 1)